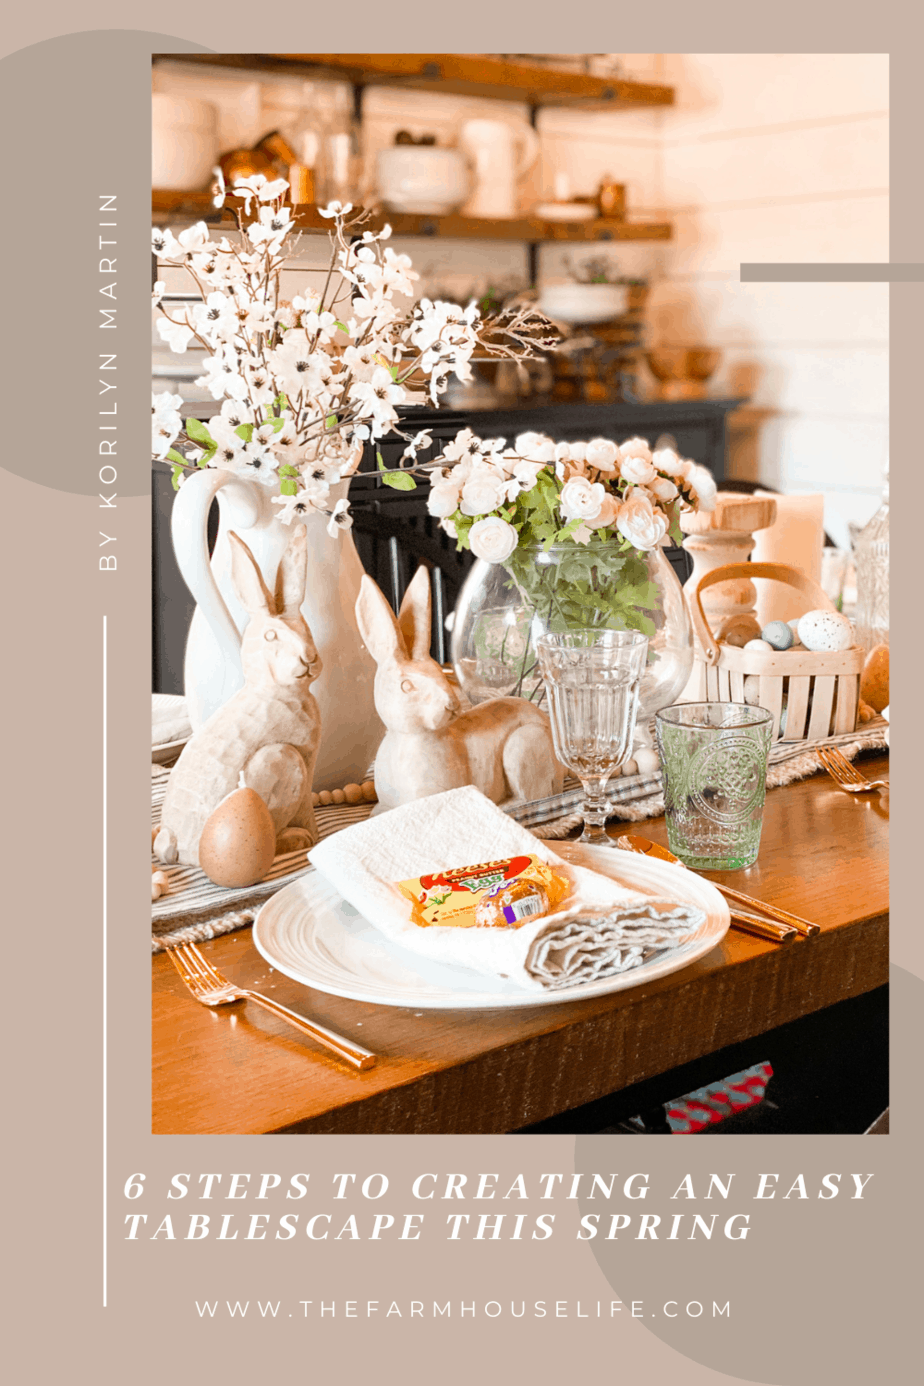
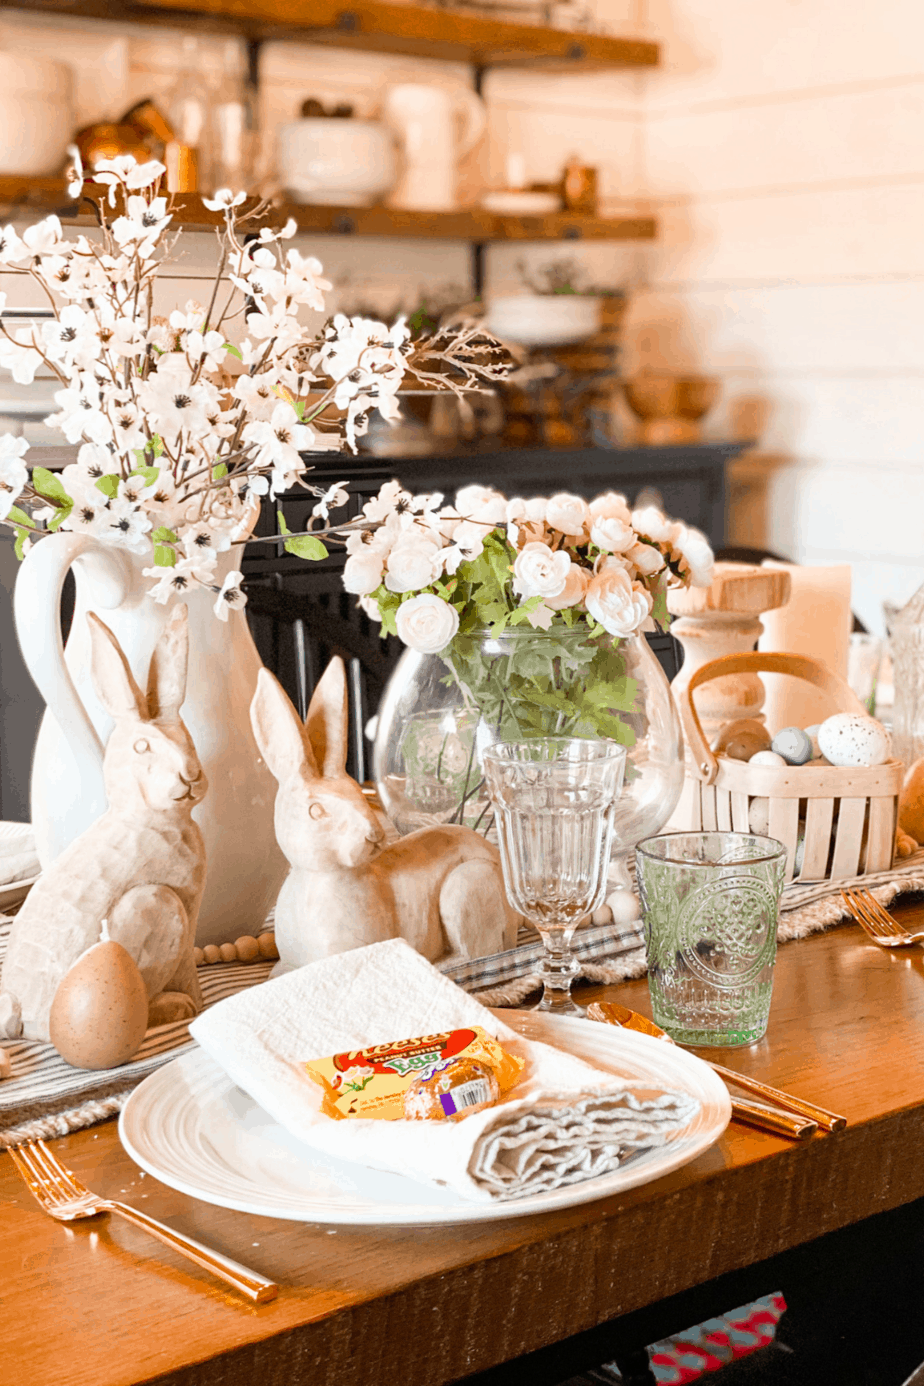
6 simple steps to creating an easy Easter tablescape this Spring
With 6 simple steps you too can create an easy Easter tablescape. Plus, I’ll show you how to make this tablescape last all Spring long!
Can you believe that it’s already Spring and Easter is just weeks away?!
I told myself this year I was going create an Easter tablescape early that way I didn’t miss out on all the cute stuff before they sell out!
AND I really wanted to try and use some home decor items I already have and only add in a few new things.
This way I can still freshen things up without killing my budget!
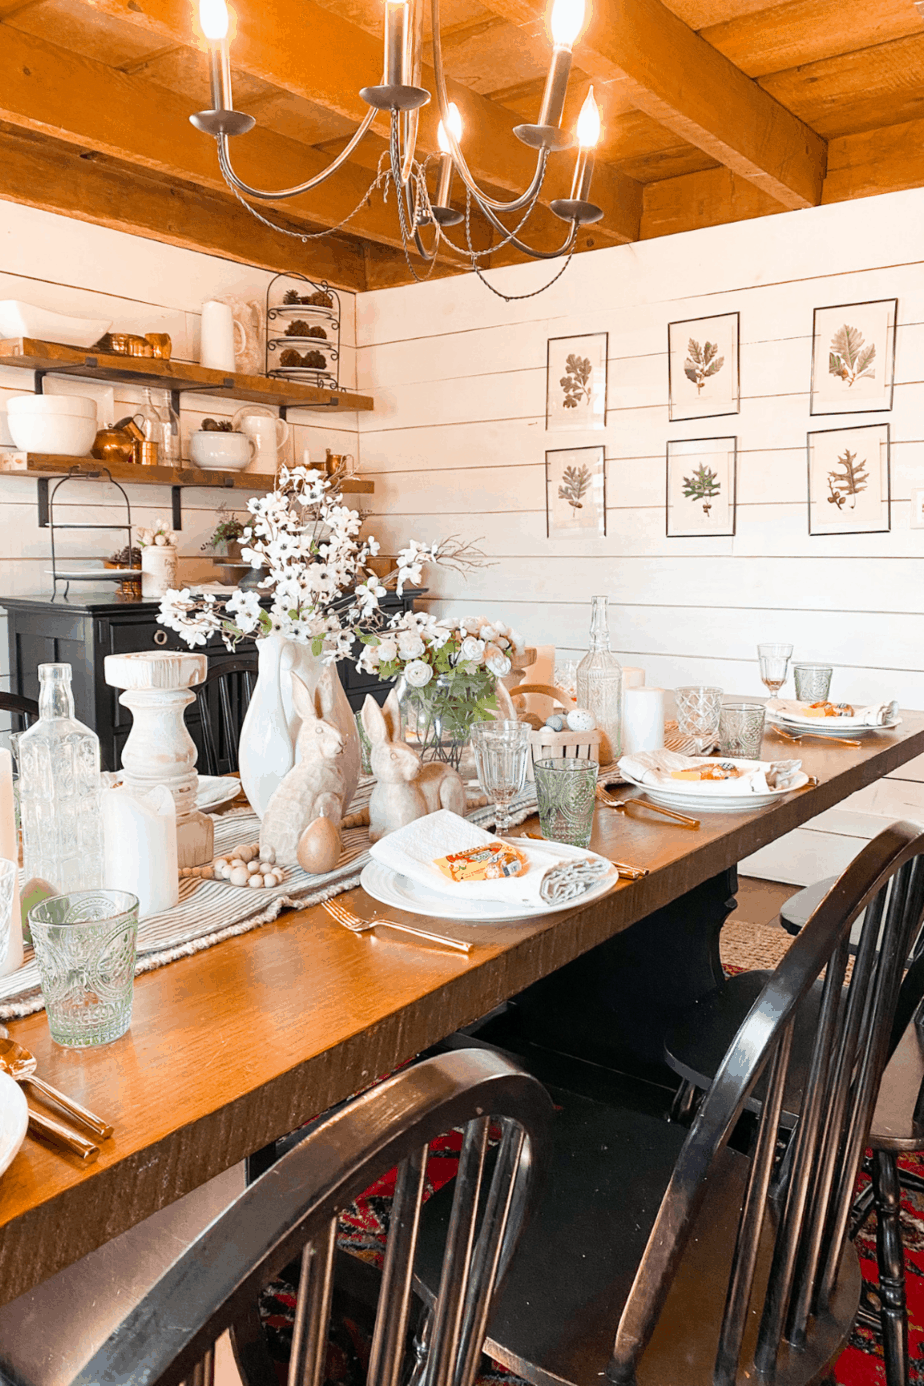
I decided to really go neutral this year for my Easter tablescape.
I wanted it to have more of a Spring vibe that way, after Easter, I could just remove the bunnies and Easter eggs and keep my tablescape for the rest of the Spring season. Alright, let’s get to creating!
Step one: Add texture by using a tablecloth or a table runner
Start by adding your favorite tablecloth or runner to your table. Because I wanted to create more of a rustic tablscape this year I decided to add a jute runner.
Jute runners are so great because they add a different texture to the mix.
I also added my favorite ticking table runner as well. This just make things more visually interesting. *The following links are affiliate links and if purchasing I may make a small commission.

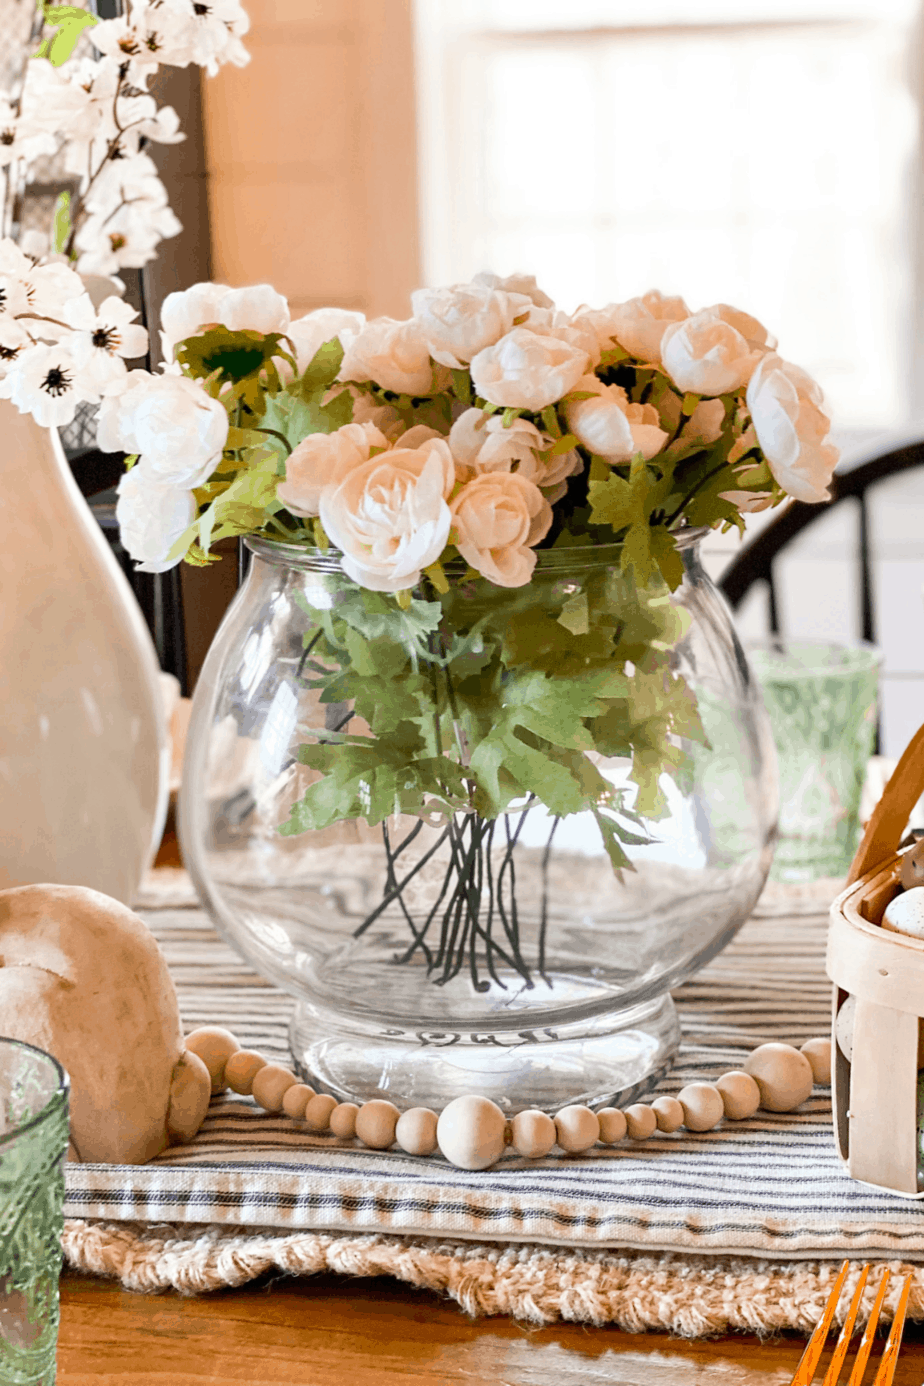
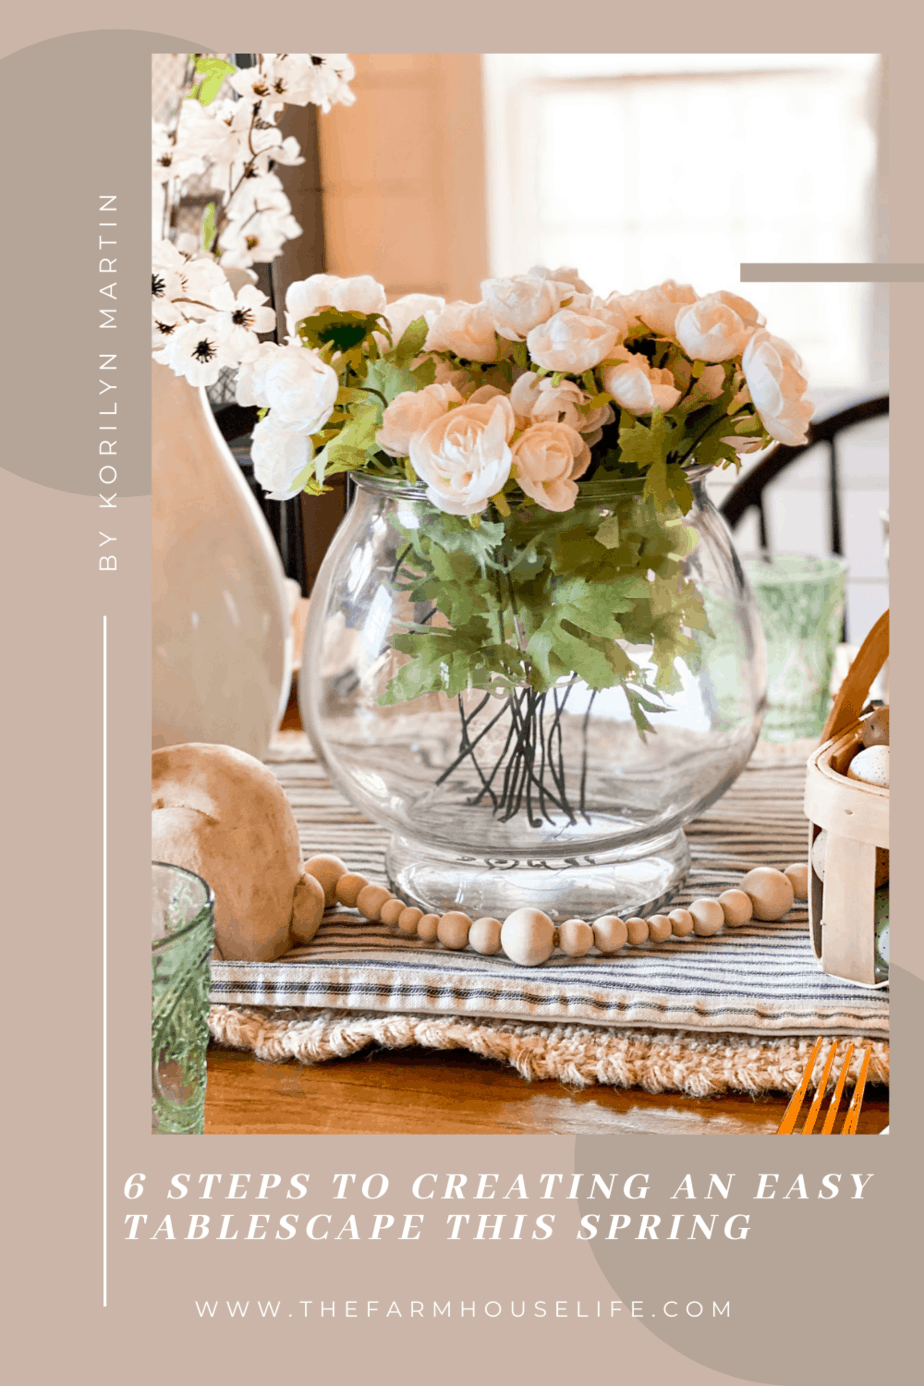
Step two: Add your focal point
Next, be sure to pick one focal point in the center of your Easter tablescape.
Otherwise, it can seem to busy and people don’t know exactly where to look.
I decided to make my Spring florals my centerpiece.
Yes, there are two vases but it works because one is taller than the other so they sort of go together as one unit.
Step three: Add your accent decor to your Easter tablescape
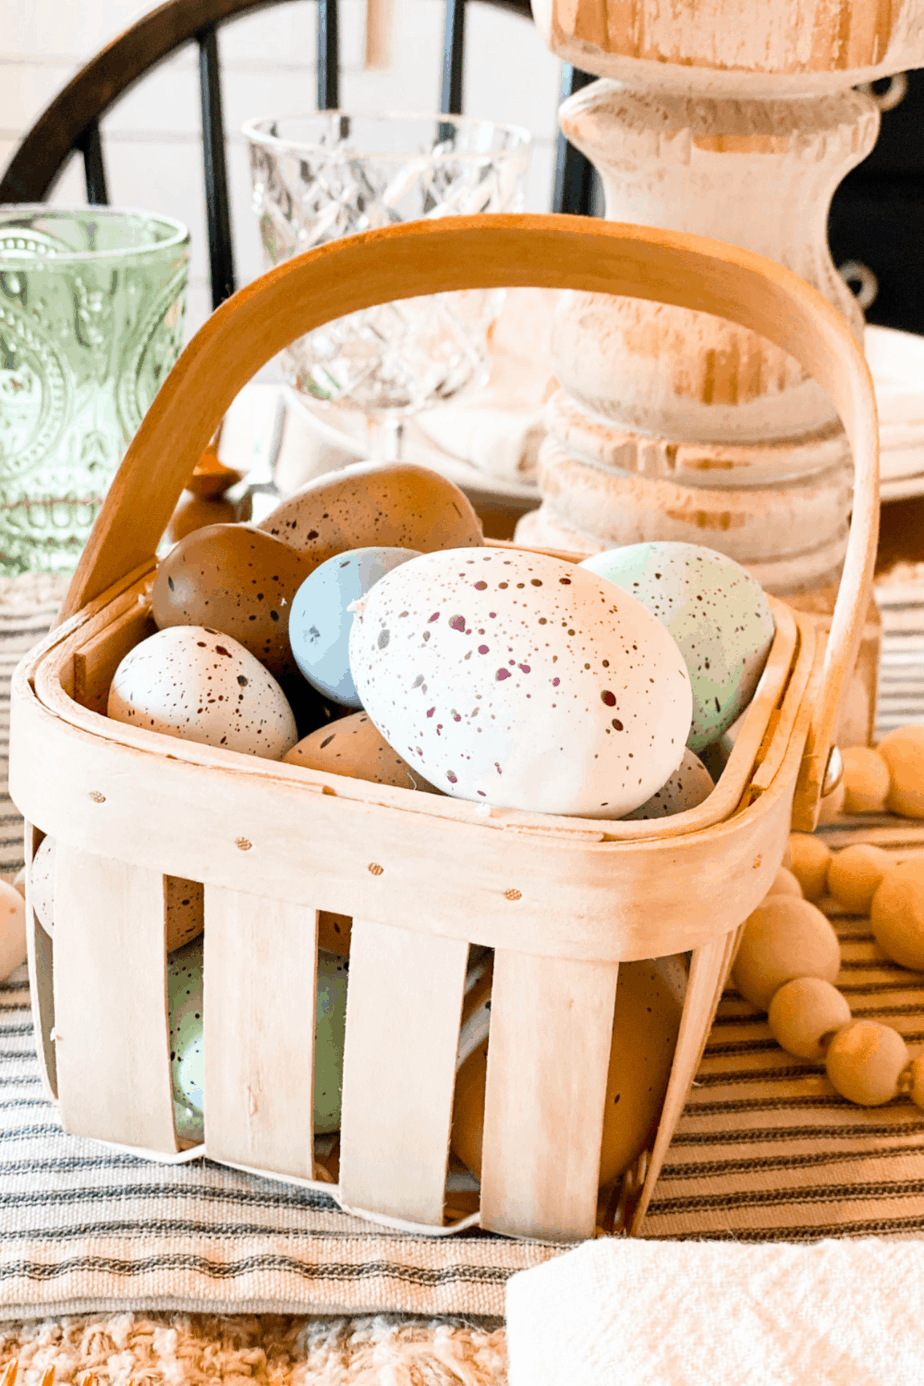
Next, add your accent decor to your Easter tablescape.
This is where you get to have a little fun! I used coordinating wooden accents in my bead garland, Easter basket, and wooden Easter bunnies.
I also repeated the same few colors over and cover again to try and tie everything together.
Otherwise, it can look random and misplaced. *The following links are affiliate links and if purchasing I may make a small commission.
Step four: Add warmth by adding candles to your Easter display

Adding candles is such a great way to add warmth to your Easter tablescape display.
Bright and white is always beautiful, but adding warmth just makes everything cozier.
To warm things up I used some pillar candles which I already have and added some cute Easter egg ones as well.
Step five: Table setting with all the essentials
The nest step is to set your Easter table with all the essentials.
This is where you want to add anything that your guests might need for dinner.
I used my white threshold plates from Target. They’re beautiful and so versatile! I use them all the time!
Next, I paired them with some gold flatware also from Target.
Then I added some neutral cloth napkins. I also wanted to add a pop of color so I used some green hobsnail glasses.
Step six: Add a personal touch to each place setting on your Easter tablescape
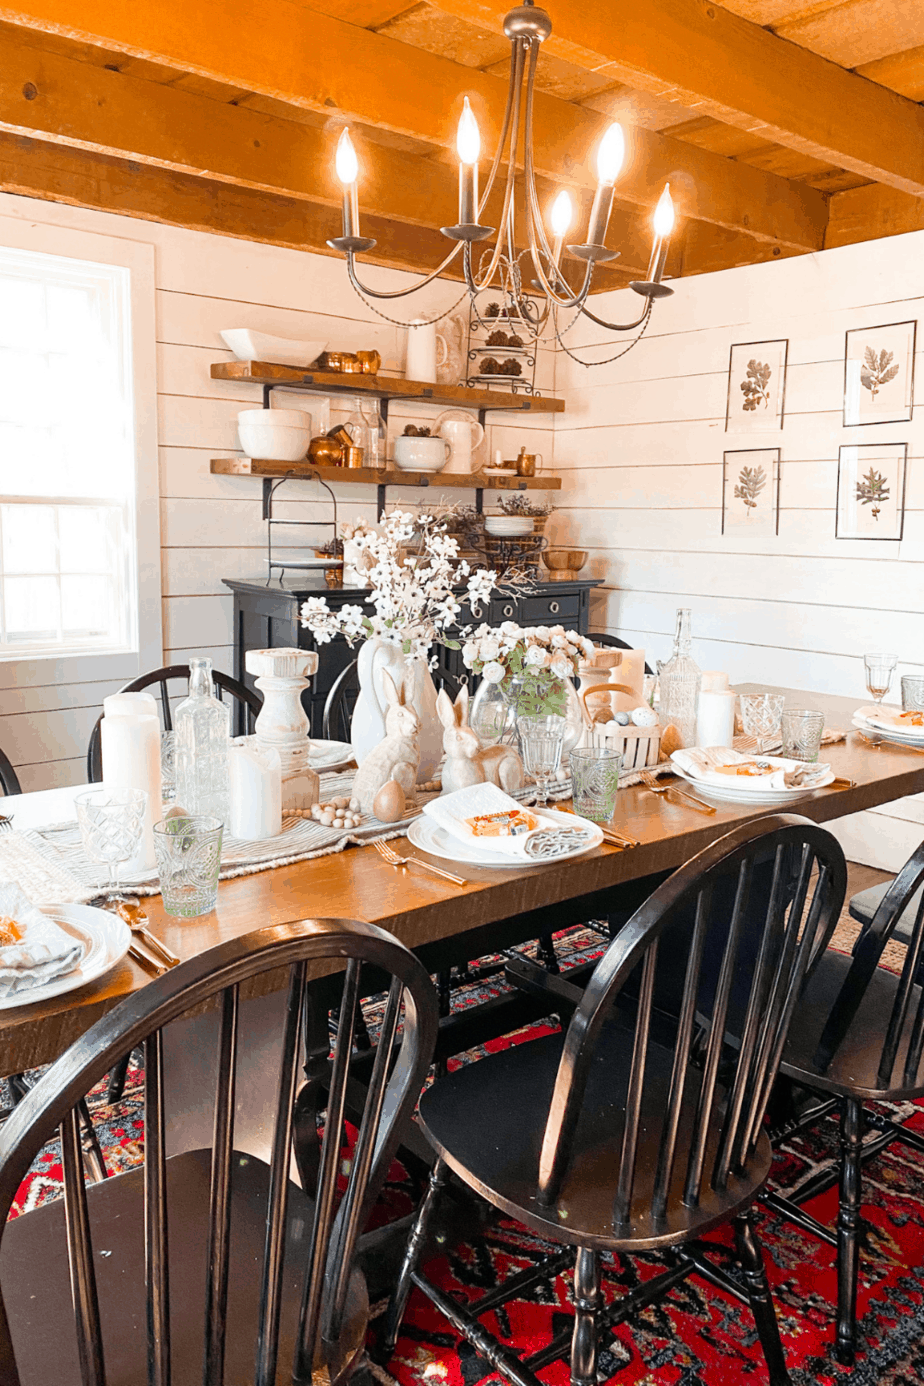
For the last and final step, add a personal touch to each place setting.
Last year, I added personalized postcards to each plate, but this year I wanted to go a little more simple.
I landed on Easter candy… Because no one can say no to a Reese’s Easter egg!
Be sure to pin for Later
Thanks for reading along!!![]()
One Comment