DIY mud vase
I will show you how to make a DIY mud vase in 6 easy steps that is the fraction of the cost of an expensive vase!
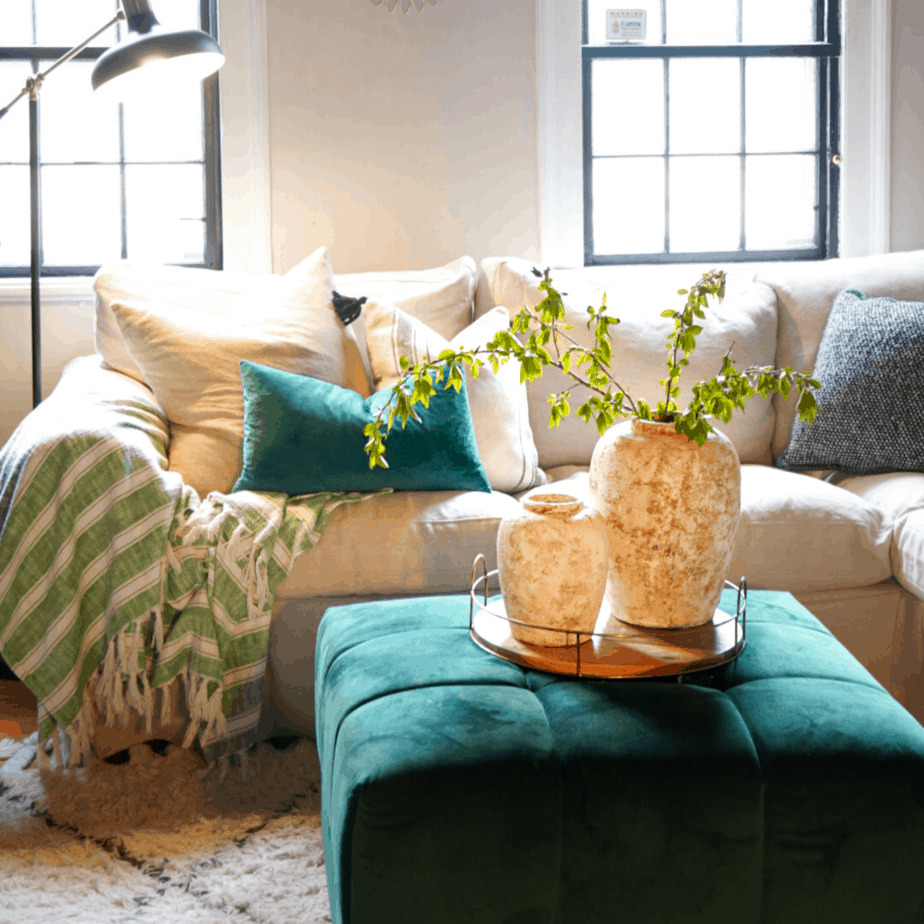
Lately, I’ve been pulling more natural warmer tones into my home. Our house is large and feels kind of stark and cold. More tactile textures of natural linens and warm tans/beiges really help to add that cozy feeling.
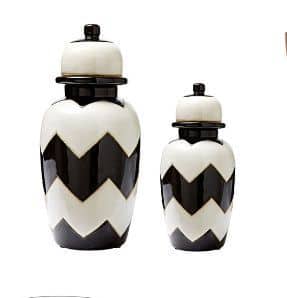
I’ve been in love with large clay pots I’ve seen at Pottery Barn that would complete the vibe I’ve been transitioning into. But at this time in my life, I just can’t drop that kind of cash on decor pieces. Then I saw my friend Bre from @brepurposed on the gram transform her lamp with just a few easy steps into this gorgeous clay-looking Pottery Barn /Restoration Hardware creation!
Easy DIY mud vase with a high end look
I decided to give it a go – and I’m so glad I did! I’m so in love and can’t believe I actually made this! Below I’ll show you each step so you too can create a gorgeous DIY mud vase. really whatever your heart desires… for a fraction of the cost of what you’d pay for brand new! I’ll also have a video of my DIY vase project from start to finish at the bottom.
To start, pick out your piece! This is where you can have fun… Really anything will work. Don’t worry if it’s too shiny and smooth.
We’ll be adding texture to help give it that textured clay look! I chose two large vases and a pitcher. I’ve had these jars for many years… Remember when Chevron pattern was all the rage? Well, I jumped on that bandwagon and displayed these beauties proudly. They’ve since been stored in my attic just waiting to be used for the right DIY.
Next, get all your mud vase supplies together
- drywall mud
- Plaster of Paris
- sandpaper
- paint of your choice
- mud from outside
- paper towels
- paintbrushes (small and medium)
Thankfully, I had all of these supplies on hand. Plaster of Paris is what you use when you’re mixing up your own chalk paint recipe – and lord knows I mix up a lot of chalk paint so I had plenty of that on hand.
Step one: spackle you vase
With your small brush, lightly spackle over your vase. It’s ok if it goes on thicker in some areas – after everything is dry, we’ll give it a good sanding to get rid of anything loose. Keep going until your entire vase is covered and then let dry. Make sure to rinse your brush well because you’ll be using this size again in another step.
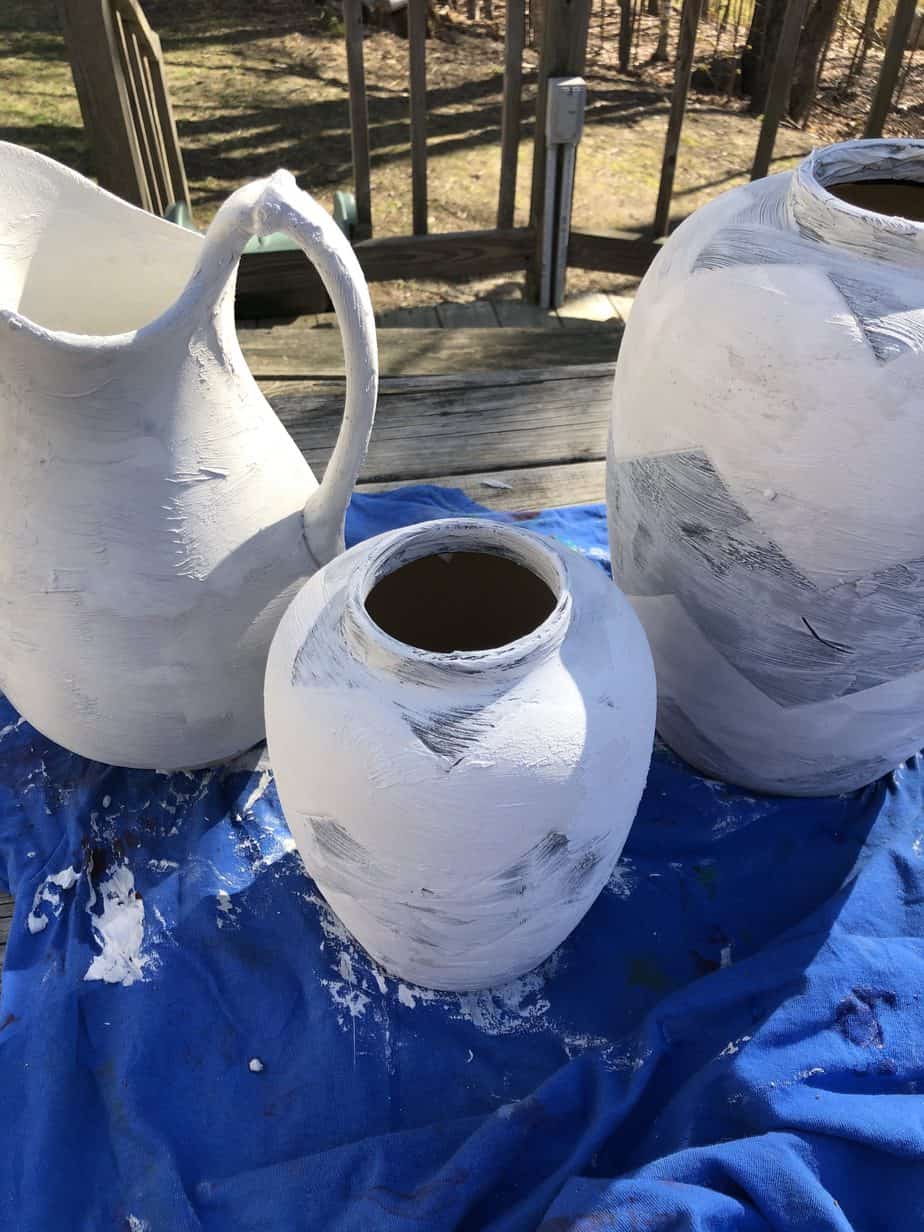
Step 2: sand your vase
When your vase is dry – give it a light sand to get rid of all of the loose pieces of spackle. It’s ok if some spots of your vase are bare again.. it’ll only add texture and dimension if some areas are more raised than others.
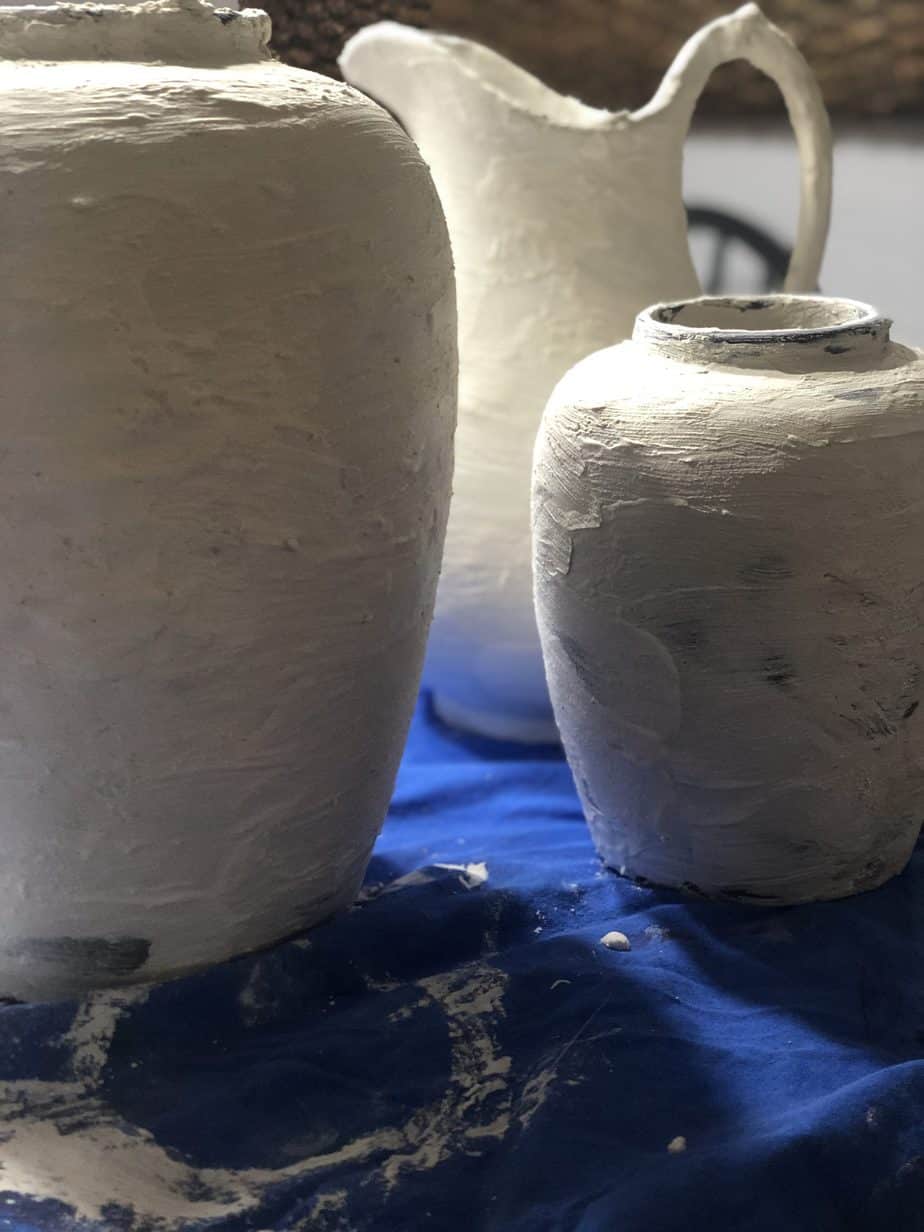
Step 3: mix plaster of Paris and water together
Mix 1/2 cup of plaster of Paris and about 1/4 cup water together. It’s ok if it’s a little watery. Plaster of Paris thickens over time so you may have to add a little more water as you go or even start with a fresh batch to continue to have the right consistency.
With your small brush, paint your vase with the plaster of Paris mixture until you have your desired texture and until it’s fully covered. Remember to work quickly or be prepared to make a new mixture because your plaster will harden in your dish. Let dry completely.
Step 4: paint your mud vase
Choose a paint color. I used Glidden Off-White. It has a subtle beige that really adds a lot of warmth. Use your medium-sized brush and paint over your entire vase and let dry.
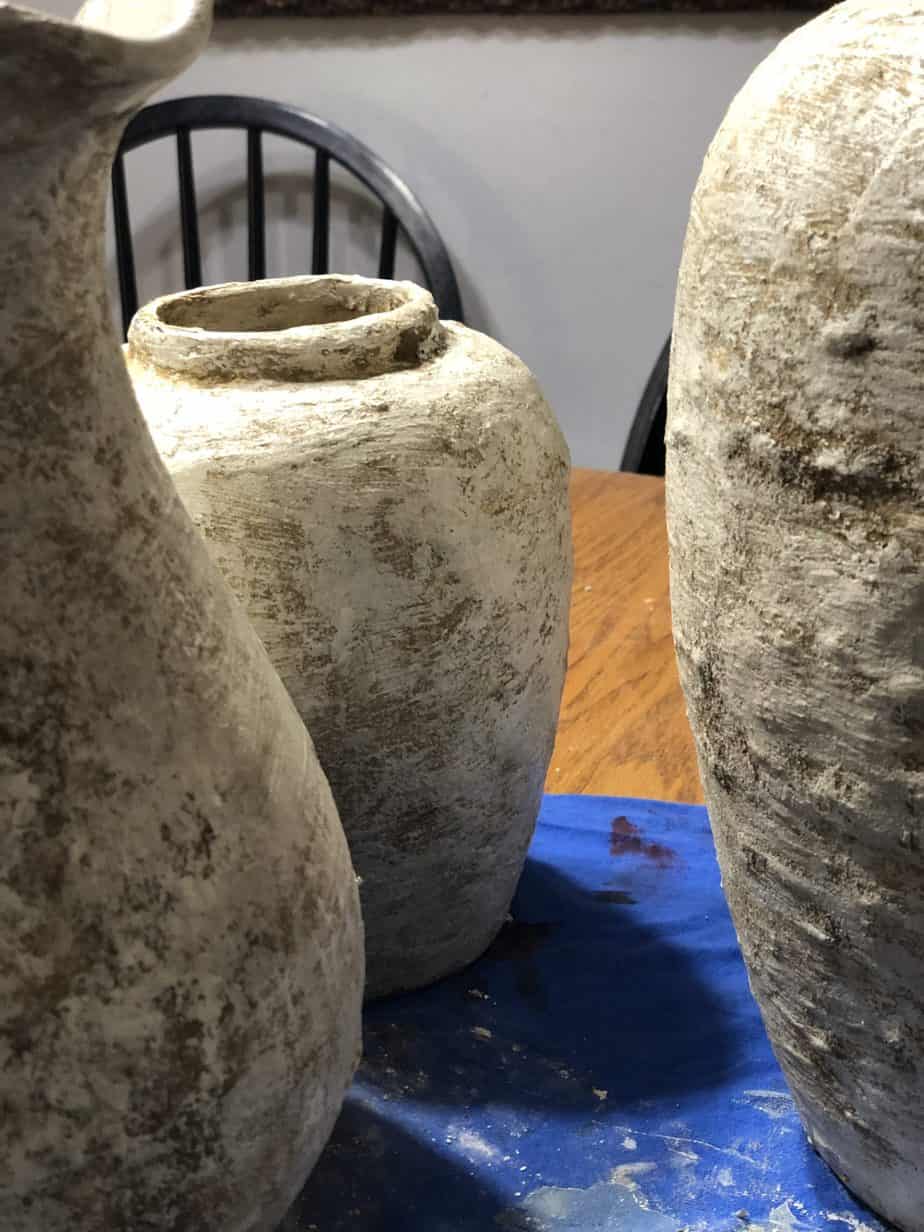
Step 5: create mud mixture
Mix dirt and water to create a thick mud mixture (not watery) and completely coat your vase. It’s ok to put it on thick. After it dries, take a paper towel and brush off any loose mud from your vase.
Step 6: sponge on paint
Lastly, grab a paper towel and dip back into your paint and sponge it on in small areas on your vase. This is so you can get your desired color and also to help capture a more multidimensional look.
That’s it guys! How cool was that?!
Here is a video from start to finish of my projects and just how simple it really was!

Want to shop this post for supplies? Just click an image below!

As always pals – Thanks for reading along!
Much love,
Korilyn ~ from The Farmhouse Life
2 Comments