How to make an easy DIY fall sign for your front porch
Happy Fall! I can now officially say that without the death glares from those of you sitting on the beach drinking your white claws soaking up every last bit of summer!
Not only does it mean the calendar finally says it’s ok to decorate for Fall, but the weather (at least around here) is changing as well. It was 35* this morning where I live!
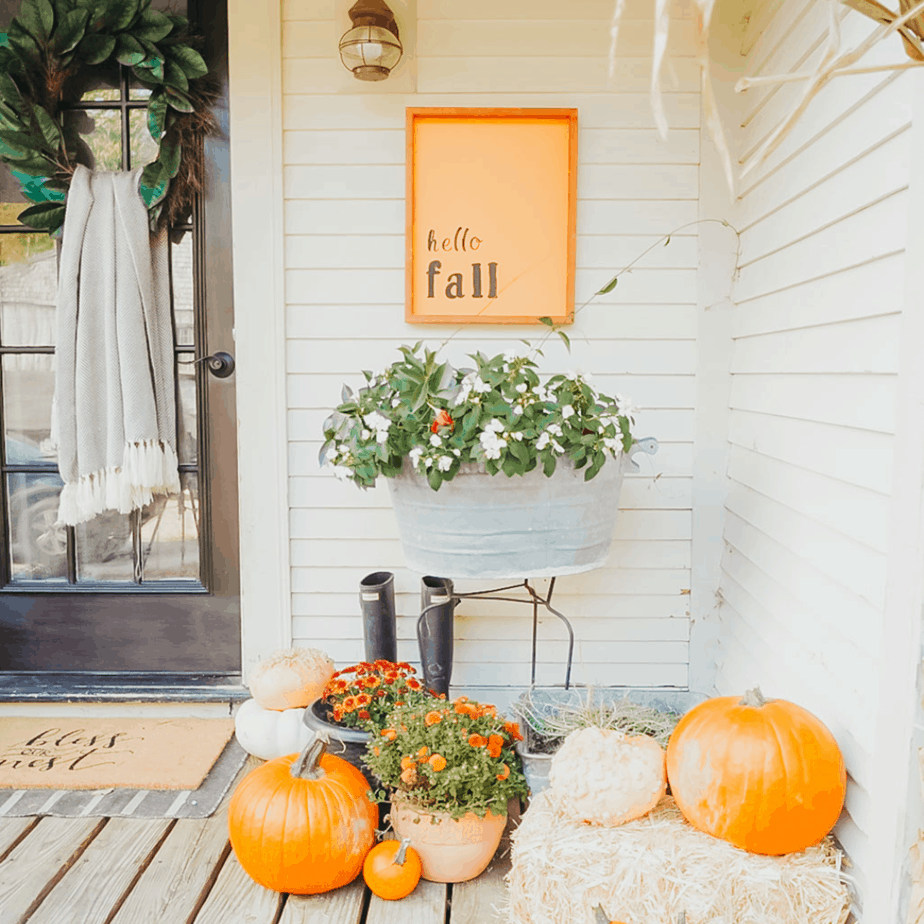
So to signify the official start of Fall, I thought it would be fun to make a Fall sign for my front porch! For those of you that aren’t crafty, I’ve linked my inspiration picture below. I’ve also linked all the supplies needed for this DIY below for those of you guys who are here for it! You be you girl!

The difference between an outdoor sign and an indoor sign
Making an outdoor sign is pretty similar to making an indoor sign… the only difference is a coat of urethane to protect it from the weather outside. Using a polyurethane will give it a shiny glossy look or using a polycrylic will give it a matte finish.
Today I’ll be using a polycrylic. The quality of the material makes a difference too. You really want to use real wood – using composite wood isn’t the best idea. Composite wood will swell up during the first rain and start disintegrating. Plastic and metal are two other great materials that work well outside as well.
To start: Gather up all your supplies
I decided to use an old picture frame that was just sitting up in my attic. For those of you guys that know me, know that I’ve got an entire thrift store in my attic. It’s great when I’m doing projects like this because I can find all the supplies I need without having to spend any money!
The only supply I had to buy was some orange paint. I love getting paint at a home improvement store because the sample size is plenty of paint for most craft projects and it’s sooo cheap! Plus there’s like a million colors to choose from!
I also used some old stencils and some black paint I had stored up in my craft bin. To seal everything up from the weather outside I used a polycrylic that I had in my basement. I did 2-3 coats – not just on the front of the sign.. but all over, including the back. I didn’t want any moisture getting in there!
Get to work!
I started by taking the plastic out of the frame and giving it 3 coats of paint. I Allowed the paint to completely dry before applying another coat. Next, I measured out my stencils to make sure my letters would be spaced accordingly. After I was sure the letters were where I wanted them, I used my black paint to fill in the lines of the stencil.
I used two different size stencils to give the sign a little more dimension. And lastly, After I was sure my letters were dry I used 3 coats of polycrylic. Make sure when using polycrylic that your coats are thin. Otherwise, you’ll be able to see streaks left behind when everything is dry.


Want to shop the supplies for this project?! Click an image below! *These links are affiliates and if used I make a small commission at no cost to you. Thanks for supporting the brands that support this blog of mine!
Thank you so much, pals, for reading along!
Much Love,
Kori ~ from the Farmhouse Life!



Hi Kori! Your sign is so cute. All of the porch decor is adorable. Visiting from Tuesday Turnabout 🙂
Welcome! Thank you so much for stopping by! Thank you for your kind words!
This sign is so cute, and your front porch is adorable!
You are too kind! Thanks! And thanks for stopping by!