Everything you need to know about how to install a carpet runner
If you’ve ever wondered, “can I use a carpet runner on stairs?”, the answer is YES, you absolutely can!
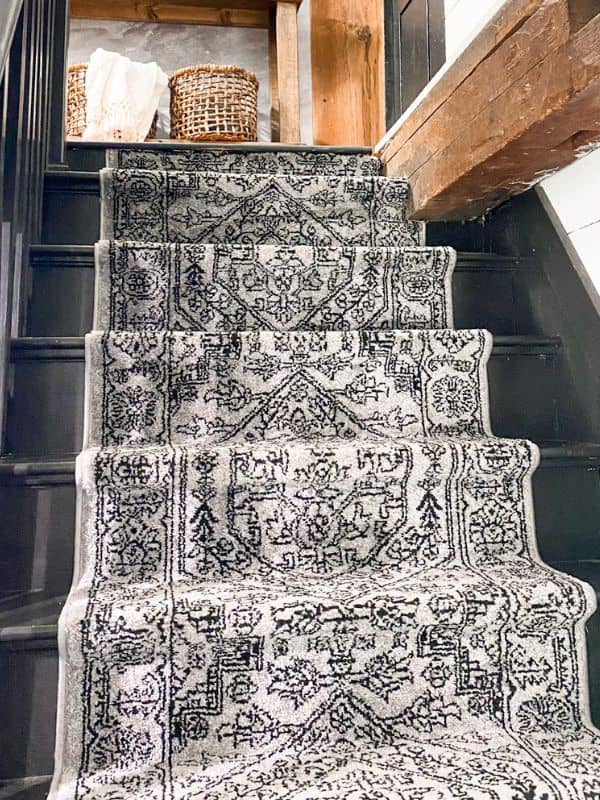
Installing a carpet runner on your stairs is not only a beautiful upgrade but a practical one too! Today, I’ll be sharing how to add a diy stair runner to your staircase.
Carpet runners on stairs help to protect your home’s flooring from wear and damage from heavy traffic, as well as from cleaning and exposure to the elements.
This is one DIY project that I ma so glad I did. Not only has it added style but warmth and comfort too! So if you’re in the market to Install a carpet runner on your staircase, or to upgrade an old runner and add a new carpet, read on!

Can I install a carpet runner myself?
Yes, you definitely can! Installing stair carpet runners are a moderately simple project, which can be easily DIY’d in one day without a lot of specialized tools.
Do I have to use a tackless strip to install a carpet runner to my stairs?
The short answer is no, you don’t have to. Tack strips are thin pieces of wood with hundreds of sharp nails or tacks used in the installation of carpet.
They help to hold down heavy carpets so they don’t pull up over time. This is especially important when you are installing wall to wall carpet.
Installing a carpet runner is a different story. Runners are thinner and narrower then the carpet you would install for wall-to-wall carpeting. Rug tape, a staples gun and carpet tacks are sufficient enough to hold down your runner.

Can I use an outdoor rug on my stairs?
Yes, You can use any kind of carpet on your stairs. Choosing a runner for your stairs has more to do with the material of the runner rather than if its meant for outdoor or indoor use.
What material is best on stairs?
When choosing a stair runner, its best to choose a runner that is either a synthetic nylon carpet or wool. Wool can be quite expensive though. Runners made from synthetic fibers are very durable and stain resistant.
They can also have a bit of a stretch too. Really you don’t want a runner that has too loose a weave or too high pile. The loose weave will come undone more easily and the high pile can make it dangerous to walk on. Your foot could get caught and you could take a fall.

How to install a stair runner without nails
The easiest way to install a stair runner without the use of nails is to use a heavy-duty staple gun instead.
If you opt not to use any hardware, be sure to use a high-quality carpet tape and carpet pad that grips strongly to the surface of the stairs.
This can also be done if you’d like to install the carpet runner without damaging hardwood!
Do I use staples or carpet tacks to secure my stair runner?
You can use either or both. I prefer using both because I like the finished look of carpet tacks and I like the quick insulation with a staple gun.
I place the carpet nails along finished edge of the side of the runner. This keeps everything is place and looks stylish.
Although, sometimes a staple gun isn’t bring enough to penetrate hardwood stairs. If this is the case for you, you’ll have to use carpet nails.
What size staples to use for carpet runner instalation?
I find it best to use 1/2 staples when installing a carpet runner. This way at least 3/16 – 1/4 inch will penetrate and secure the carpet to the stairs. Otherwise, if not enough of the staple penetrates, you run the risk of the staples popping out.

How to accurately map out the placement of your stair runner?
I find it best to use painter’s tape to accurately map out where my carpet runner will be placed on my staircase. This way you aren’t chancing that you are hitting dead center as you are installing your carpet.
Start by measuring the width of the bottom tread. Next, divide that number by two. This will be the center of the staircase.
Take that number and measure from one side of the staircase to the center. Mark that spot with painter’s tape. Then measure the stair runner itself and divide that number by two.
Take that number and measure from the center of the stairs (from the painter tape) to the outer edges in each direction, marking each spot with painters tape.
Repeat this process on each step all the way to the top the step at the top of the staircase. Now you can visually see where your carpet needs to be placed while installing it.
How to measure your staircase and select your new stair runner
One of the first things to do is figure out the measurement of the runner you need before you buy one. To start, grab your tape measure and measure the depth of the tread and the height of the riser.
Multiply the height by the number of stairs (risers), and the depth by the number of treads. Add these figures together, plus six inches for waste. It’s better to have excess carpet then not enough! This is the total length you’ll need to order.
The width of the runner is up to you, but stair runners look best when there is about 4-6 inches of the exposed riser on either side. Start by measuring the from one edge of the tread to the other.
Then minus about 8 inches from that number. You can use that number as a starting place while shopping for carpet runners. Once you choose a runner, consider the width when ordering the correct size carpet padding.

Do carpet runners need padding?
Unless you choose a runner with a non-slip backing, you will need to use carpet padding. Ideally, carpet padding should be used under any rug that is at risk of sliding around.
Without carpet padding, stair runners are at risk of slipping out of place and lead to dangerous slips and falls. It can also work to protects the the stairs overall from normal wear and tear.You can either buy tread pads in the correct measurement or cut your own.
How to install carpet pads
If you bought treat pads cut to the correct size, then you can begin by placing each pad in the center od each tread and stapling in place. If you beed to cut your own carpet pads, start by measuring the carpet runner you intend to install.
Next, cut one pad to be the width of the runner minus 1 inch, and the depth of the stair tread minus ½ inch. Use this pad as a guide to cut as many as you will need for each stair tread.
Using a measuring tape for accuracy or the painters tape from the guide mentioned above, center and place the pad on the bottom tread. Leave a space about the width of one fingertip between the pad and the back of the riser.
Drive one staple into the center of the pad, then evenly place two more staples on either side. Repeat this process on each stair tread.

What installation style is best while installing a carpet runner on your stairs?
There are a few methods you can use when installing a carpet runner on your staircase. You can use double sided carpet tape, carpet adhesive, staples, carpet nails, tack strip, or stair rods. Today I’ll be using double sides carpet tape and a 1/2 inch staples.
How are carpet runners installed?
To install a carpet runner on your stairs you’ll first need to gather your supplies.
Tools Required:
- Carpet runner
- Rug pad *optional
- Double-sided carpet tape
- Carpet tucker
- Carpet knife
- Carpet scissors
- Staple gun and staples
- Measuring tape
- Bolster chisel
Step one: Apply the double sided carpet tape
Begin by cutting a strip of double-sided carpet tape, slightly shorter than the width of the carpet runner.
Starting at the bottom of the stairs, place the tape under the bottom step, along the bottom riser. Depending on the height of that riser, you may need to use two pieces.
One at the top of the riser and one at the bottom. Place another piece in the middle of the tread. Next, take the bottom edge of the runner and press it firmly to the tape on the bottom riser and over the tread.
I like to cut off the binding and use a lighter to seal the edge. But this isn’t necessary.


Step one: Apply the double sided carpet tape
Begin by cutting a strip of double-sided carpet tape, slightly shorter than the width of the carpet runner. Starting at the bottom of the stairs, place the tape under the bottom step, along the bottom riser. Depending on the height of that riser, you may need to use two pieces. One at the top of the riser and one at the bottom. Place another piece in the middle of the tread. Next, take the bottom edge of the runner and press it firmly to the tape on the bottom riser and over the tread. I like to cut off the binding and use a lighter to seal the edge. But this isn’t necessary.
Step two: Secure with staple gun
Once the runner is attached to the tape, use your staple gun to drive your first staple into the center of the edge of the rug at the top of the bottom riser, and another every three inches from the center on either side. Next, add another piece of carpet tape to the center of the tread and the next riser. Continue to secure your carpet in place by pressing the carpet over the tape.
Step three: Tuck and chisel
Once the carpet is smoothed over the tread of the next step, press your carpet tucker into the crease where the base of the riser and tread and tread meet. This will create a nice clean line. Lastly, press the bolster chisel into the top of the riser (under the nose) and into underside of the next tread. Securing it in place with a row of staples. Or if you don’t want to use a chisel, you can use the waterfall method instead.
What is the waterfall method in carpet installation?
The waterfall method refers to allowing the carpet to “fall” over the edge of the riser and down to the next without it being securely fitted around the riser. Otherwise, you would use a chisel under the nose of the stair tread to mould the carpet to the tread.
Step four: Repeat process
Continue with the method above by going one stair tread at a time, using the same pattern as mentioned before. Lay down your carpet tape and press your carpet runner inlace, tuck your carpet in the crease of the bottom of the riser and again at the top, using a chisel, and then run a line of staples at the top of each riser.
Repeat the process until you’ve reached the top of the stairs.


Step five: Finish installing the carpet runner
Once you reach the top riser, the last step is to use your utility knife to cut off any excess material at the end of the runner, then staple it into place. This will create a straight line and give your new runner a clean look.
If you’d like to see another example of how to instal a Capet runner check out HGTV’s!
Need help picking out a runner for your staircase? Check out this post I’ve written 12 on classic stair runners and where to buy them.
How to install carpet runner on basement stairs
When installing stair runners on basement stairs, it’s very important to use carpet padding that will grip the surface well.
Some basement stairs are made of materials such as concrete or raw wood or may have a slippery, painted surface.
In this case, nails or staples may not be an option, and normal floor tape and carpet padding may not be effective. You may have to use a carpet pad with heavy-duty rubberized backing in order to hold the runner in place.
Another option to give the runner extra stability is to install stair rods once the runner is in place. Stair rods are typically slim, metallic tubes that are attached to brackets.
They lie on either end of the stair runner, and are installed on each individual stair.

How to install a stair runner with rods
Tools Required:
- Carpet rods and brackets
- Rotary drill
- 1/16 drill bit
- Pencil
First, install the brackets by lining one against either edge of the runner, and sliding them back until they are sitting in the crease at the bottom of the riser (where the riser and the tread meet). Be sure they are aligned flush with the runner as well as the crease!
Holding the brackets in place, mark the location for the drill holes with a pencil, then use a 1/16 inch drill bit to create a pilot hole at each mark. Secure the brackets in place, at the back of the tread, by using the included hardware.
Next, press the rods over the carpet into the crease of the stair. Secure the rod into each bracket, and repeat until they are all secured. Home Depot has a great tutorial on installing carpet rods. Be sure to check it out to see a more step by step tutorial.
Be sure to to pin for later

Want to shop carpet runners and supplies for this project? Just click on an image below! *These links are affiliates. If used I make a small commission at no cost to you. Thanks for supporting the brands that support this blog of mine!

Want to read more about updating your home on a budget? Check out the article below!
Thanks for reading,
Chat soon,
Kori
I really like the rug runner on your stairs. Can you tell me what it is called and where you bought it?
prednisone for cheap: prednisone tablets 10mg 20mg – prednisone uk over the counter
prednisone where can i buy: buy prednisone online usa – buy prednisone nz
reputable canadian online pharmacy: my canadian pharmacy reviews – canadian pharmacy online
https://northaccessrx.com/depression-treatments.html# canadian world pharmacy
top 10 online pharmacy in india: Global India Pharmacy – Global India Pharmacy
Paw Trust Meds: Paw Trust Meds – vet pharmacy online
dog prescriptions online: best pet rx – Paw Trust Meds
https://globalindiapharmacy.com/# world pharmacy india
canadapharmacyonline com: global pharmacy canada – pharmacy rx world canada
https://northaccessrx.com/otc-meds.html# canadapharmacyonline com
pet rx: Paw Trust Meds – pet prescriptions online
https://northaccessrx.com/otc-meds.html# canadian discount pharmacy
best online canadian pharmacy: canadian drug pharmacy – canadian pharmacy uk delivery
dog prescriptions online: Paw Trust Meds – pet meds online
https://pawtrustmeds.com/# Paw Trust Meds
canadian pharmacy world: NorthAccess Rx – canadian pharmacy meds
indian pharmacies safe: Global India Pharmacy – buy medicines online in india
https://northaccessrx.com/otc-meds.html# global pharmacy canada
drugs from canada: canadian pharmacy online ship to usa – buying drugs from canada
http://globalindiapharmacy.com/# top 10 pharmacies in india
Online medicine home delivery: Online medicine order – Online medicine home delivery
Global India Pharmacy: Online medicine home delivery – reputable indian pharmacies
Paw Trust Meds: pet meds online – Paw Trust Meds
https://northaccessrx.com/otc-meds.html# canadian pharmacy checker
cheapest pharmacy canada: canadian mail order pharmacy – legitimate canadian pharmacy
pet meds official website: Paw Trust Meds – pet drugs online
https://northaccessrx.com/ed-meds-guide.html# canadapharmacyonline
canadian pharmacy victoza: NorthAccess Rx – buying drugs from canada
http://globalindiapharmacy.com/# top 10 online pharmacy in india
canada ed drugs: NorthAccess Rx – canadian valley pharmacy
legit canadian pharmacy: NorthAccess Rx – safe reliable canadian pharmacy
canadian drug pharmacy: reliable canadian pharmacy – canadian pharmacy india
https://globalindiapharmacy.com/# buy medicines online in india
п»їdog medication online: Paw Trust Meds – Paw Trust Meds
canadian pharmacy no scripts: NorthAccess Rx – safe canadian pharmacy
https://northaccessrx.com/canadian-pharmacy-rating.html# canadian pharmacy 365
Global India Pharmacy: Global India Pharmacy – mail order pharmacy india
onlinecanadianpharmacy: canadian drugs online – canadian pharmacy near me
Global India Pharmacy: buy prescription drugs from india – india pharmacy mail order
Paw Trust Meds: pet pharmacy online – Paw Trust Meds
best canadian online pharmacy: NorthAccess Rx – canadian pharmacies compare
top 10 pharmacies in india: Global India Pharmacy – indian pharmacy paypal
https://northaccessrx.shop/# legitimate canadian pharmacy
Global India Pharmacy: world pharmacy india – top 10 online pharmacy in india
canada ed drugs: NorthAccess Rx – canadian online pharmacy
Paw Trust Meds: Paw Trust Meds – dog medication online
Paw Trust Meds: Paw Trust Meds – Paw Trust Meds
Paw Trust Meds: pet rx – online pet pharmacy
п»їdog medication online: Paw Trust Meds – vet pharmacy
Global India Pharmacy: buy medicines online in india – mail order pharmacy india
https://globalindiapharmacy.shop/# cheapest online pharmacy india
best mail order pharmacy canada: canadian pharmacy in canada – canadian pharmacy ltd
http://globalindiapharmacy.com/# Global India Pharmacy
Paw Trust Meds: canada pet meds – canada pet meds
is canadian pharmacy legit: NorthAccess Rx – best canadian online pharmacy
trusted online pharmacy reviews: CivicMeds – canada drugs online reviews
https://veritascarepharm.com/# VeritasCare
VeritasCare [url=https://veritascarepharm.shop/#]Generic Cialis without a doctor prescription[/url] Tadalafil Tablet
Sildenafil Citrate Tablets 100mg: Viagra without a doctor prescription Canada – CoreBlue Health
VeritasCare: Tadalafil price – Buy Cialis online
american online pharmacy [url=https://civicmeds.shop/#]CivicMeds[/url] rate canadian pharmacies
https://corebluehealth.shop/# CoreBlue Health
cheapest pharmacy: online pharmacy dubai – pharmacy order online
https://civicmeds.com/# online pharmacy without insurance
CoreBlue Health: CoreBlue Health – CoreBlue Health
northern pharmacy canada [url=http://civicmeds.com/#]CivicMeds[/url] family pharmacy
discount pharmacy: CivicMeds – best australian online pharmacy
VeritasCare: Buy Tadalafil 20mg – Buy Cialis online
generic sildenafil [url=https://corebluehealth.com/#]CoreBlue Health[/url] CoreBlue Health
Tadalafil price: VeritasCare – Generic Cialis price
http://corebluehealth.com/# viagra without prescription
https://veritascarepharm.com/# VeritasCare
VeritasCare [url=http://veritascarepharm.com/#]п»їcialis generic[/url] VeritasCare
VeritasCare: Buy Tadalafil 20mg – cheapest cialis
the pharmacy: no rx pharmacy – online canadian pharmacy review
buy Viagra online [url=http://corebluehealth.com/#]CoreBlue Health[/url] buy viagra here
canadian pharmacy 24 com: CivicMeds – canadian pharmacy online cialis
http://corebluehealth.com/# CoreBlue Health
peoples pharmacy: CivicMeds – online pharmacy in turkey
cheapest viagra [url=https://corebluehealth.com/#]Viagra online price[/url] CoreBlue Health
http://civicmeds.com/# best canadian online pharmacy
CoreBlue Health: CoreBlue Health – CoreBlue Health
canadian pharmacy prices: polish pharmacy online uk – no script pharmacy
http://veritascarepharm.com/# Cialis 20mg price in USA
canadian pharmacies not requiring prescription [url=http://civicmeds.com/#]CivicMeds[/url] canadian pharmacy online cialis
VeritasCare: Buy Tadalafil 10mg – Cialis without a doctor prescription
CoreBlue Health: CoreBlue Health – CoreBlue Health
low cost online pharmacy [url=http://civicmeds.com/#]reputable online pharmacy[/url] mail order pharmacy
canadian pharmacy meds reviews: no prescription pharmacy paypal – п»їcanadian pharmacy online
https://corebluehealth.shop/# best price for viagra 100mg
best online pharmacy india: CivicMeds – top 10 online pharmacy in india
http://civicmeds.com/# canadian pharmacy mall
Generic Cialis price [url=https://veritascarepharm.com/#]cialis for sale[/url] VeritasCare
Cheapest Sildenafil online: CoreBlue Health – Cheap generic Viagra online
Buy Tadalafil 20mg: VeritasCare – VeritasCare
https://veritascarepharm.com/# Buy Tadalafil 20mg
online pharmacy delivery delhi [url=https://civicmeds.com/#]best online canadian pharmacy[/url] silkroad online pharmacy
tops pharmacy: CivicMeds – indian pharmacy
CoreBlue Health: sildenafil 50 mg price – CoreBlue Health
cialis for sale [url=http://veritascarepharm.com/#]Cialis 20mg price[/url] VeritasCare
sure save pharmacy: CivicMeds – online pharmacy australia paypal
http://veritascarepharm.com/# Buy Tadalafil 20mg
CoreBlue Health: Buy Viagra online cheap – buy viagra here
CoreBlue Health [url=http://corebluehealth.com/#]CoreBlue Health[/url] CoreBlue Health
Cialis 20mg price: VeritasCare – VeritasCare
best rated canadian pharmacy: CivicMeds – best rated canadian pharmacy
https://civicmeds.shop/# on line pharmacy
online pharmacy reddit [url=https://civicmeds.com/#]CivicMeds[/url] trusted canadian pharmacy
VeritasCare: VeritasCare – VeritasCare
top 10 pharmacy websites: pharmacy website india – web pharmacy
http://veritascarepharm.com/# VeritasCare
CoreBlue Health [url=https://corebluehealth.com/#]Order Viagra 50 mg online[/url] Viagra online price
Generic Cialis without a doctor prescription: Generic Cialis without a doctor prescription – Cialis over the counter
canadian pharmacy sildenafil: CivicMeds – cheap canadian pharmacy
https://civicmeds.shop/# save on pharmacy
reliable canadian pharmacy: internet pharmacy mexico – my canadian pharmacy rx
CoreBlue Health: Sildenafil Citrate Tablets 100mg – CoreBlue Health
https://veritascarepharm.shop/# Cheap Cialis
Sildenafil 100mg price [url=https://corebluehealth.shop/#]order viagra[/url] sildenafil over the counter
VeritasCare: Buy Cialis online – Cialis without a doctor prescription
CoreBlue Health: cheapest viagra – Generic Viagra for sale
legit pharmacy websites [url=https://civicmeds.shop/#]medstore online pharmacy[/url] canada drugs online
Generic Tadalafil 20mg price: VeritasCare – VeritasCare
the pharmacy: cialis canadian pharmacy – non prescription medicine pharmacy
https://corebluehealth.com/# Viagra tablet online
CoreBlue Health [url=https://corebluehealth.com/#]Cheap Viagra 100mg[/url] CoreBlue Health
cialis canadian pharmacy: canadian compounding pharmacy – northwest canadian pharmacy
canadian pharmacy online reviews: overseas pharmacy no prescription – wholesale pharmacy
Cheapest Sildenafil online [url=http://corebluehealth.com/#]CoreBlue Health[/url] CoreBlue Health
cheap viagra canadian pharmacy: CivicMeds – pharmacy home delivery
cialis for sale: VeritasCare – Generic Tadalafil 20mg price
Tadalafil Tablet [url=http://veritascarepharm.com/#]buy cialis pill[/url] Cialis 20mg price
http://civicmeds.com/# canadian pharmacy generic cialis
medstore online pharmacy: drugstore com online pharmacy prescription drugs – canadian pharmacy viagra 50 mg
online pharmacy no prescription: CivicMeds – mexico pharmacy order online
CoreBlue Health [url=https://corebluehealth.shop/#]Viagra online price[/url] generic sildenafil
cialis for sale: Tadalafil Tablet – VeritasCare
viagra without prescription: buy Viagra online – Viagra without a doctor prescription Canada
Buy Tadalafil 20mg [url=http://veritascarepharm.com/#]Generic Tadalafil 20mg price[/url] VeritasCare
Cialis 20mg price in USA: VeritasCare – Buy Tadalafil 20mg
Cheap generic Viagra: CoreBlue Health – Cheap generic Viagra
https://civicmeds.com/# capsule online pharmacy
online pharmacy birth control pills [url=https://civicmeds.shop/#]CivicMeds[/url] canadian pharmacy prices
VeritasCare: VeritasCare – Cialis over the counter
Viagra generic over the counter: CoreBlue Health – cheapest viagra
reputable online pharmacy reddit [url=https://civicmeds.shop/#]canadian pharmacy cialis 20mg[/url] overseas online pharmacy
canadian pharmacy ltd: legit pharmacy websites – pharmacy no prescription required
Generic Tadalafil 20mg price [url=https://veritascarepharm.com/#]Buy Tadalafil 20mg[/url] Buy Tadalafil 20mg
https://corebluehealth.shop/# Viagra generic over the counter
https://veritascarepharm.com/# Generic Cialis without a doctor prescription
sildenafil 50 mg price [url=https://corebluehealth.com/#]CoreBlue Health[/url] CoreBlue Health
Generic Viagra for sale [url=https://corebluehealth.shop/#]CoreBlue Health[/url] CoreBlue Health
http://corebluehealth.com/# CoreBlue Health
Cheap Cialis [url=https://veritascarepharm.shop/#]Cheap Cialis[/url] Cialis without a doctor prescription
CoreBlue Health [url=https://corebluehealth.shop/#]CoreBlue Health[/url] CoreBlue Health
https://corebluehealth.com/# sildenafil online
https://corebluehealth.shop/# CoreBlue Health
Cheap Viagra 100mg [url=https://corebluehealth.shop/#]CoreBlue Health[/url] CoreBlue Health
canada pharmacy not requiring prescription [url=https://civicmeds.shop/#]no rx pharmacy[/url] best rogue online pharmacy
https://civicmeds.shop/# us pharmacy no prescription
best value pharmacy [url=https://civicmeds.com/#]CivicMeds[/url] mail pharmacy
http://corebluehealth.com/# CoreBlue Health
CoreBlue Health [url=http://corebluehealth.com/#]CoreBlue Health[/url] buy viagra here
Thanks for sharing. I read many of your blog posts, cool, your blog is very good.
https://corebluehealth.com/# CoreBlue Health
Cheap Viagra 100mg: CoreBlue Health – CoreBlue Health
pharmacy websites [url=https://civicmeds.com/#]which online pharmacy is reliable[/url] viagra from canadian pharmacy
https://corebluehealth.com/# CoreBlue Health
VeritasCare: VeritasCare – VeritasCare
canadian pharmacy review [url=https://civicmeds.com/#]CivicMeds[/url] generic pharmacy online
canada drugs online review: CivicMeds – mexican pharmacy online
canadian pharmacy for viagra [url=https://civicmeds.shop/#]canadian pharmacy cialis 40 mg[/url] legitimate canadian pharmacy online
http://corebluehealth.com/# CoreBlue Health
http://civicmeds.com/# best canadian pharmacy to order from
VeritasCare: VeritasCare – buy cialis pill
Buy Tadalafil 5mg [url=http://veritascarepharm.com/#]Cialis 20mg price in USA[/url] Buy Tadalafil 5mg
https://veritascarepharm.com/# cheapest cialis
CoreBlue Health: buy Viagra over the counter – CoreBlue Health
VeritasCare [url=http://veritascarepharm.com/#]Buy Cialis online[/url] VeritasCare
Cialis 20mg price: VeritasCare – Cialis over the counter
Buy Tadalafil 5mg [url=http://veritascarepharm.com/#]VeritasCare[/url] Generic Cialis without a doctor prescription
https://civicmeds.com/# buy online pharmacy uk
canadian pharmacy viagra 50 mg: CivicMeds – reputable online pharmacy no prescription
online pharmacy delivery [url=https://civicmeds.shop/#]CivicMeds[/url] trusted canadian pharmacy
http://civicmeds.com/# reputable online pharmacy
cheapest cialis: п»їcialis generic – VeritasCare
pin up az online pin-up online casino
пин ап пин ап казино
pin up pin-up oyunu
пин ап пин ап казино
pin up pin up az
https://pinupaz.online/ pin up casino
https://pinupazz.top/ pin up az
https://pin-up-kz.space/ пин ап казино
pin-up pin up
pin up pin-up online casino
https://pin-up-kz.space/ пин ап казахстан
pin up pin up casino
pin up pin-up online casino
https://pinupaz.online/ pin up casino
пин ап пин ап кз
pin up pin-up oyunu
https://pin-up-kz.space/ пин ап кз
pin up pin-up oyunu
https://pinupaz.online/ pin up az
https://pinupazz.top/ pin-up oyunu
https://pin-up-kz.space/ пин ап кз
https://pinupazz.top/ pin-up online casino
pin-up pin-up online casino
https://pin-up-kz.space/ пин ап кз
pin up pin up casino
pin up az online pin-up online casino
https://formulinepharmacy.com/# online pharmacy without scripts
AccessBridge Pharmacy: pharmacy mexico city – mexico pharmacy list
AccessBridge Pharmacy: AccessBridge Pharmacy – AccessBridge Pharmacy
https://accessbridgepharmacy.shop/# AccessBridge Pharmacy
worldwide pharmacy: FormuLine Pharmacy – new pharmacy online
https://accessbridgepharmacy.shop/# purple pharmacy online ordering
pharmacy mexico online [url=http://accessbridgepharmacy.com/#]AccessBridge[/url] mexico prescription online
reputable online pharmacy no prescription: FormuLine Pharmacy – п»їinternational drug mart
AccessBridge Pharmacy: AccessBridge Pharmacy – pharmacy in mexico that ships to us
https://formulinepharmacy.com/# no script pharmacy
п»їinternational drug mart: indian pharmacies safe – online pharmacy no prescription needed
shop medicine online: FormuLine Pharmacy – medicine online
https://formulinepharmacy.com/# secure medical online pharmacy
northwest pharmacy canada: SteadyMeds – canadian pharmacy com
AccessBridge [url=https://accessbridgepharmacy.com/#]AccessBridge Pharmacy[/url] farmacia pharmacy mexico purchase online
AccessBridge: AccessBridge Pharmacy – tijuana pharmacy online
https://accessbridgepharmacy.com/# AccessBridge
no prescription needed pharmacy: reputable indian online pharmacy – buy online medicine
https://formulinepharmacy.com/# pharmacy no prescription required
http://steadymedspharmacy.com/# SteadyMeds pharmacy
northwest canadian pharmacy: pharmacy in canada – SteadyMeds
online pharmacy canada: SteadyMeds – SteadyMeds pharmacy
foreign online pharmacy [url=http://formulinepharmacy.com/#]FormuLine Pharmacy[/url] pharmacy websites
https://accessbridgepharmacy.com/# order meds from mexico
SteadyMeds: prescription drugs canada buy online – SteadyMeds pharmacy
AccessBridge: mexico rx – AccessBridge
https://steadymedspharmacy.shop/# SteadyMeds
https://steadymedspharmacy.com/# SteadyMeds pharmacy
online pharmacy without prescription: india pharmacy mail order – us pharmacy no prescription
http://accessbridgepharmacy.com/# mexican meds
SteadyMeds pharmacy: canadian pharmacy cheap – canadian king pharmacy
SteadyMeds pharmacy [url=https://steadymedspharmacy.shop/#]adderall canadian pharmacy[/url] SteadyMeds pharmacy
SteadyMeds pharmacy: SteadyMeds pharmacy – canadian drugs
https://accessbridgepharmacy.com/# online mexican pharmacy
http://steadymedspharmacy.com/# SteadyMeds pharmacy
pharmacy websites: india online pharmacy – worldwide pharmacy
SteadyMeds: SteadyMeds – SteadyMeds
https://steadymedspharmacy.shop/# pharmacy in canada
https://steadymedspharmacy.shop/# canadian drugs online
AccessBridge: AccessBridge Pharmacy – AccessBridge Pharmacy
AccessBridge [url=https://accessbridgepharmacy.shop/#]mexican pharmacies online[/url] AccessBridge Pharmacy
https://steadymedspharmacy.com/# legitimate canadian pharmacies
SteadyMeds: thecanadianpharmacy – SteadyMeds pharmacy
AccessBridge Pharmacy: AccessBridge – pharmacy mexico city
http://accessbridgepharmacy.com/# AccessBridge Pharmacy
https://steadymedspharmacy.com/# northwest pharmacy canada
online pharmacies: top 10 online pharmacy in india – trustworthy online pharmacy
no script pharmacy: FormuLine Pharmacy – new pharmacy online
https://accessbridgepharmacy.shop/# AccessBridge Pharmacy
reputable online pharmacy no prescription [url=https://formulinepharmacy.shop/#]FormuLine Pharmacy[/url] online pharmacy without scripts
http://formulinepharmacy.com/# new pharmacy online
п»їinternational drug mart: FormuLine Pharmacy – safe online pharmacies
http://formulinepharmacy.com/# no script pharmacy
SteadyMeds pharmacy: SteadyMeds pharmacy – canadian pharmacy victoza
SteadyMeds pharmacy: SteadyMeds pharmacy – SteadyMeds
https://formulinepharmacy.com/# medicine online order
http://steadymedspharmacy.com/# SteadyMeds
trusted online pharmacy: FormuLine Pharmacy – online pharmacy without prescription
reputable overseas online pharmacies [url=https://formulinepharmacy.com/#]india pharmacy[/url] best mail order pharmacy
http://steadymedspharmacy.com/# canadian online drugs
online pharmacy no prescription: FormuLine Pharmacy – foreign online pharmacy
https://formulinepharmacy.com/# pharmacy no prescription required
online pharmacy discount code: FormuLine Pharmacy – buy drugs online
https://steadymedspharmacy.shop/# SteadyMeds pharmacy
SteadyMeds: the canadian drugstore – SteadyMeds pharmacy
http://accessbridgepharmacy.com/# AccessBridge Pharmacy
http://accessbridgepharmacy.com/# AccessBridge Pharmacy
SteadyMeds pharmacy [url=https://steadymedspharmacy.com/#]cheapest pharmacy canada[/url] SteadyMeds pharmacy
AccessBridge Pharmacy: AccessBridge – AccessBridge
overseas online pharmacy: best india pharmacy – buy drugs online
https://accessbridgepharmacy.com/# AccessBridge
AccessBridge Pharmacy: AccessBridge – AccessBridge
mexico pharmacy online: best mexican online pharmacy – AccessBridge
legit online pharmacy: online pharmacy india – reliable online pharmacy
https://accessbridgepharmacy.com/# AccessBridge
online pharmacy without prescription: cheapest online pharmacy india – pharmacy no prescription required
foreign online pharmacy: FormuLine Pharmacy – worldwide pharmacy online
AccessBridge Pharmacy [url=https://accessbridgepharmacy.com/#]good online mexican pharmacy[/url] AccessBridge Pharmacy
https://steadymedspharmacy.com/# canada drug pharmacy
foreign online pharmacy: FormuLine Pharmacy – worldwide pharmacy online
prescriptions from mexico: AccessBridge – online mexican pharmacy
https://steadymedspharmacy.com/# onlinecanadianpharmacy 24
AccessBridge Pharmacy: meds from mexico – AccessBridge Pharmacy
AccessBridge: AccessBridge Pharmacy – prescriptions from mexico
https://formulinepharmacy.shop/# online pharmacy no rx
mexico prescriptions: can i buy meds from mexico online – mexican drugstore
reputable overseas online pharmacies https://edmedscoupon.com/# buying ed pills online
Pet Canada Direct: п»їdog medication online – Pet Canada Direct
https://edmedscoupon.shop/# ed online meds
Pharm Rate: pharmacy websites – best online pharmacy
п»їdog medication online [url=http://petcanadadirect.com/#]Pet Canada Direct[/url] Pet Canada Direct
Pet Canada Direct: vet pharmacy online – Pet Canada Direct
http://petcanadadirect.com/# Pet Canada Direct
trusted online pharmacy https://petcanadadirect.com/# dog medication online
Pet Canada Direct: Pet Canada Direct – online vet pharmacy
п»їdog medication online: pet meds official website – Pet Canada Direct
https://pharmrate.com/# pharmacy online
Pharm Rate [url=https://pharmrate.shop/#]Pharm Rate[/url] Pharm Rate
Pharm Rate: Pharm Rate – reputable online pharmacy no prescription
top online pharmacy http://edmedscoupon.com/# best ed pills online
pet meds online: Pet Canada Direct – online vet pharmacy
http://petcanadadirect.com/# pet meds online
vet pharmacy online: canada pet meds – online vet pharmacy
vet pharmacy: Pet Canada Direct – п»їdog medication online
https://pharmrate.shop/# online pharmacies
medicine online http://petcanadadirect.com/# discount pet meds
pet meds online [url=https://petcanadadirect.com/#]Pet Canada Direct[/url] dog prescriptions online
pet rx: Pet Canada Direct – п»їdog medication online
cheap ed pills online: ed pills for sale – reliable online pharmacy
https://petcanadadirect.com/# pet pharmacy online
best pet rx: Pet Canada Direct – Pet Canada Direct
best rx pharmacy online https://edmedscoupon.shop/# pills for ed online
ed online meds: order ed meds online – reliable online pharmacy
https://edmedscoupon.shop/# best ed medication online
best pet rx [url=https://petcanadadirect.com/#]Pet Canada Direct[/url] online pet pharmacy
cheap ed medication: erection pills online – safe online pharmacies
discount pet meds: п»їdog medication online – best pet rx
https://pharmrate.shop/# Pharm Rate
shop medicine online https://pharmrate.shop/# Pharm Rate
worldwide pharmacy online: Pharm Rate – trustworthy online pharmacy
pharmacy online: express scripts mail order pharmacy – Pharm Rate
https://edmedscoupon.com/# buying erectile dysfunction pills online
Pharm Rate: top-rated online pharmacies – Pharm Rate
cheapest erectile dysfunction pills [url=https://edmedscoupon.shop/#]Ed Meds Coupon[/url] online pharmacy no prescription needed
ed rx online: Ed Meds Coupon – best online pharmacy no prescription
medicine online order http://pharmrate.com/# reliable online pharmacy
https://edmedscoupon.com/# online erectile dysfunction prescription
online pharmacy without prescription: pharmacy online – top-rated online pharmacies
https://edmedscoupon.shop/# online ed pharmacy
get ed meds today: ed medications cost – medstore online pharmacy
overseas online pharmacy https://pharmrate.shop/# Pharm Rate
Pet Canada Direct: Pet Canada Direct – discount pet meds
Pharm Rate [url=http://pharmrate.com/#]trusted online pharmacy[/url] no prescription needed pharmacy
http://edmedscoupon.com/# low cost ed pills
ed treatments online: Ed Meds Coupon – foreign online pharmacy
antibiotics cheap: over the counter antibiotics – over the counter antibiotics
semaglutide benefits: rybelsus dosage for weight loss – buy online medicine
https://stromectol.reviews/# stromectol in canada
https://antibiotics.cheap/# buy amoxicillin antibiotic
semaglutide hair loss: semaglutide life – shop medicine online
which is better tirzepatide or semaglutide [url=https://semaglutide.life/#]semaglutide life[/url] how to lose weight on semaglutide
https://semaglutide.life/# what is rybelsus used for
over the counter antibiotics: over the counter antibiotics – antibiotics cheap
weight loss pills rybelsus: taking rybelsus every other day – top-rated online pharmacies
https://antibiotics.cheap/# over the counter antibiotics
https://semaglutide.life/# wegovy semaglutide
semaglutide tirzepatide: semaglutide life – overseas pharmacy no prescription
rybelsus and alcohol [url=https://semaglutide.life/#]semaglutide life[/url] dosage of semaglutide
https://semaglutide.life/# rybelsus sulfur burps
stromectol tablets: stromectol reviews – ivermectin 50
https://antibiotics.cheap/# antibiotics online purchase
buy antibiotics online safely: antibiotics cheap – over the counter antibiotics
https://antibiotics.cheap/# over the counter antibiotics
over the counter antibiotics: antibiotics cheap – buy antibiotics over the counter
stromectol reviews: generic ivermectin cream – stromectol reviews
https://semaglutide.life/# semaglutide ozempic rash pictures
over the counter antibiotics [url=https://antibiotics.cheap/#]otc antibiotics[/url] antibiotics over the counter
antibiotics cheap: antibiotic without presription – antibiotics cheap
https://semaglutide.life/# semaglutide for weight loss in non diabetics
icd 10 code for long term use of rybelsus: semaglutide life – п»їinternational drug mart
https://semaglutide.life/# rybelsus pastillas
over the counter antibiotics: prescribed antibiotics online – over the counter antibiotics
https://antibiotics.cheap/# antibiotics cheap
stromectol reviews [url=https://stromectol.reviews/#]stromectol reviews[/url] stromectol without prescription
over the counter antibiotics: п»їbuy antibiotics – over the counter antibiotics
rybelsus 14mg price: semaglutide life – pharmacy websites
https://antibiotics.cheap/# get antibiotics without seeing a doctor
https://semaglutide.life/# semaglutide miami
will insurance cover rybelsus for weight loss: semaglutide life – no prescription pharmacy paypal
rybelsus is used for: rybelsus vs phentermine – buy online medicine
https://stromectol.reviews/# ivermectin 90 mg
ivermectin iv [url=https://stromectol.reviews/#]stromectol reviews[/url] stromectol reviews
where to buy stromectol: stromectol – stromectol pill
https://antibiotics.cheap/# over the counter antibiotics
rybelsus usa: rybelsus side effects – online pharmacy
https://semaglutide.life/# how long does it take for semaglutide to start working
antibiotics cheap: antibiotics cheap – over the counter antibiotics
stromectol reviews: stromectol reviews – stromectol reviews
https://antibiotics.cheap/# antibiotics cheap
https://antibiotics.cheap/# buy antibiotics from canada
goodrx rybelsus [url=https://semaglutide.life/#]semaglutide life[/url] online semaglutide prescription
can you cut rybelsus in half: best place to inject semaglutide for weight loss – legal online pharmacies in the us
stromectol 0.5 mg: ivermectin where to buy – stromectol reviews
https://semaglutide.life/# semaglutide alternatives
stromectol drug: ivermectin 9 mg – ivermectin generic cream
https://semaglutide.life/# what is semaglutide
antibiotics cheap: antibiotics cheap – over the counter antibiotics
https://antibiotics.cheap/# over the counter antibiotics
semaglutide hers: semaglutide life – reputable online pharmacy no prescription
where to buy ivermectin [url=https://stromectol.reviews/#]ivermectin australia[/url] stromectol reviews
what’s the difference between semaglutide and tirzepatide: semaglutide life – legitimate online pharmacy
https://antibiotics.cheap/# over the counter antibiotics
https://antibiotics.cheap/# over the counter antibiotics
over the counter antibiotics: get antibiotics quickly – over the counter antibiotics
over the counter antibiotics: antibiotics cheap – best online doctor for antibiotics
https://antibiotics.cheap/# buy antibiotics from india
antibiotics cheap: antibiotics cheap – over the counter antibiotics
ivermectin australia [url=https://stromectol.reviews/#]ivermectin buy australia[/url] buy ivermectin for humans uk
https://semaglutide.life/# rybelsus tijuana
ivermectin 8 mg: stromectol reviews – ivermectin 8000
https://semaglutide.life/# what to eat while on semaglutide
stromectol reviews: stromectol reviews – stromectol reviews
cheap antibiotics: antibiotics cheap – over the counter antibiotics
https://semaglutide.life/# semaglutide results before and after
https://antibiotics.cheap/# antibiotics cheap
rybelsusе‰ЇдЅњз”Ё: how to get semaglutide without insurance – legal online pharmacies in the us
can you buy antibiotics over the counter [url=https://antibiotics.cheap/#]over the counter antibiotics[/url] over the counter antibiotics
antibiotics cheap: antibiotics cheap – over the counter antibiotics
https://semaglutide.life/# does rybelsus cause heartburn
can you take wegovy and rybelsus together: semaglutide withdrawal symptoms – online pharmacy no rx
stromectol reviews: stromectol reviews – stromectol reviews
https://semaglutide.life/# rybelsus with metformin
https://antibiotics.cheap/# over the counter antibiotics
is rybelsus over the counter: semaglutide life – us pharmacy no prescription
over the counter antibiotics: prescription antibiotic – over the counter antibiotics
ro semaglutide reviews [url=https://semaglutide.life/#]wegovy vs semaglutide[/url] rybelsus 7 mg
https://antibiotics.cheap/# antibiotics online purchase
https://stromectol.reviews/# ivermectin gel
antibiotics cheap: over the counter antibiotics – cheap antibiotics
stromectol reviews: stromectol 15 mg – stromectol reviews
https://antibiotics.cheap/# antibiotics cheap
maximum dose of semaglutide: semaglutide life – pharmacy websites
stromectol reviews: stromectol reviews – ivermectin 12 mg
https://stromectol.reviews/# where to buy ivermectin pills
indianpharmacy com [url=http://indianmedsdelivery.com/#]п»їlegitimate online pharmacies india[/url] online pharmacy without prescription
https://mexicanpharm.xyz/# Mexican Pharm
Mexican Pharm: Mexican Pharm – Mexican Pharm
escrow pharmacy canada: Canadian Tabs – canadian pharmacy king reviews
http://indianmedsdelivery.com/# online pharmacy india
Canadian Tabs: Canadian Tabs – online pharmacy canada
http://indianmedsdelivery.com/# indian pharmacy paypal
online pharmacy india: Indian Meds Delivery – online pharmacy no rx
india pharmacy [url=https://indianmedsdelivery.com/#]buy prescription drugs from india[/url] online pharmacies
https://canadiantabs.com/# Canadian Tabs
online shopping pharmacy india: Online medicine home delivery – shop medicine online
п»їmexican pharmacy: mexico pharmacies – online pharmacies
https://indianmedsdelivery.com/# pharmacy website india
https://mexicanpharm.com/# Mexican Pharm
Canadian Tabs: п»їcanadian pharmacy uk delivery – northwest pharmacy canada
mexico pharmacies: mexican medicine – Mexican Pharm
Mexican Pharm [url=http://mexicanpharm.com/#]pharmacy mexico online[/url] farmacia mexicana en linea
https://indianmedsdelivery.xyz/# indianpharmacy com
Mexican Pharm: farmacias online usa – farmacia mexicana en linea
http://indianmedsdelivery.com/# best india pharmacy
mail order pharmacy india: Indian Meds Delivery – overseas pharmacy no prescription
https://mexicanpharm.xyz/# farmacia mexicana en linea
pharmacy canadian superstore: reliable canadian pharmacy – canadian pharmacy oxycodone
Canadian Tabs: maple leaf pharmacy in canada – canadian pharmacy sarasota
https://canadiantabs.xyz/# Canadian Tabs
top 10 online pharmacy in india [url=https://indianmedsdelivery.xyz/#]india pharmacy[/url] worldwide pharmacy online
https://mexicanpharm.com/# Mexican Pharm
mail order pharmacy india: indian pharmacies safe – reliable online pharmacy
buying prescriptions in mexico: Mexican Pharm – purple pharmacy online ordering
top 10 pharmacies in india: Indian Meds Delivery – online pharmacy discount code
https://canadiantabs.com/# Canadian Tabs
https://mexicanpharm.xyz/# Mexican Pharm
cheapest pharmacy canada: canadian pharmacy 24 – Canadian Tabs
Canadian Tabs [url=https://canadiantabs.com/#]Canadian Tabs[/url] Canadian Tabs
Mexican Pharm: mexican pharmacy online – los algodones pharmacy online
https://mexicanpharm.com/# Mexican Pharm
online shopping pharmacy india: top 10 online pharmacy in india – online drugs order
india pharmacy: Indian Meds Delivery – pharmacy no prescription required
https://canadiantabs.com/# Canadian Tabs
https://canadiantabs.com/# canada drugs reviews
order meds from mexico: medicine mexico – best pharmacy in mexico
mexipharmacy reviews [url=https://mexicanpharm.com/#]los algodones pharmacy online[/url] farmacias mexicanas
Mexican Pharm: Mexican Pharm – Mexican Pharm
https://canadiantabs.com/# cross border pharmacy canada
https://indianmedsdelivery.com/# cheapest online pharmacy india
farmacia pharmacy mexico: farmacia online usa – hydrocodone mexico pharmacy
mexico medication: mexican medicine – mexican drugstore
https://ivermectinfirst.com/# ivermectin over the counter canada
pet pharmacy: pet meds online – Vet Pharm First
Vet Pharm First [url=https://vetpharmfirst.shop/#]Vet Pharm First[/url] dog prescriptions online
Ivermectin First: Ivermectin First – Ivermectin First
https://vetpharmfirst.shop/# pet meds official website
http://ivermectinfirst.com/# Ivermectin First
online pharmacy no rx: Online Pharm First – legal online pharmacies in the us
shop medicine online: Online Pharm First – online pharmacy without prescription
https://ivermectinfirst.com/# Ivermectin First
https://vetpharmfirst.com/# pet pharmacy online
best rx pharmacy online: overseas pharmacy no prescription – no prescription needed pharmacy
Vet Pharm First: Vet Pharm First – dog medicine
pet med [url=http://vetpharmfirst.com/#]Vet Pharm First[/url] Vet Pharm First
https://vetpharmfirst.com/# Vet Pharm First
Vet Pharm First: pet pharmacy online – online vet pharmacy
Ivermectin First: Ivermectin First – ivermectin humans
http://onlinepharmfirst.com/# pharmacy order online
http://onlinepharmfirst.com/# legal online pharmacy
foreign online pharmacy: Online Pharm First – legal online pharmacy
Vet Pharm First: pet med – Vet Pharm First
pet pharmacy online [url=https://vetpharmfirst.shop/#]Vet Pharm First[/url] Vet Pharm First
https://vetpharmfirst.shop/# Vet Pharm First
safe online pharmacies: online pharmacy no rx – online pharmacy
https://onlinepharmfirst.com/# best online pharmacy
best pet rx: pet drugs online – Vet Pharm First
https://onlinepharmfirst.shop/# us pharmacy no prescription
Vet Pharm First [url=https://vetpharmfirst.shop/#]pet prescriptions online[/url] vet pharmacy
pharmacy order online: Online Pharm First – top online pharmacy
http://onlinepharmfirst.com/# secure medical online pharmacy
dog medicine: dog prescriptions online – Vet Pharm First
https://onlinepharmfirst.shop/# no prescription pharmacy paypal
legal online pharmacy: best mail order pharmacy – trusted online pharmacy
Vet Pharm First: Vet Pharm First – pet pharmacy
Vet Pharm First [url=https://vetpharmfirst.com/#]Vet Pharm First[/url] pet med
https://onlinepharmfirst.com/# overseas online pharmacy
no prescription pharmacy paypal: overseas pharmacy no prescription – legitimate online pharmacy
https://vetpharmfirst.shop/# Vet Pharm First
pet prescriptions online: Vet Pharm First – Vet Pharm First
http://vetpharmfirst.com/# Vet Pharm First
pharmacy websites: Online Pharm First – reputable overseas online pharmacies
pet meds online Vet Pharm First vet pharmacy
legal online pharmacies in the us [url=https://onlinepharmfirst.shop/#]Online Pharm First[/url] worldwide pharmacy online
https://onlinepharmfirst.com/# foreign online pharmacy
ivermectin buy nz: Ivermectin First – Ivermectin First
http://ivermectinfirst.com/# Ivermectin First
vet pharmacy online Vet Pharm First pet pharmacy
Ivermectin First: Ivermectin First – Ivermectin First
https://onlinepharmfirst.com/# legal online pharmacy
Vet Pharm First: Vet Pharm First – pet rx
pharmacy order online [url=http://onlinepharmfirst.com/#]no script pharmacy[/url] pharmacy online
pet meds for dogs Vet Pharm First pet rx
https://ivermectinfirst.com/# stromectol 3mg cost
online pet pharmacy: canada pet meds – vet pharmacy online
https://ivermectinfirst.shop/# buy stromectol online
trusted online pharmacy: trustworthy online pharmacy – trusted online pharmacy
best pet rx Vet Pharm First pet rx
https://onlinepharmfirst.shop/# top online pharmacy
canada pet meds: online vet pharmacy – п»їdog medication online
online pharmacy without scripts [url=https://onlinepharmfirst.com/#]overseas online pharmacy[/url] reputable overseas online pharmacies
https://onlinepharmfirst.com/# legitimate online pharmacy
where to buy ivermectin pills: Ivermectin First – Ivermectin First
https://rybelsus.pro/# how to pronounce semaglutide
https://rybelsus.pro/# what is the starting dose of semaglutide
rybelsus icd 10 code semaglutide cost legitimate online pharmacy
fda compounded semaglutide [url=https://rybelsus.pro/#]semaglutide and breast cancer[/url] can you switch from semaglutide to tirzepatide
Generic Tadalafil 20mg price Buy Tadalafil 5mg buy cialis pill
https://rybelsus.pro/# rybelsus 1mg
para que sirve rybelsus 7 mg rybelsus other names no script pharmacy
https://cialis.sbs/# Cialis 20mg price
https://viagra.onl/# Order Viagra 50 mg online
Buy Tadalafil 10mg cialis for sale п»їcialis generic
https://rybelsus.pro/# weight loss drug semaglutide
why am i not losing weight on semaglutide does rybelsus cause sulfur burps reputable online pharmacy no prescription
generic sildenafil [url=https://viagra.onl/#]Order Viagra 50 mg online[/url] sildenafil online
https://rybelsus.pro/# can you take jardiance and rybelsus together
Viagra online price Cheap Sildenafil 100mg Viagra without a doctor prescription Canada
https://rybelsus.pro/# semaglutide injection dosage
https://rybelsus.pro/# semaglutide clinic near me
Viagra online price buy Viagra online viagra canada
Buy Tadalafil 20mg Generic Cialis without a doctor prescription Generic Cialis price
https://rybelsus.pro/# rybelsus 7 mg vs 14 mg
Cialis without a doctor prescription [url=https://cialis.sbs/#]Cheap Cialis[/url] Cheap Cialis
https://viagra.onl/# Cheap Viagra 100mg
cheapest cialis cheapest cialis buy cialis pill
how can i get rybelsus rybelsus 21 mg pharmacy online
https://viagra.onl/# Cheap Viagra 100mg
cheap viagra sildenafil online order viagra
https://viagra.onl/# cheapest viagra
https://rybelsus.pro/# mochi semaglutide price
cheap viagra Order Viagra 50 mg online best price for viagra 100mg
semaglutide titration schedule [url=https://rybelsus.pro/#]icd 10 code for long term use of rybelsus[/url] rybelsus approved for weight loss
cialis for sale Cialis 20mg price in USA Cialis over the counter
https://rybelsus.pro/# semaglutide mixing calculator
generic sildenafil sildenafil 50 mg price Cheap generic Viagra
https://rybelsus.pro/# semaglutide vial left out of fridge
semaglutide moa can i take rybelsus at night online pharmacy no rx
https://cialis.sbs/# Generic Cialis price
stomach pain semaglutide rybelsus (semaglutide reputable overseas online pharmacies
Sildenafil 100mg price [url=https://viagra.onl/#]Cheap generic Viagra online[/url] buy viagra here
https://rybelsus.pro/# side effects from semaglutide
Buy Tadalafil 10mg Buy Cialis online Cialis without a doctor prescription
https://rybelsus.pro/# how much does rybelsus cost
order viagra buy Viagra online best price for viagra 100mg
sildenafil 50 mg price Generic Viagra for sale Viagra without a doctor prescription Canada
https://rybelsus.pro/# can you take 2 3 mg rybelsus
https://viagra.onl/# best price for viagra 100mg
rybelsus amazon [url=https://rybelsus.pro/#]how long does it take for semaglutide to start working[/url] is rybelsus for weight loss
Viagra tablet online Sildenafil Citrate Tablets 100mg cheapest viagra
https://viagra.onl/# Viagra tablet online
Cheap Sildenafil 100mg Sildenafil Citrate Tablets 100mg Viagra Tablet price
https://viagra.onl/# Cheap Sildenafil 100mg
buy cialis pill Generic Cialis without a doctor prescription Buy Tadalafil 20mg
https://cialis.sbs/# Buy Tadalafil 20mg
buy Viagra online Cheap Sildenafil 100mg Viagra Tablet price
cheap viagra [url=https://viagra.onl/#]Viagra online price[/url] Cheap Viagra 100mg
https://viagra.onl/# over the counter sildenafil
does rybelsus cause cancer rybelsus side effects 3 mg online pharmacy no rx
https://viagra.onl/# best price for viagra 100mg
Buy Tadalafil 5mg Buy Cialis online Buy Tadalafil 5mg
https://rybelsus.pro/# does rybelsus make you urinate more
https://rybelsus.pro/# semaglutide heart palpitations
Buy Tadalafil 10mg Buy Tadalafil 5mg buy cialis pill
Viagra Tablet price sildenafil online Buy Viagra online cheap
semaglutide results before and after [url=https://rybelsus.pro/#]what happens when you stop taking semaglutide[/url] buy rybelsus uk
https://rybelsus.pro/# why does semaglutide cause nausea
https://viagra.onl/# Viagra online price
Sildenafil 100mg price Viagra tablet online over the counter sildenafil
https://bestbetgiris.online# pusulabet resmi
https://casivipgiris.site# bahiscasino giriş
bahiscasino casino: bahiscasino güncel giriş
bahiscasino giris [url=https://casivipgiris.site/#]bahiscasino[/url]
https://casivipgiris.site# bahiscasino güncel adres
Tadalafil price [url=https://cialis.sbs/#]cheapest cialis[/url] Cialis 20mg price
https://bestbetgiris.online# pusulabet giris
https://casivipgiris.site# bahiscasino güncel giriş
https://casivipgiris.site# bahiscasino
bahiscasino resmi giriş: bahiscasino
mexipharmacy reviews [url=https://easymexmeds.shop/#]order medicine from mexico[/url] Easy Mex Meds
Easy Mex Meds: farmacia online usa – Easy Mex Meds
https://easycanadameds.com/# Easy Canada Meds
Easy Canada Meds [url=https://easycanadameds.shop/#]legitimate canadian pharmacy[/url] pharmacy canadian superstore
buy medicines online in india: top online pharmacy india – top online pharmacy
recommended canadian pharmacies: canadian online pharmacy no prescription – canadian discount pharmacy
canadian pharmacy king reviews: rate canadian pharmacies – canadianpharmacyworld
india pharmacy [url=https://easyindiameds.com/#]indian pharmacy[/url] no rx needed pharmacy
legit canadian pharmacy: best online canadian pharmacy – best mail order pharmacy canada
buy medicines online in india: Easy India Meds – best mail order pharmacy
http://easycanadameds.com/# my canadian pharmacy rx
reputable mexican pharmacy [url=https://easymexmeds.com/#]Easy Mex Meds[/url] Easy Mex Meds
best india pharmacy: best online pharmacy india – overseas pharmacy no prescription
Online medicine order: Online medicine home delivery – pharmacy order online
Easy Canada Meds: Easy Canada Meds – Easy Canada Meds
canadian pharmacy sarasota [url=http://easycanadameds.com/#]reputable canadian online pharmacy[/url] Easy Canada Meds
best pharmacy in mexico: Easy Mex Meds – pharmacy delivery
online pharmacy india: Easy India Meds – trustworthy online pharmacy
Online medicine order: Easy India Meds – online pharmacy no prescription needed
Easy Mex Meds [url=https://easymexmeds.shop/#]Easy Mex Meds[/url] Easy Mex Meds
http://easyindiameds.com/# india online pharmacy
Easy Mex Meds: order antibiotics from mexico – farmacias online usa
Easy Mex Meds: order antibiotics from mexico – Easy Mex Meds
pharmacy wholesalers canada [url=https://easycanadameds.shop/#]Easy Canada Meds[/url] canada drugs reviews
best india pharmacy: Easy India Meds – medicine online
purple pharmacy online: purple pharmacy mexico – mexicanrxpharm
Easy Mex Meds [url=https://easymexmeds.com/#]Easy Mex Meds[/url] mexican meds
online shopping pharmacy india: Online medicine order – pharmacy online
canadian pharmacy online ship to usa: canada rx pharmacy – Easy Canada Meds
https://easyindiameds.shop/# п»їlegitimate online pharmacies india
indian pharmacies safe [url=https://easyindiameds.shop/#]Easy India Meds[/url] trusted online pharmacy
Easy Canada Meds: pharmacy canadian – canada rx pharmacy world
reputable indian pharmacies: reputable indian online pharmacy – п»їinternational drug mart
canadian pharmacy 365: canadian pharmacy online – Easy Canada Meds
best online pharmacy india [url=https://easyindiameds.shop/#]online shopping pharmacy india[/url] medicine online order
Easy Canada Meds: Easy Canada Meds – canada cloud pharmacy
Easy Mex Meds: farmacia mexicana en chicago – hydrocodone mexico pharmacy
top 10 pharmacies in india: reputable indian pharmacies – medicine online
canada drugs reviews [url=http://easycanadameds.com/#]Easy Canada Meds[/url] canadadrugpharmacy com
vipps canadian pharmacy: Easy Canada Meds – 77 canadian pharmacy
https://easycanadameds.com/# Easy Canada Meds
los algodones pharmacy online [url=http://easymexmeds.com/#]online pharmacy in mexico[/url] pharmacys in mexico
buy canadian drugs: Easy Canada Meds – Easy Canada Meds
п»їlegitimate online pharmacies india: Easy India Meds – pharmacy no prescription required
cheapest online pharmacy india: world pharmacy india – overseas pharmacy no prescription
reputable indian online pharmacy [url=https://easyindiameds.com/#]indianpharmacy com[/url] overseas pharmacy no prescription
legitimate canadian online pharmacies: the canadian drugstore – Easy Canada Meds
canada pharmacy online: buying drugs from canada – Easy Canada Meds
https://easyindiameds.com/# mail order pharmacy india
recommended canadian pharmacies [url=http://easycanadameds.com/#]ed drugs online from canada[/url] Easy Canada Meds
world pharmacy india: Easy India Meds – legal online pharmacy
Easy Mex Meds: mexican pharmacies that ship to us – Easy Mex Meds
purple pharmacy mexico [url=https://easymexmeds.shop/#]Easy Mex Meds[/url] online drugs order
farmacia online usa: mexican medicine – Easy Mex Meds
Easy Canada Meds: safe canadian pharmacy – Easy Canada Meds
Easy Canada Meds [url=https://easycanadameds.com/#]canadian pharmacy meds review[/url] canadian pharmacies compare
india pharmacy mail order: indian pharmacy online – no rx needed pharmacy
Easy Canada Meds: legit canadian pharmacy online – escrow pharmacy canada
http://easyindiameds.com/# buy medicines online in india
canadian pharmacy mall [url=https://easycanadameds.shop/#]Easy Canada Meds[/url] online canadian pharmacy
world pharmacy india: reputable indian online pharmacy – pharmacy order online
Easy Mex Meds: Easy Mex Meds – mail order pharmacy mexico
canada drugs reviews [url=http://easycanadameds.com/#]canadian online drugstore[/url] Easy Canada Meds
Easy Mex Meds: mexican meds – Easy Mex Meds
Easy Canada Meds: Easy Canada Meds – Easy Canada Meds
mexico drug store [url=http://easymexmeds.com/#]pharmacy in mexico city[/url] mexipharmacy reviews
Easy Mex Meds: los algodones pharmacy online – Easy Mex Meds
northern pharmacy canada: canadian pharmacy store official website – canada rx pharmacy
canadian drug prices [url=https://easycanadameds.shop/#]Easy Canada Meds[/url] onlinepharmaciescanada com
Easy Mex Meds: pharmacy in mexico that ships to us – mexico pharmacies
Have you ever thought about adding a little bit more than just your articles? I mean, what you say is valuable and everything. Nevertheless think about if you added some great pictures or video clips to give your posts more, http://www.kayswell.com“pop”! Your content is excellent but with pics and videos, this site could certainly be one of the best in its niche. Terrific blog!
indian pharmacy paypal: Easy India Meds – medstore online pharmacy
Easy Canada Meds [url=http://easycanadameds.com/#]Easy Canada Meds[/url] canadian pharmacy world
Easy Canada Meds: Easy Canada Meds – Easy Canada Meds
Easy Canada Meds: Easy Canada Meds – Easy Canada Meds
indian pharmacy paypal [url=https://easyindiameds.com/#]Easy India Meds[/url] top online pharmacy
canadapharmacyonline com: reliable canadian online pharmacy – canadian drugs
https://easyindiameds.com/# top 10 pharmacies in india
indian pharmacy: reputable indian online pharmacy – trusted online pharmacy
indianpharmacy com [url=https://easyindiameds.com/#]online shopping pharmacy india[/url] top-rated online pharmacies
Easy Mex Meds: Easy Mex Meds – online pharmacy in mexico
mexico prescriptions [url=http://easymexmeds.com/#]mexico medication[/url] Easy Mex Meds
Easy Canada Meds: Easy Canada Meds – canadian pharmacy prices
indian pharmacy: Easy India Meds – online pharmacy no prescription needed
mexico pharmacy: Easy Mex Meds – online mexican pharmacy
п»їlegitimate online pharmacies india: Easy India Meds – buy online medicine
Easy Canada Meds [url=http://easycanadameds.com/#]Easy Canada Meds[/url] canadian pharmacy 24
online pharmacies: Easy Mex Meds – mexican pharmacies
https://easymexmeds.shop/# Easy Mex Meds
top 10 pharmacies in india: india online pharmacy – international pharmacy
indian pharmacy [url=https://easyindiameds.shop/#]Online medicine order[/url] best online pharmacy no prescription
mexico medication: online pharmacies in mexico – Easy Mex Meds
Easy Mex Meds: Easy Mex Meds – Easy Mex Meds
top 10 pharmacies in india [url=http://easyindiameds.com/#]Easy India Meds[/url] trustworthy online pharmacy
Easy Canada Meds: Easy Canada Meds – Easy Canada Meds
online pharmacy india: Easy India Meds – reliable online pharmacy
indian pharmacy paypal [url=https://easyindiameds.com/#]indian pharmacy online[/url] online drugs order
https://easycanadameds.com/# maple leaf pharmacy in canada
farmacia mexicana online: Easy Mex Meds – Easy Mex Meds
Easy Mex Meds [url=https://easymexmeds.com/#]Easy Mex Meds[/url] Easy Mex Meds
india online pharmacy: Easy India Meds – pharmacy no prescription required
indian pharmacy paypal: top online pharmacy india – pharmacy no prescription required
buy prescription drugs from india [url=http://easyindiameds.com/#]Easy India Meds[/url] legit online pharmacy
indian pharmacy paypal: Easy India Meds – reliable online pharmacy
Easy Mex Meds: Easy Mex Meds – buying prescriptions in mexico
http://easymexmeds.com/# mexican pharmacies near me
Easy Canada Meds [url=http://easycanadameds.com/#]canada drugs online reviews[/url] canadian pharmacy 24
https://freshpharm24.com/product/stendra online pharmacy no prescription
https://freshpharm24.com/product/stendra medstore online pharmacy
stendra best rx pharmacy online
Fresh Pharm 24 legal online pharmacies in the us
https://freshpharm24.com/ online pharmacy no rx
norvasc online pharmacy discount code
pharmacy pharmacy no prescription required
levothroid fresh pharm pharmacy online
https://freshpharm24.com/product/priligy secure medical online pharmacy
https://freshpharm24.com/product/norvasc pharmacy online
pharmacy fresh pharm no rx needed pharmacy
Fresh Pharm medstore online pharmacy
Fresh Pharm 24 overseas pharmacy no prescription
https://freshpharm24.com/product/stendra online pharmacy no prescription needed
Fresh Pharm 24 no prescription needed pharmacy
pharmacy fresh pharm no prescription pharmacy paypal
https://freshpharm24.com/ online pharmacy without prescription
https://freshpharm24.com/product/cialis trustworthy online pharmacy
online pharmacy shop medicine online
generic priligy shop medicine online
pharmacy international pharmacy
https://freshpharm24.com/product/lipitor overseas online pharmacy
pharmacy fresh pharm best online pharmacy no prescription
Fresh Pharm 24 online pharmacies
https://freshpharm24.com/product/priligy no rx needed pharmacy
https://freshpharm24.com/product/levothroid best online pharmacy
Fresh Pharm medstore online pharmacy
https://freshpharm24.com/ overseas pharmacy no prescription
Fresh Pharm reputable online pharmacy no prescription
online pharmacy reliable online pharmacy
https://freshpharm24.com/product/levothroid overseas pharmacy no prescription
Fresh Pharm medicine online
https://freshpharm24.com/product/norvasc no prescription needed pharmacy
online pharmacy safe online pharmacies
https://freshpharm24.com/ top online pharmacy
Fresh Pharm 24 online pharmacy
Fresh Pharm trusted online pharmacy
https://freshpharm24.com/product/levothroid trusted online pharmacy
http://stromectolvip.com/# ivermectin 500ml
ivermectin cream cost ivermectin 3 mg tabs where to buy stromectol online
https://stromectolvip.com/# ivermectin iv
ivermectin cream 5% [url=https://stromectolvip.com/#]stromectol Vip[/url] stromectol liquid
https://cialisvip.online/# Cialis Vip
https://sildenafilvip.com/# cheap viagra
cialis for sale Buy Cialis online Buy Tadalafil 5mg
https://sildenafilvip.com/# viagra without prescription
https://cialisvip.online/# Cialis without a doctor prescription
Viagra Tablet price Generic Viagra online Order Viagra 50 mg online
stromectol liquid [url=https://stromectolvip.com/#]stromectol Vip[/url] ivermectin stromectol
http://stromectolvip.com/# buy ivermectin
http://stromectolvip.com/# stromectol buy uk
stromectol generic name ivermectin purchase ivermectin rx
https://cialisvip.online/# Cialis Vip
http://stromectolvip.com/# ivermectin 250ml
п»їcialis generic Cialis Vip Tadalafil Tablet
ivermectin tablets stromectol Vip purchase ivermectin
https://sildenafilvip.shop/# Sildenafil Vip
ivermectin tablets order [url=http://stromectolvip.com/#]stromectol Vip[/url] stromectol 3mg
https://stromectolvip.online/# stromectol otc
Tadalafil Tablet Cheap Cialis cheapest cialis
http://cialisvip.com/# buy cialis pill
https://sildenafilvip.shop/# Sildenafil Vip
stromectol online pharmacy stromectol Vip buy stromectol online uk
https://stromectolvip.com/# ivermectin buy
https://sildenafilvip.shop/# Sildenafil Vip
ivermectin cream canada cost [url=https://stromectolvip.online/#]ivermectin 90 mg[/url] stromectol ivermectin 3 mg
Buy generic 100mg Viagra online Viagra generic over the counter Cheapest Sildenafil online
http://stromectolvip.com/# ivermectin 90 mg
https://sildenafilvip.com/# Sildenafil Vip
Viagra generic over the counter buy Viagra online buy Viagra online
https://sildenafilvip.shop/# Viagra generic over the counter
https://sildenafilvip.com/# sildenafil 50 mg price
cialis for sale Cialis Vip Tadalafil price
stromectol in canada [url=https://stromectolvip.com/#]stromectol Vip[/url] order stromectol
https://stromectolvip.com/# ivermectin lotion cost
ivermectin 2mg stromectol Vip stromectol where to buy
https://stromectolvip.online/# buy stromectol uk
best price for viagra 100mg Viagra without a doctor prescription Canada Buy Viagra online cheap
http://cialisvip.com/# Cialis Vip
Buy Tadalafil 20mg Cheap Cialis Cialis 20mg price in USA
Hello there! I could have sworn I’ve been to this blog before but after checking through some of the post I realized it’s new to me.Anyways, I’m definitely glad I found it and I’ll be bookmarking and checking back frequently! http://www.kayswell.com
Buy Tadalafil 5mg [url=https://cialisvip.online/#]Cialis Vip[/url] Cialis over the counter
Good day! Would you mind if I share your blog with my zynga group?There’s a lot of folks that I think would really enjoy your content. Please let me know. Cheers http://www.kayswell.com
https://sildenafilvip.com/# Cheap Sildenafil 100mg
Cialis over the counter Cialis without a doctor prescription Generic Cialis price
https://stromectolvip.online/# ivermectin price uk
Cialis over the counter Cialis 20mg price buy cialis pill
https://cialisvip.com/# buy cialis pill
Generic Tadalafil 20mg price Cialis Vip Cialis without a doctor prescription
ivermectin 250ml [url=https://stromectolvip.online/#]ivermectin purchase[/url] stromectol tab price
https://cialisvip.online/# cialis for sale
Buy Tadalafil 20mg Cialis Vip Generic Cialis without a doctor prescription
https://sildenafilvip.com/# cheapest viagra
ivermectin 6 stromectol Vip ivermectin cream uk
http://stromectolvip.com/# ivermectin 50
ivermectin gel stromectol Vip ivermectin oral solution
cialis for sale [url=http://cialisvip.com/#]Cialis Vip[/url] Cialis 20mg price in USA
http://sildenafilvip.com/# Cheap generic Viagra online
stromectol xr ivermectin over the counter ivermectin lotion cost
https://cialisvip.online/# Cialis Vip
stromectol ivermectin ivermectin generic ivermectin 400 mg brands
https://stromectolvip.online/# ivermectin 250ml
Tadalafil price Cialis over the counter Buy Tadalafil 10mg
https://sildenafilvip.shop/# Sildenafil Vip
liraglutide [url=https://liraglutideglp1.shop/#]LiraglutideGlp1[/url] glp 1
http://semaglutideglp1.com/# rybelsus where to buy
liraglutide liraglutide buy victoza online
liraglutide pharmacy victoza weight loss generic liraglutide
cheap liraglutide cheap victoza liraglutide fast delivery
http://victopharm.com/# best mail order pharmacy
rybelsus commercial glp-1 drugs for weight loss rybelsus for sale
no script pharmacy [url=https://victopharm.shop/#]online drugs order[/url] secure medical online pharmacy
victoza weight loss glp-1 liraglutide online
https://liraglutideglp1.com/# buy victoza online
cheap liraglutide victoza glp-1
http://liraglutideglp1.com/# liraglutide pharmacy
how to inject semaglutide glp-1 drugs for weight loss rybelsus when to take
no prescription pharmacy paypal Victo Pharm medicine online order
https://victopharm.shop/# reputable overseas online pharmacies
glp-1 buy liraglutide online victoza
nausea semaglutide [url=https://semaglutideglp1.shop/#]glp 1 pills[/url] is wegovy a semaglutide
https://semaglutideglp1.shop/# does oral semaglutide work for weight loss
trustworthy online pharmacy online pharmacy no rx online pharmacy no rx
semaglutide tablets price glp-1 drugs for weight loss rybelsus diabetes
https://liraglutideglp1.com/# cheap victoza
how to get rybelsus prescription glp-1 drugs for weight loss rybelsus savings card
no prescription pharmacy paypal Victo Pharm pharmacy websites
http://semaglutideglp1.com/# rybelsus pills weight loss
victoza generic [url=http://liraglutideglp1.com/#]LiraglutideGlp1[/url] buy victoza online
online pharmacy no prescription needed Victo Pharm secure medical online pharmacy
long term effects of rybelsus pros and cons of rybelsus wegovy vs compounded semaglutide
best rx pharmacy online trusted online pharmacy trustworthy online pharmacy
http://liraglutideglp1.com/# liraglutide fast delivery
no prescription needed pharmacy no script pharmacy online pharmacy no prescription needed
liraglutide fast delivery buy victoza online cheap liraglutide
https://victopharm.shop/# legitimate online pharmacy
best price for viagra 100mg buy viagra here – Order Viagra 50 mg online
https://urohealthdaily.shop/# Viagra Tablet price
Viagra without a doctor prescription Canada [url=https://urohealthdaily.com/#]UroHealth Daily[/url] buy viagra here
Buy generic 100mg Viagra online Viagra Tablet price – generic sildenafil
buy viagra here UroHealth Daily – buy Viagra online
viagra without prescription UroHealth Daily – cheapest viagra
Viagra online price Buy Viagra online cheap – over the counter sildenafil
https://urohealthdaily.com/dosage-guide/# Viagra generic over the counter
Sildenafil Citrate Tablets 100mg sildenafil 50 mg price – Viagra online price
Generic Viagra for sale UroHealth Daily – generic sildenafil
cheapest viagra best price for viagra 100mg – Viagra online price
Generic Viagra online [url=http://urohealthdaily.com/#]UroHealth Daily[/url] sildenafil 50 mg price
Viagra generic over the counter viagra without prescription – sildenafil 50 mg price
Viagra without a doctor prescription Canada over the counter sildenafil – Sildenafil 100mg price
https://urohealthdaily.com/dosage-guide/# Sildenafil Citrate Tablets 100mg
Cheap Viagra 100mg viagra canada – cheap viagra
sildenafil over the counter buy Viagra over the counter – cheapest viagra
buy Viagra online Sildenafil 100mg price – buy Viagra over the counter
viagra without prescription UroHealth Daily – Cheap generic Viagra
Cheap generic Viagra online [url=http://urohealthdaily.com/#]Sildenafil 100mg price[/url] sildenafil 50 mg price
Viagra tablet online Viagra without a doctor prescription Canada – sildenafil online
cheapest viagra UroHealth Daily – Viagra online price
viagra canada UroHealth Daily – Buy Viagra online cheap
Viagra online price over the counter sildenafil – Viagra Tablet price
cheapest viagra UroHealth Daily – Cheap generic Viagra
Viagra without a doctor prescription Canada UroHealth Daily – sildenafil online
Viagra generic over the counter Viagra online price – Buy Viagra online cheap
buy viagra here UroHealth Daily – best price for viagra 100mg
Cheap Sildenafil 100mg Sildenafil Citrate Tablets 100mg – generic sildenafil
Sildenafil Citrate Tablets 100mg [url=http://urohealthdaily.com/#]Viagra without a doctor prescription Canada[/url] buy Viagra online
п»їcialis generic Buy Cialis online – Buy Tadalafil 10mg
https://mensrxguide.org/# buy cialis pill
Cialis 20mg price Generic Cialis price – Tadalafil Tablet
Cialis without a doctor prescription http://mensrxguide.org/# Cialis 20mg price
cheapest cialis MensRxGuide – Buy Cialis online
https://mensrxguide.org/# Buy Tadalafil 20mg
cialis for sale MensRxGuide – cheapest cialis
Tadalafil Tablet [url=http://mensrxguide.org/#]Tadalafil price[/url] cialis for sale
Tadalafil Tablet Cialis 20mg price in USA – Cheap Cialis
Cialis 20mg price in USA http://mensrxguide.org/# Cialis without a doctor prescription
Cialis over the counter cheapest cialis – Buy Tadalafil 10mg
Cialis 20mg price in USA MensRxGuide – Cialis without a doctor prescription
https://mensrxguide.org/# cialis for sale
Tadalafil Tablet MensRxGuide – Cialis without a doctor prescription
Buy Cialis online MensRxGuide – cialis for sale
Buy Tadalafil 5mg [url=http://mensrxguide.org/#]Generic Cialis without a doctor prescription[/url] Cialis 20mg price
Buy Tadalafil 20mg https://mensrxguide.org/# buy cialis pill
http://mensrxguide.org/# Cialis without a doctor prescription
Cialis 20mg price Generic Tadalafil 20mg price – Cialis over the counter
Cialis over the counter MensRxGuide – Buy Tadalafil 5mg
Tadalafil Tablet Buy Tadalafil 10mg – Cheap Cialis
Cialis 20mg price in USA Cheap Cialis – Cialis 20mg price in USA
Generic Tadalafil 20mg price http://mensrxguide.org/# Generic Cialis without a doctor prescription
http://mensrxguide.org/# Buy Tadalafil 5mg
Generic Cialis without a doctor prescription MensRxGuide – Buy Cialis online
Generic Cialis without a doctor prescription MensRxGuide – Generic Cialis price
Cialis without a doctor prescription http://mensrxguide.org/# Cheap Cialis
Tadalafil Tablet Buy Tadalafil 5mg – Cialis 20mg price in USA
http://mensrxguide.org/# buy cialis pill
Generic Tadalafil 20mg price Buy Tadalafil 5mg – Tadalafil price
victoza weight loss Advancing Clinical Research in Metabolic Health and Weight Management
glp-1 agonists https://usobesityscience.org/liraglutide-studies/ rybelsus vs ozempic weight loss
glp 1 us obesity science
Advancing Clinical Research in Metabolic Health and Weight Management compound pharmacy semaglutide
henry semaglutide semaglutide
tirzepatide https://usobesityscience.org/ buy victoza online
cheap liraglutide us obesity science
Advancing Clinical Research in Metabolic Health and Weight Management https://usobesityscience.org/orlistat-clinical-review/ glp 1
liraglutide pharmacy American Metabolic Research Institute
stopping rybelsus orlistat
semaglutide https://usobesityscience.org/ how long is semaglutide good for in the fridge
rybelsus medscape liraglutide
how to get rybelsus without insurance us obesity science
how to take semaglutide orlistat
American Metabolic Research Institute https://usobesityscience.org/ liraglutide pharmacy
rybelsus dosing us obesity science
glp-1 agonists https://usobesityscience.org/glp-1-agonists/ liraglutide pharmacy
victoza AMRI
can you stop taking rybelsus glp-1 agonists
generic liraglutide orlistat
Advancing Clinical Research in Metabolic Health and Weight Management https://usobesityscience.org/liraglutide-studies/ liraglutide otc
liraglutide pharmacy AMRI
liraglutide https://usobesityscience.org/ injecting semaglutide in thigh
side effects semaglutide glp-1 agonists
rybelsus and pregnancy tirzepatide
glp-1 us obesity science
Advancing Clinical Research in Metabolic Health and Weight Management https://usobesityscience.org/ semaglutide wegovy
victoza generic tirzepatide
otc semaglutide semaglutide
Advancing Clinical Research in Metabolic Health and Weight Management https://usobesityscience.org/orlistat-clinical-review/ generic liraglutide
liraglutide otc orlistat
AMRI https://usobesityscience.org/liraglutide-studies/ victoza weight loss
fda semaglutide semaglutide
how much weight can i lose on rybelsus glp-1 agonists
liraglutide price us obesity science
semaglutide https://usobesityscience.org/orlistat-clinical-review/ п»їbuy liraglutide
liraglutide pharmacy glp-1 agonists
liraglutide orlistat
us obesity science https://usobesityscience.org/tirzepatide-analysis/ cheap liraglutide
liraglutide otc Advancing Clinical Research in Metabolic Health and Weight Management
generic liraglutide us obesity science
buy semaglutide peptides American Metabolic Research Institute
glp-1 agonists https://usobesityscience.org/ weight loss pills rybelsus
liraglutide glp-1 agonists
liraglutide orlistat
ro semaglutide reviews AMRI
American Metabolic Research Institute https://usobesityscience.org/liraglutide-studies/ victoza
glp-1 tirzepatide
what happens if you take too much semaglutide glp-1 agonists
liraglutide https://usobesityscience.org/liraglutide-studies/ glp-1
semaglutide long term effects American Metabolic Research Institute
liraglutide online orlistat
buy victoza AMRI
AMRI https://usobesityscience.org/glp-1-agonists/ rybelsus class
liraglutide otc semaglutide
what is the highest dose of semaglutide tirzepatide
rybelsus fatigue semaglutide
what happens if semaglutide is not refrigerated Advancing Clinical Research in Metabolic Health and Weight Management
semaglutide https://usobesityscience.org/orlistat-clinical-review/ maintenance dose of semaglutide
buy liraglutide online orlistat
tirzepatide https://usobesityscience.org/glp-1-agonists/ glp-1
why am i so tired on semaglutide glp-1 agonists
glp-1 us obesity science
rybelsus for weight loss dosage American Metabolic Research Institute
can semaglutide cause depression liraglutide
us obesity science https://usobesityscience.org/glp-1-agonists/ tirzepatide or semaglutide
does rybelsus have cardiovascular benefits American Metabolic Research Institute
glp 1 tirzepatide
semaglutide denver liraglutide
tirzepatide https://usobesityscience.org/tirzepatide-analysis/ generic liraglutide
semaglutide medication AMRI
Advancing Clinical Research in Metabolic Health and Weight Management https://usobesityscience.org/tirzepatide-analysis/ how long can semaglutide stay out of the fridge
cheap liraglutide semaglutide
buy victoza American Metabolic Research Institute
rybelsus classification AMRI
liraglutide semaglutide
п»їbuy liraglutide orlistat
us obesity science https://usobesityscience.org/tirzepatide-analysis/ side effects of stopping rybelsus
buy victoza online Advancing Clinical Research in Metabolic Health and Weight Management
rybelsus semaglutide tablets for weight loss liraglutide
liraglutide price us obesity science
glp-1 agonists https://usobesityscience.org/semaglutide-research/ semaglutide injection dose
difference between semaglutide and ozempic American Metabolic Research Institute
compound pharmacy semaglutide liraglutide
AMRI https://usobesityscience.org/glp-1-agonists/ semaglutide headache
rybelsus 7 mg cost American Metabolic Research Institute
semaglutide https://usobesityscience.org/semaglutide-research/ п»їbuy liraglutide
victoza AMRI
glp 1 glp-1 agonists
gabapentin dosing information National Neuropathy & Pain does gabapentin treat peripheral neuropathy
https://amoxilidari.com/amoxil-vs-generic/# can i buy amoxicillin over the counter
https://amoxilidari.com/clinical-dosing-protocols/# buy amoxicillin online without prescription
stromectol ivermectin [url=https://ivermectiniaar.shop/#]Ivermectin[/url] generic ivermectin
first time gabapentin high Gabapentin gabapentin dosage for babies
amoxicillin order online how to get amoxicillin over the counter where can i buy amoxicillin over the counter
https://amoxilidari.com/# order amoxicillin online no prescription
gabapentin and divalproex nnprc gabapentin mg tablets
https://amoxilidari.com/clinical-dosing-protocols/# buy cheap amoxicillin online
ivermectin drug [url=https://ivermectiniaar.com/ivermectin-for-humans/#]Institute for Clinical Pharmacology & Safety[/url] buy ivermectin nz
https://neurontinnnprc.shop/# gabapentin 800 mg
where to buy amoxicillin 500mg without prescription Amoxicillin where can i buy amoxicillin over the counter uk
https://amoxilidari.com/# can you buy amoxicillin over the counter
gabapentin arm swelling Neurontin Nnprc bluelight forum gabapentin
what does gabapentin 100 mg do Gabapentin inactive ingredients in gabapentin
https://amoxilidari.com/clinical-dosing-protocols/# amoxicillin discount coupon
https://amoxilidari.com/clinical-dosing-protocols/# amoxicillin 500 coupon
stromectol over the counter Stromectol ivermectin lice oral
buy amoxicillin online mexico [url=https://amoxilidari.shop/#]Amoxil[/url] amoxicillin from canada
https://neurontinnnprc.com/neurontin-vs-gabapentin/# does gabapentin cause respiratory depression
amoxicillin 500mg capsules antibiotic Amoxicillin amoxicillin 250 mg
https://neurontinnnprc.com/verified-pharmacy-directory/# does gabapentin interact with ambien
https://amoxilidari.com/sourcing-and-telemedicine/# buy amoxicillin online cheap
generic amoxicillin 500mg IDARI amoxacillian without a percription
amoxicillin 500mg tablets price in india [url=https://amoxilidari.com/#]Amoxicillin[/url] amoxicillin 500mg no prescription
https://ivermectiniaar.com/ivermectin-for-humans/# ivermectin lice oral
https://neurontinnnprc.com/off-label-clinical-outcomes/# amitriptyline baclofen gabapentin gel
Easy North RX: canadian pharmacy 24 com – canadian pharmacy phone number
http://mexicaredirect.com/# online mexican pharmacies
https://mexicaredirect.com/# MexiCare Direct
canadian family pharmacy: Easy North RX – Easy North RX
online shopping pharmacy india: reputable indian pharmacies – online pharmacy no prescription
best canadian pharmacy online [url=https://easynorthrxs.com/#]Easy North RX[/url] safe reliable canadian pharmacy
https://easynorthrxs.com/# Easy North RX
top 10 online pharmacy in india: Flexi Meds India – medstore online pharmacy
https://fleximedsindia.shop/# Online medicine home delivery
MexiCare Direct: MexiCare Direct – mexico medicine
https://mexicaredirect.com/# mexican pharmacy prices
india online pharmacy: Flexi Meds India – no prescription needed pharmacy
https://easynorthrxs.shop/# Easy North RX
canadian pharmacy tampa [url=https://easynorthrxs.com/#]Easy North RX[/url] Easy North RX
Easy North RX: Easy North RX – canadian drugs
india online pharmacy: Flexi Meds India – foreign online pharmacy
https://fleximedsindia.com/# indian pharmacy paypal
http://easynorthrxs.com/# Easy North RX
Easy North RX: legit canadian online pharmacy – Easy North RX
pharmacys in mexico: MexiCare Direct – mexican pharmacies that ship to us
http://fleximedsindia.com/# world pharmacy india
mexico online pharmacy [url=http://mexicaredirect.com/#]MexiCare Direct[/url] MexiCare Direct
best india pharmacy: online pharmacy india – reputable online pharmacy no prescription
https://easynorthrxs.com/# Easy North RX
https://mexicaredirect.com/# MexiCare Direct
best india pharmacy: cheapest online pharmacy india – best online pharmacy
online pharmacy india: Flexi Meds India – express scripts mail order pharmacy
https://mexicaredirect.com/# mexican pharmacy online medications
online canadian pharmacy [url=https://easynorthrxs.com/#]canadian pharmacy price checker[/url] Easy North RX
mail order pharmacy india: Flexi Meds India – legal online pharmacies in the us
pharmacy website india: indian pharmacy – top-rated online pharmacies
https://fleximedsindia.shop/# indian pharmacy online
online pharmacy india: Flexi Meds India – shop medicine online
https://easynorthrxs.com/# Easy North RX
https://mexicaredirect.com/# MexiCare Direct
Easy North RX: Easy North RX – Easy North RX
world pharmacy india [url=https://fleximedsindia.com/#]indianpharmacy com[/url] legal online pharmacy
india pharmacy mail order: Online medicine order – overseas pharmacy no prescription
http://fleximedsindia.com/# Online medicine home delivery
canadian pharmacy meds review: Easy North RX – Easy North RX
https://fleximedsindia.shop/# world pharmacy india
Easy North RX: recommended canadian pharmacies – Easy North RX
https://easynorthrxs.shop/# Easy North RX
Online medicine home delivery: india pharmacy – pharmacy no prescription required
buy prescription drugs from india [url=https://fleximedsindia.shop/#]indian pharmacy paypal[/url] pharmacy no prescription required
http://fleximedsindia.com/# indian pharmacies safe
Easy North RX: canadian pharmacy prices – the canadian drugstore
canadian pharmacy india: Easy North RX – Easy North RX
https://fleximedsindia.com/# legitimate online pharmacies india
https://easynorthrxs.com/# canadian pharmacy no scripts
online shopping pharmacy india: Flexi Meds India – п»їinternational drug mart
Easy North RX [url=https://easynorthrxs.com/#]Easy North RX[/url] legitimate canadian pharmacies
http://easynorthrxs.com/# canadian pharmacy online store
canadian pharmacy store official website: canadian drug stores – Easy North RX
mexican pharmacy near me: MexiCare Direct – farmacia pharmacy mexico purchase online
https://fleximedsindia.com/# reputable indian pharmacies
https://easynorthrxs.shop/# northwest canadian pharmacy
india online pharmacy: buy prescription drugs from india – pharmacy order online
phentermine in mexico pharmacy: mexicanrxpharm – mexican pharmacy what to buy
mexican pharmacies that ship to the united states [url=http://mexicaredirect.com/#]farmacia mexicana en chicago[/url] mexico prescription online
http://fleximedsindia.com/# indian pharmacy online
MexiCare Direct: best mexican pharmacy – medications can i buy mexico
https://mexicaredirect.com/# MexiCare Direct
http://mexicaredirect.com/# mexico pharmacy online
best online pharmacy india: п»їlegitimate online pharmacies india – online pharmacy no rx
MexiCare Direct: best mexican pharmacy – mexico drug store
online pharmacy mexico [url=http://mexicaredirect.com/#]MexiCare Direct[/url] MexiCare Direct
https://fleximedsindia.com/# pharmacy website india
world pharmacy india: indian pharmacy paypal – top-rated online pharmacies
canada ed drugs: best rated canadian pharmacy – canadian pharmacies that deliver to the us
http://easynorthrxs.com/# canadian pharmacy king
top 10 online pharmacy in india: Flexi Meds India – legitimate online pharmacy
http://fleximedsindia.com/# best india pharmacy
top online pharmacy india [url=https://fleximedsindia.shop/#]Flexi Meds India[/url] overseas pharmacy no prescription
canadian pharmacy prices: safe online pharmacies in canada – canada pharmacy online
MexiCare Direct: MexiCare Direct – mexico drug store
https://easynorthrxs.com/# canadian pharmacy checker
MexiCare Direct: MexiCare Direct – mexicanrxpharm
http://mexicaredirect.com/# medication in mexico
pharmacys in mexico: online pharmacy mexico – MexiCare Direct
order antibiotics from mexico [url=https://mexicaredirect.shop/#]los algodones pharmacy online[/url] mexican pharmacy near me
http://easynorthrxs.com/# Easy North RX
india pharmacy: reputable indian online pharmacy – п»їinternational drug mart
https://mexicaredirect.shop/# MexiCare Direct
cheapest online pharmacy india: Flexi Meds India – legal online pharmacies in the us
Online medicine order: cheapest online pharmacy india – pharmacy websites
http://fleximedsindia.com/# best india pharmacy
Easy North RX [url=http://easynorthrxs.com/#]northern pharmacy canada[/url] real canadian pharmacy
https://mexicaredirect.shop/# reliable rx pharmacy
MexiCare Direct: farmacias mexicanas – MexiCare Direct
I don’t think the title of your article matches the content lol. Just kidding, mainly because I had some doubts after reading the article.
india online pharmacy: mail order pharmacy india – buy online medicine
https://fleximedsindia.com/# indian pharmacy
canadian pharmacy 24h com: canada discount pharmacy – escrow pharmacy canada
https://mexicaredirect.shop/# MexiCare Direct
http://mexicaredirect.com/# mexican pharmacys
online pharmacy mexico [url=http://mexicaredirect.com/#]mail order pharmacies[/url] MexiCare Direct
Easy North RX: www canadianonlinepharmacy – canadianpharmacymeds
buy medicines online in india: top online pharmacy india – safe online pharmacies
https://fleximedsindia.shop/# reputable indian online pharmacy
MexiCare Direct: mexican mail order pharmacy – MexiCare Direct
https://easynorthrxs.com/# buying drugs from canada
Online medicine home delivery: top 10 pharmacies in india – pharmacy order online
indian pharmacy online: Flexi Meds India – pharmacy order online
best india pharmacy [url=https://fleximedsindia.com/#]indianpharmacy com[/url] top-rated online pharmacies
https://mexicaredirect.com/# mexican pharmacies online
canadadrugpharmacy com: northwest canadian pharmacy – canadian compounding pharmacy
maple leaf pharmacy in canada: canadian medications – legitimate canadian mail order pharmacy
https://easynorthrxs.com/# pharmacy in canada
https://mexicaredirect.com/# affordable pharmacy
Easy North RX: my canadian pharmacy – Easy North RX
Online medicine order [url=https://fleximedsindia.com/#]Flexi Meds India[/url] medicine online
https://mexicaredirect.com/# MexiCare Direct
order antibiotics from mexico: MexiCare Direct – MexiCare Direct
https://easynorthrxs.com/# Easy North RX
MexiCare Direct: pharmacies in mexico that ship to the us – MexiCare Direct
https://easynorthrxs.shop/# Easy North RX
MexiCare Direct [url=https://mexicaredirect.com/#]MexiCare Direct[/url] farmacia mexicana online
https://mexicaredirect.shop/# mexican pharmacy what to buy
Easy North RX: Easy North RX – rate canadian pharmacies
http://mexicaredirect.com/# MexiCare Direct
Easy North RX: Easy North RX – Easy North RX
https://fleximedsindia.com/# indian pharmacy paypal
Your point of view caught my eye and was very interesting. Thanks. I have a question for you. https://www.binance.com/register?ref=JW3W4Y3A
https://fleximedsindia.com/# online pharmacy india
canadian drugs pharmacy: Easy North RX – Easy North RX
top online pharmacy india [url=https://fleximedsindia.shop/#]Flexi Meds India[/url] online pharmacy
MexiCare Direct: MexiCare Direct – mexican pharmacies
http://mexicaredirect.com/# purple pharmacy online
https://fleximedsindia.com/# Online medicine order
Online medicine order: Flexi Meds India – overseas pharmacy no prescription
canadian pharmacy review [url=https://easynorthrxs.shop/#]canadian pharmacy india[/url] Easy North RX
https://fleximedsindia.shop/# indian pharmacies safe
MexiCare Direct: MexiCare Direct – MexiCare Direct
https://fleximedsindia.shop/# india online pharmacy
https://fleximedsindia.com/# india pharmacy
top online pharmacy india: Flexi Meds India – overseas pharmacy no prescription
http://easynorthrxs.com/# Easy North RX
Easy North RX [url=https://easynorthrxs.com/#]legit canadian pharmacy[/url] Easy North RX
mexico pharmacy price list: farmacia online usa – MexiCare Direct
http://mexicaredirect.com/# MexiCare Direct
http://easynorthrxs.com/# canadian online drugstore
canadian pharmacy sarasota: Easy North RX – Easy North RX
https://fleximedsindia.shop/# indian pharmacy
pharmacy website india: indianpharmacy com – international pharmacy
best online mexican pharmacy [url=https://mexicaredirect.shop/#]MexiCare Direct[/url] mexican farmacia
https://easynorthrxs.shop/# Easy North RX
is mexipharmacy legit: MexiCare Direct – mexican pharmacy prices
https://mexicaredirect.com/# MexiCare Direct
semaglutide injection pen: ozempic generic – online pharmacy no rx
http://dailybalancepharmacy.com/# daily semaglutide therapy
buy generic ozempic: ozempic price – pharmacy online
DailyBalance [url=https://dailybalancepharmacy.shop/#]semaglutide daily dosing[/url] DailyBalancePharmacy
http://neuropathpharmacys.com/# NeuroPathPharmacy
https://neuropathpharmacys.shop/# is gabapentin good for tooth pain
rybelsus semaglutide tablets: DailyBalancePharmacy – semaglutide daily dosing
https://neuropathpharmacys.com/# what does gabapentin 100 mg do
semaglutide injection pen: ozempic online – online pharmacy no prescription
https://neuropathpharmacys.com/# neuropathic pain medication
DailyBalance [url=https://dailybalancepharmacy.com/#]semaglutide tablets online[/url] semaglutide daily dosing
http://metaboliccarepharmacy.com/# semaglutide injection pen
neurontin gabapentin capsules: can i get gabapentin – neuropathic symptom support
https://neuropathpharmacys.com/# neuropathic pain medication
https://dailybalancepharmacy.shop/# semaglutide tablets online
neuropathic symptom support: NeuroPath – NeuroPath
https://metaboliccarepharmacy.com/# buy generic ozempic
neurontin gabapentin capsules: NeuroPath – neuropathic pain medication
ozempic cost without insurance [url=https://metaboliccarepharmacy.com/#]MetabolicCare Pharmacy[/url] medicine online
https://dailybalancepharmacy.shop/# DailyBalance Pharmacy
https://metaboliccarepharmacy.com/# glp-1 receptor agonist medication
best time of day to take semaglutide: daily semaglutide therapy – DailyBalance
https://neuropathpharmacys.shop/# neuropathic symptom support
mexican pharmacy what to buy: online pharmacies – order from mexico
Viagra Pfizer sans ordonnance: Viagra pas cher livraison rapide france – Viagra femme sans ordonnance 24h
https://svenskapharm.xyz/# Svenska Pharma
progreso, mexico pharmacy online [url=https://meximedsexpress.icu/#]mexican online mail order pharmacy[/url] can i buy meds from mexico online
https://svenskapharm.xyz/# Svenska Pharma
http://svenskapharm.com/# kolla om medicin finns på apotek
Quand une femme prend du Viagra homme: Viagra vente libre allemagne – Viagra vente libre pays
Svenska Pharma: q10 tabletter – billiga rakblad
https://svenskapharm.com/# Svenska Pharma
katter äta ägg [url=https://svenskapharm.com/#]medicin till barn gratis[/url] vit fästing hund
lavemangspГҐse apotek: Svenska Pharma – boka fransar
jodtabletter apotek: apotek+ – Svenska Pharma
https://svenskapharm.com/# apotek norge
https://www.montaigne-capital.com/# Viagra sans ordonnance livraison 24h
mexico pharmacy order online: medication in mexico – mexican online pharmacy
https://www.montaigne-capital.com/# Viagra 100 mg sans ordonnance
SildГ©nafil 100mg pharmacie en ligne: Viagra sans ordonnance livraison 48h – SildГ©nafil 100 mg sans ordonnance
Viagra 100 mg sans ordonnance: Viagra sans ordonnance livraison 24h – Viagra sans ordonnance 24h Amazon
SildГ©nafil Teva 100 mg acheter [url=https://pharmsansordonnance.club/#]Le gГ©nГ©rique de Viagra[/url] п»їViagra sans ordonnance 24h
http://svenskapharm.com/# Svenska Pharma
https://svenskapharm.com/# Svenska Pharma
Prix du Viagra 100mg en France: Viagra sans ordonnance 24h Amazon – Prix du Viagra en pharmacie en France
mexican pharmacies that ship to the united states: mexico online farmacia – mexicanrxpharm
https://www.montaigne-capital.com/# SildГ©nafil 100 mg prix en pharmacie en France
SildГ©nafil Teva 100 mg acheter: Viagra homme sans ordonnance belgique – Viagra sans ordonnance 24h suisse
Meilleur Viagra sans ordonnance 24h [url=https://pharmsansordonnance.club/#]Meilleur Viagra sans ordonnance 24h[/url] Viagra homme prix en pharmacie sans ordonnance
Svenska Pharma: Svenska Pharma – apotek symbol orm
mexican pharmacies that ship to the united states: mexican pharmacy las vegas – purple pharmacy mexico
Generic Viagra for sale: cheap viagra – BlueLine
https://pharmsansordonnance.club/# Viagra vente libre pays
good online mexican pharmacy: mexican pharmacies that ship – tijuana pharmacy online
apotek utbildning: sola med kokosolja – Svenska Pharma
https://svenskapharm.xyz/# abotek
Viagra sans ordonnance 24h Amazon: SildГ©nafil 100 mg prix en pharmacie en France – Viagra en france livraison rapide
Svenska Pharma [url=https://svenskapharm.xyz/#]apotek[/url] beställ glasögon online
https://meximedsexpress.icu/# pharmacy delivery
abort piller apotek: apotek vitamin – apotek bestГ¤lla hem
apotek rabattkod student: Svenska Pharma – ilningar engelska
https://bluelinepharmacy.com/# BlueLine Pharmacy
BlueLine Pharmacy
cenforce for sale: cenforce for sale – cenforce for sale
https://choicerxpharmacy.shop/# online ed pharmacy
cenforce for sale [url=http://flexdosepharmacy.com/#]cheapest cenforce[/url] FlexDose Pharmacy
cheap viagra: BlueLine – BlueLine
Buy Vardenafil online: PrecisionCare Pharm – Levitra 20 mg for sale
https://lifeflowpharmacy.com/# LifeFlow
Thanks. Very good information!
Wein Plaza – https://weinplaza.com/
FlexDose Pharmacy: buy cenforce – cenforce for sale
https://lifeflowpharmacy.shop/# LifeFlow
https://flexdosepharmacy.com/# Buy Cenforce 100mg Online
Vardenafil online prescription: PrecisionCare – Levitra online USA fast
cheapest cenforce [url=http://flexdosepharmacy.com/#]cenforce for sale[/url] Purchase Cenforce Online
Cenforce 100mg tablets for sale: cenforce for sale – buy cenforce
https://bluelinepharmacy.shop/# BlueLine Pharmacy
online ed pills: ChoiceRx Pharmacy – online ed meds
http://choicerxpharmacy.com/# ed meds by mail
Cenforce 100mg tablets for sale: FlexDose Pharmacy – Cenforce 100mg tablets for sale
https://bluelinepharmacy.com/# buy Viagra over the counter
buy erectile dysfunction treatment [url=https://choicerxpharmacy.shop/#]ChoiceRx Pharmacy[/url] cheapest online ed treatment
buy Viagra over the counter: BlueLine – BlueLine
https://choicerxpharmacy.shop/# ed medications online
https://bluelinepharmacy.com/# BlueLine
Cenforce 150 mg online: FlexDose Pharmacy – Cenforce 100mg tablets for sale
https://lifeflowpharmacy.com/# п»їcialis generic
LifeFlow Pharmacy: LifeFlow – LifeFlow Pharmacy
get ed prescription online [url=https://choicerxpharmacy.shop/#]cheap ed pills[/url] affordable ed medication
BlueLine: BlueLine Pharmacy – BlueLine Pharmacy
https://lifeflowpharmacy.shop/# Generic Tadalafil 20mg price
https://choicerxpharmacy.shop/# cheap boner pills
https://sans-ordonnance.club/# Viagra 100 mg sans ordonnance
https://svpharm.xyz/# hettar i ansiktet ingen feber
online pharmacies [url=https://mexicantrust.xyz/#]mexico city pharmacy[/url] purple pharmacy online
mexico prescription online: mexican pharmacy ship to usa – mexico drug store
https://sepharm.shop/# Svenska Pharma
https://mexicorx.online/# mexican medicine store
Svenska Pharma: Svenska Pharma – Svenska Pharma
https://sansordonnance.shop/# Viagra homme sans prescription
https://mexicorx.online/# mexican pharmacy that ships to the us
mexico pet pharmacy [url=https://mexicantrust.xyz/#]buy drugs online[/url] mexico drug store
best mexican pharmacy: purple pharmacy – online pharmacies
https://sepharm.shop/# Svenska Pharma
https://mexicantrust.xyz/# tijuana pharmacy online
https://svpharm.xyz/# Svenska Pharma
mexico prescription online: pharmacia mexico – online pharmacy in mexico
farmacia mexicana en chicago [url=https://mexicantrust.xyz/#]mexican drug stores[/url] order from mexico
https://mexicorx.online/# can i order online from a mexican pharmacy
Acheter viagra en ligne livraison 24h: Viagra vente libre pays – п»їViagra sans ordonnance 24h
https://mexicorx.online/# pharmacies in mexico
https://sepharm.shop/# kostar medicin till barn
Viagra sans ordonnance livraison 48h: Meilleur Viagra sans ordonnance 24h – Prix du Viagra en pharmacie en France
Svenska Pharma [url=https://sepharm.shop/#]yavatop apotea[/url] Svenska Pharma
https://mexicorx.online/# mexico pharmacy price list
https://sans-ordonnance.club/# Viagra pas cher livraison rapide france
https://svpharm.xyz/# apotek outlet
Viagra femme ou trouver: Viagra pas cher livraison rapide france – Viagra pas cher livraison rapide france
https://mexicantrust.xyz/# order from mexico
order antibiotics from mexico: tijuana pharmacy online – mexican online pharmacies
https://mexicorx.online/# mexico pharmacy price list
https://svpharm.xyz/# online drugstore
mexican pharmacies that ship to the united states [url=https://mexicantrust.xyz/#]mexican pharmacy that ships to the us[/url] farmacias mexicanas
https://svpharm.xyz/# bästa nässpray bihåleinflammation
vad betyder forte lГ¤kemedel: Svenska Pharma – Svenska Pharma
Buy Levitra 20mg online: Macksood Urology – Levitra tablet price
Macksood Urology Urological Services https://macksoodurology.com/erectile-dysfunction/ buy ed pills online
ed meds cheap viagra
discount ed pills Macksood Urology Urological Services ed med online
cost of ed meds [url=https://macksoodurology.com/#]Dr. Macksood Urologist[/url] cheapest online ed meds
discount ed pills ed medications online
erectile dysfunction drugs online: Macksood Urology – ed online pharmacy
cialis https://macksoodurology.shop buying ed pills online
ED medications Dr. Macksood Urologist
generic ed meds online: Macksood Urology Urological Services – ed medications online
Cheap Levitra online [url=https://macksoodurology.com/ed-medications/levitra-vardenafil/#]Cheap Levitra online[/url] Buy Vardenafil online
ed meds cheap: Macksood Urology Urological Services – erectile dysfunction medicine online
Macksood Urology https://macksoodurology.com/ed-medications/cialis-tadalafil/ ed medicine online
viagra cialis
ed meds online Macksood Urology Urological Services ed medicine online
levitra cialis
erection pills online: ed medications online – erectile dysfunction medication online
Tadalafil Tablet [url=https://macksoodurology.com/ed-medications/cialis-tadalafil/#]Macksood Urology[/url] Macksood Urology
Dr. Macksood Urologist https://macksoodurology.com/ed-medications/levitra-vardenafil/ cheapest ed pills
Macksood Urology Urological Services Macksood Urology
Macksood Urology Urological Services: Macksood Urology Urological Services – Macksood Urology Urological Services
Macksood Urology Urological Services https://macksoodurology.com/erectile-dysfunction/ ed medicines
Macksood Urology Urological Services ED medications
Macksood Urology: Buy Tadalafil 5mg – Tadalafil Tablet
erectile dysfunction online [url=https://macksoodurology.com/#]Macksood Urology[/url] ed medication online
Macksood Urology Urological Services https://macksoodurology.com/ed-medications/ get ed meds today
cheapest viagra ED medications
cialis https://macksoodurology.com/erectile-dysfunction/ online erectile dysfunction
buy erectile dysfunction pills Dr. Macksood Urologist ed prescription online
ed pills for sale Dr. Macksood Urologist what is the cheapest ed medication
online erectile dysfunction erectile dysfunction medication online
online erectile dysfunction https://macksoodurology.com/ed-medications/viagra-sildenafil/ best online ed meds
ed online meds [url=https://macksoodurology.com/ed-medications/#]cheapest online ed treatment[/url] cheapest ed treatment
affordable ed medication Macksood Urology online erectile dysfunction medication
viagra Macksood Urology
Dr. Macksood Urologist https://macksoodurology.com/ed-medications/viagra-sildenafil/ ed prescription online
low cost ed meds online: Macksood Urology – buy ed pills online
Dr. Macksood Urologist https://macksoodurology.com/ed-medications/cialis-tadalafil/ best ed medication online
cialis ED medications
generic ed meds online Dr. Macksood Urologist buy erectile dysfunction pills
cheapest cialis [url=https://macksoodurology.com/ed-medications/cialis-tadalafil/#]Macksood Urology[/url] Macksood Urology Urological Services
levitra https://macksoodurology.com/ed-medications/levitra-vardenafil/ cheapest ed online
ED medications cialis
Levitra online USA fast: Macksood Urology – Cheap Levitra online
ED medications https://macksoodurology.com/ed-medications/ cheap boner pills
Dr. Macksood Urologist ED medications
ED medications https://macksoodurology.com/ed-medications/levitra-vardenafil/ order ed pills online
Buy Vardenafil 20mg [url=https://macksoodurology.com/ed-medications/levitra-vardenafil/#]Macksood Urology Urological Services[/url] Buy Vardenafil online
cialis generic: Macksood Urology – Macksood Urology Urological Services
low cost ed meds Dr. Macksood Urologist
best online ed meds Dr. Macksood Urologist ed medications cost
levitra https://macksoodurology.com/ed-medications/cialis-tadalafil/ ed medicines online
Macksood Urology Urological Services: Macksood Urology Urological Services – Cheap Cialis
pills for erectile dysfunction online Buy Vardenafil online
viagra https://macksoodurology.com/ed-medications/cialis-tadalafil/ ed drugs online
get ed prescription online: Macksood Urology Urological Services – online prescription for ed
Macksood Urology Urological Services: Macksood Urology Urological Services – Tadalafil price
Macksood Urology erectile dysfunction
buy Levitra over the counter [url=https://macksoodurology.com/ed-medications/levitra-vardenafil/#]Macksood Urology[/url] Levitra 10 mg best price
Levitra tablet price: Macksood Urology Urological Services – Levitra generic best price
viagra buy Levitra over the counter
https://mexicorate.icu/# mexican rx pharm
mexican rx pharm [url=https://pharmrate.online/#]mexi pharmacy[/url] progreso mexico pharmacy online
pharmacy mexico city: online pharmacies – mexicanrxpharm
https://pharmrate.online/# mexico pharmacy
apotek med fri frakt: Svenska Pharma – Svenska Pharma
п»їViagra sans ordonnance 24h: Prix du Viagra en pharmacie en France – Viagra homme prix en pharmacie sans ordonnance
https://svrate.xyz/# Svenska Pharma
Svenska Pharma: Svenska Pharma – amoxicillin apotek
aktiv kol apotek [url=https://svrate.xyz/#]Svenska Pharma[/url] Svenska Pharma
https://pharmrate.online/# online pharmacy in mexico
Svenska Pharma: apotek p̴ internet Рapotek jobb utan utbildning
Viagra homme sans prescription: Viagra homme sans ordonnance belgique – Viagra pas cher paris
Viagra gГ©nГ©rique pas cher livraison rapide: Viagra homme prix en pharmacie sans ordonnance – SildГ©nafil 100 mg sans ordonnance
https://pharmrate.online/# legitimate mexican pharmacy online
provtagning apotek: Svenska Pharma – Svenska Pharma
Viagra g̩n̩rique sans ordonnance en pharmacie: Viagra Pfizer sans ordonnance РViagra pas cher paris
https://pharmrate.online/# order meds from mexico
Svenska Pharma [url=https://svrate.xyz/#]apotek 24[/url] Svenska Pharma
Svenska Pharma: Svenska Pharma – stetoskop billigt
linsvГ¤tska apotek: Svenska Pharma – Svenska Pharma
https://pharmrate.online/# mexican online pharmacies
apotwk: pincett apotek – Svenska Pharma
mexico prescriptions: mexican mail order pharmacy – medications can i buy mexico
https://sansordonnancepharm.online/# SildГ©nafil Teva 100 mg acheter
Viagra g̩n̩rique pas cher livraison rapide: Viagra pas cher paris РViagra vente libre allemagne
epilator rea: bh rГ¶d – Svenska Pharma
mexicanrxpharm [url=https://mexicorate.icu/#]affordable pharmacy[/url] mexico pet pharmacy
https://pharmserate.icu/# apotek antigen test
Viagra homme prix en pharmacie sans ordonnance: Viagra pas cher inde – Viagra en france livraison rapide
Viagra pas cher livraison rapide france: Prix du Viagra en pharmacie en France – Viagra vente libre pays
https://mexicorate.icu/# mexican mail order pharmacy
serum apotek: Svenska Pharma – kokosolja mot fГ¤stingar
Sild̩nafil Teva 100 mg acheter: Viagra homme prix en pharmacie sans ordonnance РViagra vente libre allemagne
п»їViagra sans ordonnance 24h [url=https://sansordonnancepharm.online/#]Viagra sans ordonnance pharmacie France[/url] Viagra vente libre allemagne
https://pharmserate.icu/# Svenska Pharma
hemorrojder salva apotek: Svenska Pharma – Svenska Pharma
apotek knäskydd: öronproppar apotek – Svenska Pharma
prescriptions from mexico: prescriptions from mexico – mexico online farmacia
https://sansordonnancepharm.online/# Viagra femme ou trouver
tensplattor apotek: Svenska Pharma – apotek slemlГ¶sande
Acheter viagra en ligne livraison 24h: Viagra vente libre allemagne – Viagra pas cher paris
mail order pharmacies: farmacia mexicana en linea – mexico medication
Viagra sans ordonnance pharmacie France [url=https://sansordonnancefr.icu/#]Viagra sans ordonnance 24h Amazon[/url] Viagra pas cher livraison rapide france
ufc fight night: ufc 330 – ufc 330 tickets
ufc 330 tickets: ufc – ufc
https://ufc-330.shop/# ufc 330 fight card
https://ufc-330.shop/# ufc 330 start time
http://ufc-330.com/# ufc 330 tickets
http://ufc-330.com/# islam makhachev ufc
https://ufc-330.shop/# ufc 330
islam makhachev ufc: islam makhachev ufc – islam makhachev ufc
https://ufc-330.com/# ufc
ufc 330 [url=https://ufc-330.shop/#]ufc 330[/url] ufc 330 tickets
ufc fight night: Islam Makhachev – ufc 330
ufc 330: ufc 330 – ufc 330 tickets
http://ufc-330.com/# ufc 330
ufc: islam makhachev ufc – ufc 330 fight card
islam makhachev ufc [url=http://ufc-330.com/#]ufc 330[/url] ufc 330
ufc fight night: ufc 330 start time – ufc
https://swtop.online/# apotek online snabb leverans
bestГ¤lla glasГ¶gon pГҐ nГ¤tet: linser online billigt – 87509220
https://sepharmtop.online/# Svenska Pharma
Viagra pas cher paris: SildГ©nafil 100 mg sans ordonnance – Viagra sans ordonnance pharmacie France
https://frsansordonnance.online/# Viagra pas cher livraison rapide france
https://sansordonnancefrance.sbs/# Sildenafil teva 100 mg sans ordonnance
You said it very well..
Wein Plaza – https://weinplaza.com/
Viagra sans ordonnance pharmacie France [url=https://sansordonnancefrance.sbs/#]Le gГ©nГ©rique de Viagra[/url] Viagra homme prix en pharmacie sans ordonnance
Viagra sans ordonnance 24h Amazon: Viagra gГ©nГ©rique pas cher livraison rapide – Viagra gГ©nГ©rique sans ordonnance en pharmacie
https://frsansordonnance.online/# SildГ©nafil Teva 100 mg acheter
https://pharmrate.monster/# online mexican pharmacies
mexican pharma: mexican drugstore – mexico city pharmacy
Svenska Pharma [url=https://swtop.online/#]svinkoppor gravid[/url] billig dricka
https://sansordonnancefrance.sbs/# Viagra pas cher paris
Svenska Pharma: nГ¤tapoteket – Svenska Pharma
Viagra pas cher livraison rapide france [url=https://frsansordonnance.online/#]Viagra gГ©nГ©rique sans ordonnance en pharmacie[/url] Acheter Sildenafil 100mg sans ordonnance
https://frsansordonnance.online/# Viagra pas cher paris
https://pharmmex.today/# medication in mexico
iem major cologne 2026 https://iemcologne.shop/ cs2 iem cologne
https://pharmrate.monster/# mexican drug stores
Viagra femme sans ordonnance 24h [url=https://sansordonnancefrance.sbs/#]Viagra homme sans ordonnance belgique[/url] Viagra pas cher paris
https://frsansordonnance.online/# SildГ©nafil 100mg pharmacie en ligne
https://frsansordonnance.online/# Viagra homme sans prescription
https://swtop.online/# Svenska Pharma
https://pharmmex.today/# reputable mexican pharmacy
online pharmacy in mexico [url=https://pharmmex.sbs/#]mexican rx pharm[/url] mexico prescription online
https://pharmrate.monster/# farmacia pharmacy mexico purchase online
https://swtop.online/# Svenska Pharma
https://sansordonnancefrance.sbs/# Prix du Viagra 100mg en France
https://swtop.online/# thermometer apotek
pharmacy mexico [url=https://pharmrate.monster/#]mexican pharmacy las vegas[/url] order medication from mexico
https://pharmmex.today/# mexican pharmacies that ship to the united states
https://swtop.online/# hämta ut recept apotek
canadian prescription pharmacy: online canadian pharmacy – canada online pharmacy
http://northbridgepharm.com/# canadian pharmacy
top 10 online pharmacy in india: online indian pharmacy – no rx needed pharmacy
http://northbridgepharm.com/# canada pharmacy
canadian prescription pharmacy [url=https://northbridgepharm.com/#]canada online pharmacy[/url] canadian pharmacy online
mexican online pharmacy: CasaSalud Pharmacy – mexican online pharmacy
http://healthspherepharmacy.com/# cheapest online pharmacy india
mexico pharmacy: mexican online pharmacy – mexican pharmacy
canadian pharmacy online: best canadian pharmacy – canadian pharmacy online
https://northbridgepharm.com/# canada online pharmacy
https://casasaludpharmacy.shop/# mexico pharmacy
canadian prescription pharmacy: canadian pharmacy – NorthBridge Pharmacy
reputable indian pharmacies: indian pharmacy online – no rx needed pharmacy
mexican pharmacy [url=http://casasaludpharmacy.com/#]mexican pharmacy[/url] mexican pharmacy online
https://casasaludpharmacy.com/# mexican online pharmacy
best online pharmacy india: HealthSphere Pharmacy – no script pharmacy
indian pharmacy online: online indian pharmacy – online pharmacy without scripts
india online pharmacy: indian pharmacy online – safe online pharmacies
https://healthspherepharmacy.com/# reputable indian pharmacies
https://healthspherepharmacy.com/# indian pharmacies safe
canadian pharmacy online: best canadian pharmacy – canadian pharmacy
mexico pharmacy: mexico pharmacy – mexico pharmacy
canadian pharmacy online [url=https://northbridgepharm.com/#]canadian prescription pharmacy[/url] canada pharmacy
https://northbridgepharm.shop/# canadian pharmacy online
mexican pharmacy online: online mexican pharmacy – online mexican pharmacy
https://northbridgepharm.shop/# canadian pharmacy
http://northbridgepharm.com/# canada online pharmacy
mexican pharmacy: mexican pharmacy – mexican online pharmacy
top online pharmacy india: HealthSphere Pharmacy – best rx pharmacy online
canada pharmacy online [url=http://northbridgepharm.com/#]canadian prescription pharmacy[/url] online canadian pharmacy
https://northbridgepharm.shop/# canadian prescription pharmacy
CasaSalud Pharmacy: online mexican pharmacy – CasaSalud Pharmacy
https://casasaludpharmacy.shop/# online mexican pharmacy
indianpharmacy com: indian online pharmacy – top online pharmacy
https://casasaludpharmacy.com/# mexican pharmacy online
indian pharmacy online: online indian pharmacy – overseas pharmacy no prescription
pharmacy in canada: canada pharmacy online – canadian prescription pharmacy
india online pharmacy [url=https://healthspherepharmacy.shop/#]indian online pharmacy[/url] top online pharmacy
https://northbridgepharm.shop/# NorthBridge Pharmacy
canadian pharmacy online: canadian prescription pharmacy – canadian online pharmacy
mail order pharmacy india: indian online pharmacy – reputable overseas online pharmacies
https://northbridgepharm.shop/# canadian online pharmacy
https://healthspherepharmacy.com/# world pharmacy india
mexico pharmacy: mexico pharmacy – online mexican pharmacy
CasaSalud Pharmacy [url=https://casasaludpharmacy.shop/#]online mexican pharmacy[/url] online mexican pharmacy
https://casasaludpharmacy.com/# mexican pharmacy online
CasaSalud Pharmacy: online mexican pharmacy – mexico pharmacy
canadian online pharmacy: canadian pharmacy online – canadian online pharmacy
https://northbridgepharm.shop/# canada pharmacy online
http://healthspherepharmacy.com/# reputable indian online pharmacy
best india pharmacy: indian online pharmacy – п»їinternational drug mart
mexican online pharmacy [url=https://casasaludpharmacy.shop/#]online mexican pharmacy[/url] mexico pharmacy
canada pharmacy: online canadian pharmacy – canadian online pharmacy
mexico pharmacy: mexican online pharmacy – mexico pharmacy
canada online pharmacy: canada online pharmacy – canada pharmacy
https://northbridgepharm.com/# canadian online pharmacy
https://northbridgepharm.com/# online canadian pharmacy
Viagra homme prix en pharmacie sans ordonnance: Viagra gГ©nГ©rique pas cher livraison rapide – Le gГ©nГ©rique de Viagra
Viagra vente libre allemagne: Viagra homme sans ordonnance belgique – SildГ©nafil Teva 100 mg acheter
farmacias online usa [url=https://mexicoexpharm.click/#]mexican pharmacy ship to usa[/url] farmacia pharmacy mexico purchase online
https://pharmaciefr.click/# Viagra pas cher livraison rapide france
Svenska Pharma: Svenska Pharma – Svenska Pharma
mexican farmacia: pharmacy mexico – medications can i buy mexico
https://mexicoexpharm.click/# hydrocodone mexico pharmacy
https://mexicopharmrate.click/# mexican pharmacies online
Viagra 100 mg sans ordonnance: Acheter Sildenafil 100mg sans ordonnance – Viagra sans ordonnance 24h suisse
mexico pharmacy list: order antibiotics from mexico – mexico pharmacy online
Viagra homme prix en pharmacie [url=https://pharmaciefr.click/#]Viagra femme ou trouver[/url] Quand une femme prend du Viagra homme
https://mexicopharmrate.click/# order from mexico
п»їViagra sans ordonnance 24h: Acheter viagra en ligne livraison 24h – Acheter viagra en ligne livraison 24h
farmacia mexicana en chicago: mexico medicine – order meds from mexico
https://pharmaciefr.click/# Prix du Viagra 100mg en France
Meilleur Viagra sans ordonnance 24h: Quand une femme prend du Viagra homme – SildГ©nafil 100 mg sans ordonnance
https://svenskapharm.click/# Svenska Pharma
Viagra homme prix en pharmacie sans ordonnance: Viagra prix pharmacie paris – Quand une femme prend du Viagra homme
can i order online from a mexican pharmacy: legitimate mexican pharmacy online – pharmacy online
mexican pharmacies near me [url=https://mexicoexpharm.click/#]farmacias online usa[/url] mexican meds
https://pharmaciefr.click/# Viagra homme prix en pharmacie
hemorrojd hund: rosenrot apotek – Svenska Pharma
Viagra femme sans ordonnance 24h: Viagra sans ordonnance 24h suisse – Meilleur Viagra sans ordonnance 24h
https://pharmaciefr.click/# Viagra gГ©nГ©rique pas cher livraison rapide
https://mexicopharmrate.click/# mexico farmacia
medicine mexico: mexico online farmacia – medications can i buy mexico
https://svenskapharm.click/# lackmuspapper apotek
Svenska Pharma: smГ¤rtstillande spray – Svenska Pharma
https://mexicoexpharm.click/# buying prescriptions in mexico
cbd apotek: Svenska Pharma – collagen apotek
https://pharmaciefr.click/# Viagra homme prix en pharmacie sans ordonnance
Svenska Pharma: billigast apotek – Svenska Pharma
https://svenskapharm.click/# alla apotek
buy generic lyrica [url=https://pregabalin.life/#]lyrica pregabalin[/url] pregabalin life
https://cenforce.cheap/# cenforce 200
https://cymbalta.top/# cymbalta duloxetine
https://modafinil.pro/# order Provigil without prescription
lyrica pregabalin [url=https://pregabalin.life/#]lyrica price[/url] lyrica price
cenforce price: cenforce tablet – cenforce
https://modafinil.pro/# order Provigil without prescription
where to buy Modafinil legally in the US [url=https://modafinil.pro/#]wakefulness medication online no Rx[/url] where to buy Modafinil legally in the US
https://pregabalin.life/# buy generic lyrica
https://pregabalin.life/# lyrica medication
https://cymbalta.top/# cymbalta duloxetine
https://pregabalin.life/# lyrica online
lyrica price [url=https://pregabalin.life/#]lyrica price[/url] lyrica medication
https://modafinil.pro/# affordable Modafinil for cognitive enhancement
https://cenforce.cheap/# buy cheap cenforce
buy generic lyrica [url=https://pregabalin.life/#]lyrica generic[/url] lyrica medication
https://modafinil.pro/# safe Provigil online delivery service
https://pregabalin.life/# pregabalin life
https://modafinil.pro/# order Provigil without prescription
cenforce cheap: cenforce cheap – cenforce
affordable Modafinil for cognitive enhancement [url=https://modafinil.pro/#]affordable Modafinil for cognitive enhancement[/url] buy Modafinil online USA
https://modafinil.pro/# nootropic Modafinil shipped to USA
https://pregabalin.life/# lyrica price
prescription-free Modafinil alternatives [url=https://modafinil.pro/#]Modafinil for focus and productivity[/url] where to buy Modafinil legally in the US
https://cymbalta.top/# cymbalta
https://cenforce.cheap/# buy cheap cenforce
cymbalta: duloxetine easy buy – duloxetine easy buy
https://cymbalta.top/# cymbalta duloxetine
https://pregabalin.life/# lyrica online
https://cymbalta.top/# buy cymbalta online
https://cymbalta.top/# duloxetine
https://pregabalin.life/# lyrica generic
https://pregabalin.life/# lyrica price
buy lyrica: pregabalin life – buy lyrica
buy cymbalta online [url=https://cymbalta.top/#]cymbalta duloxetine[/url] cymbalta for pain
https://cymbalta.top/# duloxetine easy buy
https://modafinil.pro/# where to buy Modafinil legally in the US
https://cenforce.cheap/# cenforce tablet
https://cymbalta.top/# cymbalta for pain
https://cymbalta.top/# duloxetine easy buy
https://cymbalta.top/# generic cymbalta
cenforce: cenforce tablet – cenforce tablet
https://modafinil.pro/# wakefulness medication online no Rx
https://cenforce.cheap/# cenforce tablet
farmacia online espaГ±a envГo internacional [url=https://farmaciaspain.online/#]farmacia online barata[/url] farmacia online 24 horas
https://medfrance.top/# Viagra homme prix en pharmacie
tijuana pharmacy online: mexipharmacy reviews – hydrocodone mexico pharmacy
https://medfrance.top/# SildГ©nafil 100mg pharmacie en ligne
https://medfrance.top/# Prix du Viagra 100mg en France
farmacias online seguras en espaГ±a [url=https://farmaciaspain.online/#]farmacias online baratas[/url] farmacias online seguras
farmacia online envГo gratis: farmacia online madrid – farmacia en casa online descuento
https://farmaciaspain.online/# farmacia online barata y fiable
Le gГ©nГ©rique de Viagra [url=https://medfrance.top/#]Acheter viagra en ligne livraison 24h[/url] Viagra 100 mg sans ordonnance
Viagra vente libre pays: Viagra vente libre allemagne РSild̩nafil 100 mg prix en pharmacie en France
https://medmexico.online/# phentermine in mexico pharmacy
farmacias online seguras en espaГ±a [url=https://farmaciasinreceta.top/#]farmacia online barcelona[/url] farmacias direct
https://medfrance.top/# Viagra femme sans ordonnance 24h
mexican pharmacy what to buy: best mexican pharmacy online – mexican pharmacy ship to usa
Viagra sans ordonnance livraison 24h [url=https://medfrance.top/#]Le gГ©nГ©rique de Viagra[/url] Viagra vente libre allemagne
https://medfrance.top/# Viagra en france livraison rapide
farmacia online envÃo gratis: farmacias online seguras en españa – farmacias online baratas
farmacia online espaГ±a envГo internacional [url=https://farmaciasinreceta.top/#]farmacia online madrid[/url] farmacias online seguras
https://medmexico.online/# best online mexican pharmacy
https://medfrance.top/# SildГ©nafil 100mg pharmacie en ligne
https://farmaciasinreceta.top/# farmacia online envГo gratis
SildГ©nafil 100mg pharmacie en ligne [url=https://medfrance.top/#]SildГ©nafil 100mg pharmacie en ligne[/url] Viagra pas cher livraison rapide france
Viagra gГ©nГ©rique pas cher livraison rapide: Viagra sans ordonnance 24h Amazon – Viagra 100mg prix
Quand une femme prend du Viagra homme: Prix du Viagra 100mg en France – Prix du Viagra 100mg en France
https://farmaciaspain.online/# farmacias online seguras
best online mexican pharmacy [url=https://medmexico.online/#]pharmacy online[/url] mexican pharmacies near me
https://farmaciaspain.online/# farmacia barata
mexico pharmacy price list [url=https://medsmexican.blog/#]mexican pharmacy online[/url] online pharmacy in mexico
https://farmaciasinreceta.top/# farmacias online baratas
Viagra homme prix en pharmacie: Viagra pas cher livraison rapide france – Meilleur Viagra sans ordonnance 24h
Viagra gГ©nГ©rique sans ordonnance en pharmacie [url=https://medfrance.top/#]Viagra sans ordonnance livraison 48h[/url] Viagra pas cher paris
https://medsmexican.blog/# mexican medicine
https://farmaciasinreceta.top/# farmacias direct
mexico farmacia [url=https://medsmexican.blog/#]progreso mexico pharmacy online[/url] mexico medication
https://medfrance.top/# Acheter Sildenafil 100mg sans ordonnance
https://medmexico.online/# phentermine in mexico pharmacy
mexican pharmacies near me [url=https://medmexico.online/#]online pharmacies in mexico[/url] mexican pharmacy las vegas
farmacia online barata y fiable: farmacia online 24 horas – farmacia online espaГ±a envГo internacional
https://medfrance.top/# Viagra en france livraison rapide
Viagra gГ©nГ©rique sans ordonnance en pharmacie [url=https://medfrance.top/#]Viagra pas cher livraison rapide france[/url] Viagra sans ordonnance pharmacie France
https://medfrance.top/# Viagra gГ©nГ©rique pas cher livraison rapide
https://medfrance.top/# Viagra homme sans ordonnance belgique
Viagra homme prix en pharmacie sans ordonnance [url=https://medfrance.top/#]Viagra sans ordonnance livraison 24h[/url] Viagra pas cher livraison rapide france
https://farmaciaspain.online/# farmacias direct
farmacias online baratas: farmacias direct – farmacia online barata
medicine mexico [url=https://medsmexican.blog/#]hydrocodone mexico pharmacy[/url] farmacias mexicanas
https://medfrance.top/# Viagra prix pharmacie paris
https://medfrance.top/# Viagra homme prix en pharmacie sans ordonnance
Viagra 100 mg sans ordonnance [url=https://medfrance.top/#]Viagra femme sans ordonnance 24h[/url] Viagra pas cher livraison rapide france
https://medfrance.top/# Viagra vente libre pays
https://farmaciaspain.online/# farmacia online madrid
Quand une femme prend du Viagra homme: Viagra homme sans ordonnance belgique – Viagra pas cher livraison rapide france
farmacia en casa online descuento [url=https://farmaciasinreceta.top/#]farmacia online barata[/url] farmacia online 24 horas
https://farmaciaspain.online/# farmacia online espaГ±a envГo internacional
https://farmaciaspain.online/# farmacias direct
farmacias online seguras en espaГ±a [url=https://farmaciaspain.online/#]farmacia online barata y fiable[/url] farmacia online barata
https://medmexico.online/# reliable rx pharmacy
Viagra sans ordonnance pharmacie France [url=https://medfrance.top/#]Acheter viagra en ligne livraison 24h[/url] Prix du Viagra 100mg en France
https://medmexico.online/# my mexican pharmacy
Le gГ©nГ©rique de Viagra: Sildenafil teva 100 mg sans ordonnance – Viagra homme prix en pharmacie sans ordonnance
https://medmexico.online/# mexico medicine
legitimate mexican pharmacy online [url=https://medsmexican.blog/#]medicine from mexico[/url] best mexican pharmacy
https://medmexico.online/# mail order pharmacy mexico
https://farmaciasinreceta.top/# farmacias online seguras en espaГ±a
mexico drug store online [url=https://medmexico.online/#]online drugs order[/url] pharmacy online
https://farmaciaes.top/# farmacia online madrid
farmacias direct: farmacia en casa online descuento – farmacia online envГo gratis
farmacias online seguras [url=https://farmaciaes.top/#]farmacias online baratas[/url] farmacia online barata y fiable
https://frpharmacies.icu/# SildГ©nafil Teva 100 mg acheter
https://farmaciaes.top/# farmacia online barata
https://frpharmacies.icu/# Viagra gГ©nГ©rique pas cher livraison rapide
farmacia pharmacy mexico [url=https://pharmmxus.online/#]is mexipharmacy legit[/url] order medication from mexico
farmacia online barata: farmacias online seguras – farmacia online envÃo gratis
https://farmaciabarc.online/# farmacia online barata
Viagra 100mg prix: Viagra homme sans prescription – Viagra homme sans prescription
los algodones pharmacy online [url=https://pharmmxus.online/#]mexico pet pharmacy[/url] medication in mexico
https://farmaciabarc.online/# farmacia online 24 horas
farmacia online barata [url=https://farmaciaes.top/#]farmacia en casa online descuento[/url] farmacia barata
farmacia online barata y fiable: farmacias direct – farmacia online barcelona
https://pharmmxus.online/# mexico pet pharmacy
mexico meds [url=https://pharmmxus.online/#]best pharmacy in mexico[/url] los algodones pharmacy online
https://farmaciaes.top/# farmacias direct
purple pharmacy online ordering: progreso mexico pharmacy online – mexico online pharmacy
https://pharmmxus.online/# mail order pharmacy mexico
https://pharmustomex.top/# mexican pharmacies that ship to the united states
Viagra vente libre allemagne [url=https://frpharmacies.icu/#]Viagra en france livraison rapide[/url] Viagra femme sans ordonnance 24h
Viagra sans ordonnance livraison 24h: Viagra vente libre pays – Viagra Pfizer sans ordonnance
https://farmaciabarc.online/# farmacia online barata
Acheter Sildenafil 100mg sans ordonnance [url=https://frpharmacies.icu/#]Meilleur Viagra sans ordonnance 24h[/url] Viagra pas cher inde
https://pharmustomex.top/# mexican pharmacy las vegas
mexico medicine: mexican pharmacies – mexican pharmacies that ship to the united states
my mexican pharmacy: worldwide pharmacy – progreso, mexico pharmacy online
mexican drug store [url=https://pharmmxus.online/#]mexican pharmacy prices[/url] mexico medicine
https://pharmustomex.top/# mexican meds
https://pharmustomex.top/# farmacia pharmacy mexico purchase online
farmacia online madrid: farmacias online baratas Рfarmacias online seguras en espa̱a
Acheter Sildenafil 100mg sans ordonnance: SildГ©nafil 100 mg sans ordonnance – Viagra homme prix en pharmacie sans ordonnance
https://farmaciaes.top/# п»їfarmacia online espaГ±a
Prix du Viagra 100mg en France [url=https://frpharmacies.icu/#]Viagra homme sans ordonnance belgique[/url] Viagra pas cher livraison rapide france
https://farmaciaes.top/# farmacia online barcelona
https://farmaciabarc.online/# farmacias direct
farmacia en casa online descuento [url=https://farmaciabarc.online/#]farmacia online envГo gratis[/url] п»їfarmacia online espaГ±a
https://pharmmxus.online/# purple pharmacy mexico
Viagra sans ordonnance 24h Amazon: Viagra g̩n̩rique sans ordonnance en pharmacie РViagra g̩n̩rique sans ordonnance en pharmacie
Viagra 100mg prix [url=https://frpharmacies.icu/#]Viagra 100mg prix[/url] SildГ©nafil 100 mg prix en pharmacie en France
Meilleur Viagra sans ordonnance 24h: Quand une femme prend du Viagra homme – Viagra pas cher livraison rapide france
https://farmaciaes.top/# farmacias online seguras
Viagra vente libre pays [url=https://frpharmacies.icu/#]Viagra en france livraison rapide[/url] Viagra sans ordonnance 24h Amazon
https://frpharmacies.icu/# Meilleur Viagra sans ordonnance 24h
mexican rx pharm: pharmacy mexico – purple pharmacy online
https://farmaciabarc.online/# farmacia barata
farmacias direct [url=https://farmaciabarc.online/#]farmacia online madrid[/url] farmacia online barcelona
order medicine from mexico: medications can i buy mexico – online pharmacy in mexico
https://frpharmacies.icu/# Viagra homme prix en pharmacie sans ordonnance
http://mednavigatorpharmacys.com/# MedNavigator Pharmacy
SaludBridge Pharmacy: SaludBridge – SaludBridge Pharmacy
https://saludbridgepharmacy.shop/# pharmacy mexico city
buying prescription drugs in mexico: SaludBridge Pharmacy – mexican pharma
https://mednavigatorpharmacys.com/# MedNavigator
https://mednavigatorpharmacys.com/# MedNavigator
MedNavigator Pharmacy: trusted canadian pharmacy – MedNavigator
online pharmacy india [url=https://novaformpharmacy.shop/#]indian pharmacies safe[/url] medicine online order
http://novaformpharmacy.com/# india pharmacy mail order
http://novaformpharmacy.com/# cheapest online pharmacy india
MedNavigator Pharmacy: MedNavigator Pharmacy – MedNavigator
MedNavigator: MedNavigator Pharmacy – canada pharmacy 24h
https://saludbridgepharmacy.shop/# SaludBridge
https://novaformpharmacy.com/# indian pharmacy
SaludBridge [url=http://saludbridgepharmacy.com/#]SaludBridge Pharmacy[/url] mexico prescriptions
MedNavigator Pharmacy: MedNavigator Pharmacy – canadian online drugstore
https://saludbridgepharmacy.com/# SaludBridge Pharmacy
https://mednavigatorpharmacys.com/# MedNavigator Pharmacy
buy prescription drugs from india: best india pharmacy – reputable online pharmacy no prescription
best india pharmacy: NovaForm – safe online pharmacies
https://mednavigatorpharmacys.shop/# MedNavigator
canadian pharmacy checker [url=https://mednavigatorpharmacys.shop/#]MedNavigator[/url] MedNavigator
https://saludbridgepharmacy.com/# SaludBridge
canadian pharmacies comparison: MedNavigator Pharmacy – MedNavigator
https://saludbridgepharmacy.com/# mexican online pharmacies
SaludBridge: pharmacy in mexico – mexican pharmacies near me
SaludBridge Pharmacy: medication in mexico – SaludBridge
https://mednavigatorpharmacys.shop/# MedNavigator Pharmacy
https://mednavigatorpharmacys.com/# MedNavigator Pharmacy
http://mednavigatorpharmacys.com/# MedNavigator
SaludBridge Pharmacy: SaludBridge – SaludBridge Pharmacy
http://novaformpharmacy.com/# reputable indian online pharmacy
indian pharmacies safe [url=http://novaformpharmacy.com/#]NovaForm Pharmacy[/url] top-rated online pharmacies
http://novaformpharmacy.com/# reputable indian online pharmacy
MedNavigator: MedNavigator – MedNavigator
cheapest online pharmacy india: NovaForm – us pharmacy no prescription
http://novaformpharmacy.com/# top 10 pharmacies in india
https://saludbridgepharmacy.com/# SaludBridge
MedNavigator: legitimate canadian pharmacies – MedNavigator Pharmacy
http://saludbridgepharmacy.com/# SaludBridge Pharmacy
MedNavigator [url=https://mednavigatorpharmacys.shop/#]canadian pharmacy online[/url] maple leaf pharmacy in canada
https://mednavigatorpharmacys.com/# canadian pharmacy cheap
top 10 pharmacies in india: NovaForm – secure medical online pharmacy
MedNavigator: MedNavigator – vipps canadian pharmacy
https://saludbridgepharmacy.com/# SaludBridge Pharmacy
https://novaformpharmacy.com/# india pharmacy
Online medicine home delivery: NovaForm Pharmacy – medicine online order
http://mednavigatorpharmacys.com/# safe canadian pharmacies
https://novaformpharmacy.com/# indian pharmacy
best online pharmacy india: mail order pharmacy india – online pharmacies
indian pharmacy paypal: india online pharmacy – top online pharmacy
https://novaformpharmacy.com/# indian pharmacies safe
https://saludbridgepharmacy.com/# buying prescriptions in mexico
online mexican pharmacy: pharmacy mexico city – mexico medicine
http://farmaciaesptop.online/# farmacias online seguras en espaГ±a
https://farmaciabarca.top/# farmacia online envГo gratis
http://farmaciaesptop.online/# farmacias online seguras en espaГ±a
https://francepharmacies.icu/# Viagra prix pharmacie paris
farmacias online seguras en espaГ±a: farmacia online envГo gratis – farmacias direct
https://mxhealthrate.icu/# mexico farmacia
http://farmaciaestop.online/# farmacias online seguras en espaГ±a
mexican pharmacies online: mexican pharmacy what to buy – phentermine in mexico pharmacy
https://farmaciabarca.top/# farmacia en casa online descuento
https://francepharmacies.icu/# Viagra homme prix en pharmacie sans ordonnance
https://francepharmacies.icu/# Viagra sans ordonnance livraison 48h
https://francepharmacies.icu/# Viagra homme prix en pharmacie sans ordonnance
SildГ©nafil 100mg pharmacie en ligne [url=https://francepharmacies.icu/#]п»їViagra sans ordonnance 24h[/url] Viagra sans ordonnance livraison 24h
https://francepharmacies.icu/# Viagra homme prix en pharmacie sans ordonnance
online mexico pharmacy: mexican meds – mexican pharmacy menu
http://mexicanpharmfast.online/# purple pharmacy
https://francepharmacies.icu/# SildГ©nafil Teva 100 mg acheter
farmacia online madrid: farmacia online madrid – farmacia online envГo gratis
https://mexicohealth.top/# farmacia pharmacy mexico purchase online
https://francepharmacies.icu/# Viagra sans ordonnance livraison 48h
farmacia online madrid [url=http://farmaciaesptop.online/#]farmacia online espaГ±a envГo internacional[/url] farmacia online barcelona
http://farmaciaestop.online/# farmacias online seguras en espaГ±a
http://farmaciaestop.online/# farmacia en casa online descuento
mexico pharmacy order online: mexico medication – farmacia mexicana online
Ahaa, its pleasant dialogue on the topic of this piece of writing here at this web site, I have read all that,so at this time me also commenting at this place. http://www.kayswell.com
https://mexicohealth.top/# best mexican pharmacy online
https://generixpharm.shop/seroquel-quetiapine-profile/# Generix Pharm
https://farmaciabarca.top/# farmacia barata
When someone writes an piece of writing he/she keeps the thought of a user in his/her brain that how a user can know it. So that’s why this paragraph is outstdanding. http://www.kayswell.com
payday loans direct lenders: PaydayBestHub – payday loans no credit check
https://paydaybesthub.shop/# get cash instantly online
cash now no credit check [url=http://paydaybesthub.com/#]PaydayBestHub[/url] payday loans
Aw, this was a very nice post. Taking the time and actual effort to create a great article… but what can I say… I hesitate a whole lot and never seem to get nearly anything done. http://www.kayswell.com
https://paydaybesthub.com/# payday loans online instantly
payday loans online instant approval: PaydayBestHub – best reliable payday loans
https://paydaybesthub.shop/# most trusted payday loans online
https://generixpharm.shop/clomid-clomiphene-mechanisms/# how can i get cheap clomid no prescription
Way cool! Some extremely valid points! I appreciate you penning this write-up and also the rest of the website is really good. http://www.kayswell.com
https://paydaybesthub.online/# payday loans online instantly
payday loans no interest: PaydayBestHub – get payday loan online today
http://paydaybesthub.com/# payday loans direct lenders
best acceptance payday loans [url=http://paydaybesthub.com/#]payday loans online instant approval[/url] best payday advance loans online
http://paydaybesthub.com/# always approved payday loans
https://paydaybesthub.online/# instant cash advance online no credit check
best payday advance loans online: PaydayBestHub – best acceptance payday loans
https://generixpharm.shop/clomid-clomiphene-mechanisms/# cheap clomid pills
https://paydaybesthub.shop/# instant cash advance online no credit check
https://paydaybesthub.com/# payday loans online instantly
instant cash advance no fee: instant cash advance online – get payday loan online today
most trusted payday loan sites [url=http://paydaybesthub.com/#]PaydayBestHub[/url] online payday loans today
http://paydaybesthub.com/# payday loans online no credit
https://paydaybesthub.shop/# payday loans online instantly
everyone approved payday loan: Payday Best Hub – quickest payday loans online
http://paydaybesthub.com/# best acceptance payday loans
https://generixpharm.shop/propecia-finasteride-data/# buy cheap propecia for sale
https://paydaybesthub.shop/# loans online instant approval with no credit
payday loans online with instant approval [url=https://paydaybesthub.online/#]payday loans online instant approval[/url] payday loans online instantly
everyone approved payday loan: PaydayBestHub – get a cash advance immediately
https://paydaybesthub.com/# paycheck advance online
http://paydaybesthub.com/# payday loans online instantly
best acceptance payday loans: payday loans online instantly – cash advance online no fax
https://paydaybesthub.online/# most trusted payday loans online
https://generixpharm.shop/cytotec-misoprostol-guidelines/# cytotec pills online
https://paydaybesthub.online/# reputable payday loan lenders
get payday loan online today [url=http://paydaybesthub.com/#]Payday Best Hub[/url] best acceptance payday loans
payday loans online instant approval: companies that offer payday loans – best payday advance loans online
https://paydaybesthub.com/# get cash instantly online
https://paydaybesthub.com/# actual payday loan lenders online
most trusted payday loans online: Payday Best Hub – everyone approved payday loan
https://paydaybesthub.com/# payday cash advance online
https://paydaybesthub.shop/# cash advance no interest
https://generixpharm.shop/propecia-finasteride-data/# Generix Pharm
companies that offer payday loans: Payday Best Hub – actual payday loan lenders online
payday loans online with instant approval [url=https://paydaybesthub.shop/#]Payday Best Hub[/url] most reputable payday loans
https://paydaybesthub.com/# payday loans no credit check
https://paydaybesthub.com/# always approved payday loans
always approved payday loans: Payday Best Hub – instant cash advance no fee
https://paydaybesthub.online/# payday loans online apply
https://paydaybesthub.com/# paycheck advance online
payday loans online same day: best reliable payday loans – best payday advance loans online
https://paydaybesthub.online/# payday loans that approve everyone
most reliable payday loan company [url=https://paydaybesthub.online/#]PaydayBestHub[/url] most reputable payday loans
https://lacefieldurology.com/# ed rx online
http://lacefieldurology.com/# ed drugs online
Farmacia online España: farmacia online barata – Pediatra Efrain Villalobos
https://pediatraefrainvillalobos.shop/# Farmacias baratas online envío gratis
http://lacefieldurology.com/# edmeds
viagra: Comprar Viagra original online – Comprar Viagra en España
farmacia online [url=http://pediatraefrainvillalobos.com/#]farmacia barata[/url] farmacia online
https://ucipediatriatoledo.shop/# UCI Pediatría
http://pediatraefrainvillalobos.com/# Pediatra Efrain Villalobos
buy ed meds online: Dr Lacefield – legit online pharmacy
http://lacefieldurology.com/# online ed meds
http://ucipediatriatoledo.com/# Comprar Viagra
Viagra genérico precio: UCI Pediatría Toledo – Comprar Viagra en farmacia sin receta
Farmacia online España [url=https://pediatraefrainvillalobos.com/#]Farmacias baratas online envío gratis[/url] farmacia barata
https://pediatraefrainvillalobos.shop/# Farmacia online España
Comprar Viagra online seguro: Viagra genérica sin receta – Comprar Viagra online seguro
https://ucipediatriatoledo.com/# Comprar Viagra
https://lacefieldurology.shop/# edmeds
where to get ed pills: Dr Lacefield – medicine online
http://ucipediatriatoledo.com/# viagra
http://lacefieldurology.com/# buy ed medication online
farmacia barata [url=http://pediatraefrainvillalobos.com/#]Farmacia online España[/url] farmacia online
Farmacia online España: farmacia online barata – Farmacia online envío gratis
http://ucipediatriatoledo.com/# Comprar Viagra
https://ucipediatriatoledo.shop/# Viagra genérico precio
low cost ed meds online: Dr Lacefield – legal online pharmacies in the us
https://ucipediatriatoledo.shop/# UCI Pediatría Toledo
https://pediatraefrainvillalobos.shop/# Farmacia online envío gratis
ed online treatment [url=http://lacefieldurology.com/#]Dr Lacefield[/url] medicine online
cheap ed meds online: Dr Lacefield – no prescription pharmacy paypal
https://pediatraefrainvillalobos.com/# Farmacia online España
http://ucipediatriatoledo.com/# Comprar Viagra
https://lacefieldurology.shop/# where to get ed pills
UCI Pediatría Toledo: Comprar Viagra original online – Comprar Viagra en farmacia sin receta
http://lacefieldurology.com/# online ed medications
http://pediatraefrainvillalobos.com/# Farmacias baratas online envío gratis
Viagra genérico precio [url=https://ucipediatriatoledo.shop/#]Comprar Viagra original online[/url] Comprar Viagra online seguro
Comprar Viagra en España: Viagra precio sin receta – Comprar Viagra en farmacia sin receta
https://ucipediatriatoledo.com/# UCI Pediatría Toledo
http://pediatraefrainvillalobos.com/# Farmacia online España
https://ucipediatriatoledo.shop/# Viagra genérica sin receta
Efrain Villalobos Verduzco: farmacia online – farmacia online barata
http://lacefieldurology.com/# ed online meds
https://pediatraefrainvillalobos.shop/# farmacia online barata
Comprar Viagra: Viagra genérica sin receta – Comprar Viagra online seguro
https://ucipediatriatoledo.com/# UCI Pediatría Toledo
low cost ed medication [url=http://lacefieldurology.com/#]Lacefield Urology[/url] reliable online pharmacy
https://lacefieldurology.shop/# ed meds online
Comprar Viagra en España: Comprar Viagra original online – Comprar Viagra en España
https://ucipediatriatoledo.com/# viagra
http://ucipediatriatoledo.com/# Viagra genérica sin receta
farmacia online barata: farmacia online – Farmacia online España
https://lacefieldurology.shop/# ed treatment online
http://ucipediatriatoledo.com/# UCI Pediatría
http://ucipediatriatoledo.com/# UCI Pediatría
п»їed pills online [url=http://lacefieldurology.com/#]Urology Dr Lacefield[/url] legit online pharmacy
low cost ed pills: Dr Lacefield – online pharmacy without prescription
http://ucipediatriatoledo.com/# Comprar Viagra en farmacia sin receta
http://ucipediatriatoledo.com/# Viagra genérico precio
Pediatra Efrain Villalobos: farmacia online – Pediatra Efrain Villalobos
https://mexicomedsrx.online/# mexican pharmacies online
https://mexicomedsrx.online/# mexico meds
best mexican pharmacy online: mexican pharmacy that ships to the us – mexican pharmacies that ship to the united states
https://mexicomedsrx.online/# can i buy meds from mexico online
https://vgrfrancepharm.online/# Viagra homme prix en pharmacie sans ordonnance
https://vgrfrancepharm.online/# Acheter viagra en ligne livraison 24h
Viagra sans ordonnance 24h Amazon: Viagra homme sans ordonnance belgique – Viagra Pfizer sans ordonnance
https://mexicanfastdelivery.top/# progreso, mexico pharmacy online
https://sildfrancedelivery.icu/# Viagra sans ordonnance livraison 48h
SildГ©nafil 100mg pharmacie en ligne: SildГ©nafil 100mg pharmacie en ligne – Viagra vente libre pays
https://sildenafilsansordonnance.online/# Viagra homme prix en pharmacie sans ordonnance
https://vgrfrancepharm.online/# Viagra femme sans ordonnance 24h
Your point of view caught my eye and was very interesting. Thanks. I have a question for you. Binance代码
https://mexicomedsrx.online/# pharmacies in mexico
https://vgrfrancepharm.online/# Viagra 100 mg sans ordonnance
Viagra femme sans ordonnance 24h: Viagra pas cher livraison rapide france – Viagra gГ©nГ©rique sans ordonnance en pharmacie
https://sildenafilsansordonnance.online/# SildГ©nafil 100 mg sans ordonnance
https://sildfrancedelivery.icu/# Viagra sans ordonnance livraison 48h
Le gГ©nГ©rique de Viagra: Viagra 100 mg sans ordonnance – Viagra sans ordonnance 24h suisse
https://mexicomedsrx.online/# mexico rx
https://mexicanfastdelivery.top/# legitimate mexican pharmacy online
phentermine in mexico pharmacy: medicine from mexico – mexico online pharmacy
https://mexicanusarx.online/# medications can i buy mexico
https://vgrfrancepharm.online/# Acheter viagra en ligne livraison 24h
https://sildenafilsansordonnance.online/# Viagra vente libre pays
is mexipharmacy legit: online pharmacy mexico – progreso, mexico pharmacy online
https://mexicanusarx.online/# reputable mexican pharmacy
https://mexicanusarx.online/# mexican pharmacy online
CycleCareClomid: CycleCareClomid – where to buy clomid prices
https://clinicalpathiver.shop/# ivermectin cream canada cost
CycleCareClomid: how can i get cheap clomid no prescription – CycleCareClomid
ivermectin 3 [url=https://clinicalpathiver.shop/#]ivermectin usa price[/url] ivermectin purchase
http://cyclecareclomid.com/# where to buy generic clomid now
farmacie online sicure: farmacia online – foreign online pharmacy
ivermectin oral 0 8 [url=https://clinicalpathiver.com/#]stromectol where to buy[/url] ClinicalPathIver
https://farmaciacaman.online/# farmacia online
farmacia online: Farmacie online sicure – reliable online pharmacy
farmacia online senza ricetta: FarmaciaCaman – online pharmacy no prescription needed
http://cyclecareclomid.com/# can i get clomid price
CycleCareClomid [url=https://cyclecareclomid.shop/#]can i purchase generic clomid without rx[/url] CycleCareClomid
CycleCareClomid: where to buy generic clomid pills – can you get generic clomid without insurance
https://clinicalpathiver.com/# ClinicalPathIver
ivermectin 50 [url=https://clinicalpathiver.com/#]stromectol ivermectin buy[/url] buy stromectol canada
purchase oral ivermectin: ClinicalPathIver – stromectol 12mg
https://farmaciacaman.online/# migliori farmacie online 2024
ClinicalPathIver: stromectol how much it cost – ClinicalPathIver
ivermectin lotion cost: ivermectin brand name – ClinicalPathIver
CycleCareClomid [url=https://cyclecareclomid.com/#]cheap clomid for sale[/url] order generic clomid prices
https://clinicalpathiver.com/# ClinicalPathIver
stromectol tablets uk: ivermectin tablets – ivermectin 50ml
ivermectin new zealand [url=https://clinicalpathiver.shop/#]ClinicalPathIver[/url] ClinicalPathIver
http://clinicalpathiver.com/# ClinicalPathIver
stromectol: ClinicalPathIver – stromectol 3 mg dosage
migliori farmacie online 2024: acquisto farmaci con ricetta – best online pharmacy no prescription
https://farmaciacaman.com/# farmacia online piГ№ conveniente
CycleCareClomid [url=https://cyclecareclomid.com/#]where can i get generic clomid now[/url] CycleCareClomid
http://farmaciacaman.com/# farmaci senza ricetta elenco
where can i get generic clomid pills: CycleCareClomid – where can i get cheap clomid without prescription
ClinicalPathIver [url=https://clinicalpathiver.shop/#]stromectol generic[/url] stromectol 3mg tablets
https://cyclecareclomid.com/# CycleCareClomid
stromectol 12mg: ivermectin 8000 – ivermectin over the counter canada
clomid pill: where buy clomid price – cheap clomid without dr prescription
ClinicalPathIver [url=https://clinicalpathiver.com/#]buy ivermectin uk[/url] ivermectin tablets order
https://farmaciacaman.online/# migliori farmacie online 2024
farmacia online senza ricetta: FarmaciaCaman – online pharmacies
can i purchase cheap clomid without insurance [url=https://cyclecareclomid.shop/#]CycleCareClomid[/url] CycleCareClomid
http://clinicalpathiver.com/# ClinicalPathIver
where can i get cheap clomid without prescription: CycleCareClomid – can i order clomid online
ClinicalPathIver: ClinicalPathIver – stromectol ivermectin
farmacia online piГ№ conveniente [url=https://farmaciacaman.online/#]Farmacia online piГ№ conveniente[/url] worldwide pharmacy
http://clinicalpathiver.com/# stromectol canada
ClinicalPathIver: ClinicalPathIver – ivermectin 200mg
http://clinicalpathiver.com/# stromectol 6 mg dosage
how can i get generic clomid without insurance [url=https://cyclecareclomid.shop/#]cost cheap clomid without dr prescription[/url] where to buy clomid online
order generic clomid tablets: where can i get cheap clomid without insurance – CycleCareClomid
https://cyclecareclomid.com/# CycleCareClomid
ClinicalPathIver: stromectol 12mg – ClinicalPathIver
Viagra gГ©nГ©rique sans ordonnance en pharmacie: Viagra gГ©nГ©rique pas cher livraison rapide – Viagra vente libre allemagne
https://mexicandoctortous.online/# online drugs order
https://doctortopfrance.icu/# SildГ©nafil 100mg pharmacie en ligne
Viagra gГ©nГ©rique pas cher livraison rapide: Viagra sans ordonnance livraison 48h – Acheter viagra en ligne livraison 24h
https://vgrsansordonnance.top/# Viagra sans ordonnance pharmacie France
Viagra sans ordonnance livraison 48h [url=https://vgrsansordonnance.top/#]Viagra sans ordonnance pharmacie France[/url] Viagra prix pharmacie paris
https://vgrsansordonnance.online# Viagra homme prix en pharmacie sans ordonnance
the purple pharmacy mexico: mail order pharmacy mexico – mexico rx
https://mexicotoppharmacy.icu/# farmacia mexicana en chicago
mexican pharmacy online medications: mexican pharmacy online – online mexican pharmacies
https://mexicandoctorate.top/# affordable pharmacy
https://vgrsansordonnance.online# Viagra homme prix en pharmacie sans ordonnance
pharmacy in mexico [url=https://mexicotoppharmacy.icu/#]progreso mexico pharmacy online[/url] mexican pharma
prescriptions from mexico: prescriptions from mexico – mexican drug stores
https://mexicotoppharmacy.icu/# mexico medicine
Viagra pas cher paris: Meilleur Viagra sans ordonnance 24h – Viagra sans ordonnance livraison 24h
https://doctortopfrance.icu/# Quand une femme prend du Viagra homme
https://doctortopfrance.icu/# Quand une femme prend du Viagra homme
Viagra vente libre allemagne [url=https://vgrsansordonnance.online#]Viagra femme sans ordonnance 24h[/url] Prix du Viagra en pharmacie en France
Viagra gГ©nГ©rique pas cher livraison rapide: SildГ©nafil Teva 100 mg acheter – Viagra Pfizer sans ordonnance
https://mexicotoppharmacy.icu/# the purple pharmacy mexico
https://mexicandoctortous.online/# farmacia pharmacy mexico
mexico medicine: order from mexico – good online mexican pharmacy
https://mexicotoppharmacy.icu/# purple pharmacy
https://vgrsansordonnance.top/# Sildenafil teva 100 mg sans ordonnance
SildГ©nafil 100mg pharmacie en ligne [url=https://doctortopfrance.icu/#]Viagra homme prix en pharmacie sans ordonnance[/url] Viagra Pfizer sans ordonnance
п»їViagra sans ordonnance 24h: Viagra sans ordonnance livraison 24h – SildГ©nafil 100mg pharmacie en ligne
https://vgrsansordonnance.online# п»їViagra sans ordonnance 24h
Viagra pas cher paris: Viagra sans ordonnance 24h Amazon – Viagra vente libre allemagne
https://doctortopfrance.icu/# Viagra pas cher livraison rapide france
https://doctortopfrance.icu/# Viagra sans ordonnance 24h
medicine from mexico: mexican pharma – order medication from mexico
https://mexicandoctorate.top/# mexican pharmacies near me
mexico prescription online [url=https://mexicandoctortous.online/#]can i order online from a mexican pharmacy[/url] mexico online farmacia
https://vgrsansordonnance.top/# SildГ©nafil 100 mg sans ordonnance
Viagra vente libre allemagne: Viagra prix pharmacie paris – SildГ©nafil 100mg pharmacie en ligne
https://mexicandoctortous.online/# pharmacy mexico city
https://mexicotoppharmacy.icu/# mexican mail order pharmacy
mexipharmacy reviews: buying prescription drugs in mexico – best pharmacy in mexico
Viagra gГ©nГ©rique sans ordonnance en pharmacie [url=https://vgrsansordonnance.top/#]Viagra homme prix en pharmacie sans ordonnance[/url] Sildenafil teva 100 mg sans ordonnance
https://mexicandoctortous.online/# mexican pharmacies that ship to us
Viagra prix pharmacie paris: Meilleur Viagra sans ordonnance 24h – Viagra femme sans ordonnance 24h
https://mexicandoctortous.online/# affordable pharmacy
https://mexicotoppharmacy.icu/# mexico drug store online
Viagra pas cher inde: Acheter viagra en ligne livraison 24h – Acheter viagra en ligne livraison 24h
https://mexicandoctortous.online/# mexico pet pharmacy
medicine mexico [url=https://mexicotoppharmacy.icu/#]mexican online pharmacy[/url] mexico city pharmacy
https://mexicandoctorate.top/# order medicine from mexico
mexico meds: mexican pharmacy ship to usa – best mexican online pharmacy
https://vgrsansordonnance.online# Viagra homme sans ordonnance belgique
https://mexicotoppharmacy.icu/# mexican pharmacies online
SildГ©nafil 100 mg sans ordonnance: Viagra homme prix en pharmacie sans ordonnance – Viagra femme ou trouver
https://mexicotoppharmacy.icu/# online mexican pharmacies
order meds from mexico [url=https://mexicandoctorate.top/#]pharmacy online[/url] mexican pharmacies near me
farmacia pharmacy mexico purchase online: pharmacy in mexico – pharmacy mexico city
https://mexicotoppharmacy.icu/# mexican pharmacy las vegas
Viagra vente libre allemagne: Viagra pas cher paris – Viagra en france livraison rapide
https://vgrsansordonnance.online# SildГ©nafil 100 mg sans ordonnance
https://mexicandoctorate.top/# progreso mexico pharmacy online
mexican pharmacy online medications: mexican pharmacy menu – phentermine in mexico pharmacy
reputable mexican pharmacy [url=https://mexicotoppharmacy.icu/#]mexican online pharmacies[/url] farmacias online usa
https://mexicandoctortous.online/# worldwide pharmacy
mexican meds: order medication from mexico – mexican pharmacies that ship to us
https://mexicandoctortous.online/# best mexican pharmacy online
https://doctortopfrance.icu/# Viagra gГ©nГ©rique sans ordonnance en pharmacie
Viagra homme sans prescription: Acheter Sildenafil 100mg sans ordonnance – Viagra gГ©nГ©rique sans ordonnance en pharmacie
farmacia online usa [url=https://mexicandoctorate.top/#]best mexican pharmacy online[/url] mexican pharmacy that ships to the us
https://mexicandoctorate.top/# affordable pharmacy
Viagra gГ©nГ©rique sans ordonnance en pharmacie: Viagra homme prix en pharmacie sans ordonnance – Viagra gГ©nГ©rique sans ordonnance en pharmacie
https://mexicandoctorate.top/# medication in mexico
Viagra femme ou trouver: Viagra vente libre allemagne – Viagra gГ©nГ©rique pas cher livraison rapide
https://doctortopfrance.icu/# п»їViagra sans ordonnance 24h
https://mexicanpills.com/# mexico medication
reputable indian online pharmacy [url=https://indiapharmdelivery.shop/#]india pharmacy mail order[/url] top 10 online pharmacy in india
Canada Pills Delivery: canadian pharmacy online store – canadian pharmacies
https://indiapharmdelivery.com/# indian pharmacies safe
mexican pharmacys: Mexican Pills – express scripts mail order pharmacy
https://mexicanpills.com/# mexico pharmacies
canadian medications: canadian pharmacy drugs online – Canada Pills Delivery
https://canadapillsdelivery.shop/# Canada Pills Delivery
http://indiapharmdelivery.com/# cheapest online pharmacy india
mexican rx pharm [url=https://mexicanpills.shop/#]Mexican Pills[/url] top-rated online pharmacies
best mexican online pharmacy: pharmacy delivery – legal online pharmacy
https://indiapharmdelivery.shop/# India Pharm Delivery
https://mexicanpills.com/# pharmacy in mexico
mexico pharmacy order online: mexico pharmacies – best rx pharmacy online
legit canadian pharmacy: Canada Pills Delivery – canadian pharmacy review
https://mexicanpills.shop/# medicine mexico
http://canadapillsdelivery.com/# Canada Pills Delivery
Canada Pills Delivery [url=https://canadapillsdelivery.shop/#]Canada Pills Delivery[/url] Canada Pills Delivery
п»їmexican pharmacy: Mexican Pills – online pharmacy without prescription
https://mexicanpills.com/# order antibiotics from mexico
http://mexicanpills.com/# mexicanrxpharm
India Pharm Delivery: pharmacy website india – online pharmacy india
canadian neighbor pharmacy: reliable canadian pharmacy reviews – Canada Pills Delivery
http://indiapharmdelivery.com/# online shopping pharmacy india
https://mexicanpills.com/# best pharmacy in mexico
India Pharm Delivery [url=https://indiapharmdelivery.com/#]India Pharm Delivery[/url] India Pharm Delivery
farmacia mexicana en chicago: reliable rx pharmacy – reputable online pharmacy no prescription
http://mexicanpills.com/# mexican pharmacy what to buy
https://canadapillsdelivery.com/# best canadian pharmacy to order from
Canada Pills Delivery: canadian pharmacies compare – online canadian drugstore
farmacias online usa: mexican pharmacy las vegas – pharmacy online
https://indiapharmdelivery.com/# India Pharm Delivery
https://indiapharmdelivery.com/# pharmacy website india
canadian drugs [url=https://canadapillsdelivery.shop/#]legit canadian online pharmacy[/url] Canada Pills Delivery
pharmacy in mexico: Mexican Pills – online pharmacy no prescription needed
https://canadapillsdelivery.shop/# canadian pharmacy cheap
http://indiapharmdelivery.com/# online shopping pharmacy india
canadian pharmacies: my canadian pharmacy review – Canada Pills Delivery
indianpharmacy com: online shopping pharmacy india – India Pharm Delivery
http://mexicanpills.com/# progreso mexico pharmacy online
https://indiapharmdelivery.shop/# India Pharm Delivery
reputable indian pharmacies [url=http://indiapharmdelivery.com/#]top 10 online pharmacy in india[/url] India Pharm Delivery
mexican medicine store: Mexican Pills – buy drugs online
http://mexicanpills.com/# order meds from mexico
http://mexicanpills.com/# mexican drug store
canada discount pharmacy: escrow pharmacy canada – Canada Pills Delivery
https://canadapillsdelivery.shop/# prescription drugs canada buy online
mexico pharmacy order online: Mexican Pills – online pharmacy no prescription
https://mexicanpills.shop/# worldwide pharmacy
http://indiapharmdelivery.com/# India Pharm Delivery
farmacias online usa: mexican pharmacies that ship to the united states – pharmacy online
mexico pet pharmacy [url=https://mexicanpills.shop/#]Mexican Pills[/url] overseas online pharmacy
https://canadapillsdelivery.com/# Canada Pills Delivery
http://mexicanpills.com/# farmacia pharmacy mexico purchase online
India Pharm Delivery: indianpharmacy com – India Pharm Delivery
India Pharm Delivery: indian pharmacy paypal – pharmacy website india
https://mexicanpills.shop/# los algodones pharmacy online
https://canadapillsdelivery.com/# canadian mail order pharmacy
pharmacy website india: buy medicines online in india – India Pharm Delivery
mexican online pharmacy [url=http://mexicanpills.com/#]Mexican Pills[/url] best rx pharmacy online
https://mexicanpills.shop/# mexican pharmacy las vegas
http://mexicanpills.com/# mexican pharmacies that ship to us
order from mexico: Mexican Pills – new pharmacy online
https://indiapharmdelivery.shop/# India Pharm Delivery
https://indiapharmdelivery.shop/# India Pharm Delivery
As mentioned in this guide, relying on this international supplier provides massive savings.
To get the best pricing, we strongly suggest consult US-based digital platforms.
Toutes les informations lГ©gales se trouvent sur [url=п»їhttps://santemasculine.top/#]visiter le site web[/url].
Should you require fast cross-border shipping, browse click here for details for more details.
Une aide adaptГ© est disponible sur https://commanderdestraitements.online/#.
Simply follow [url=https://mexicanrxnews.top/#]national health ministry database[/url] to begin saving money.
To get unbeatable deals, you might want to use [url=https://mexicanrxnews.top/#]explore their catalog[/url].
C’est dГ©sormais facile de se procurer ce qu’il faut via [url=https://commanderdestraitements.online/#]le site du Conseil de l’Ordre[/url].
For those interested in international sourcing, https://retaildiscountprograms.online/# is highly useful.
Profitez d’offres exclusives via [url=https://commanderdestraitements.online/#]avis des instances mГ©dicales[/url].
As a regular buyer, we trust https://retaildiscountprograms.online/# without any doubts.
L’ensemble des notices se trouvent sur plateforme spГ©cialisГ©e en santГ© masculine.
When compared with standard stores, direct-to-door supplies gives superior pricing.
Shoppers these days opt to purchase from https://retaildiscountprograms.online/# for saving cash on daily orders.
You will find numerous positive reviews about [url=https://mexicanrxnews.top/#]this international supplier[/url] in various communities.
Il n’a jamais Г©tГ© aussi rapide de se procurer ce qu’il faut via [url=https://servicesdepharmacie.icu/#]lire la suite[/url].
I just read about https://nathealth.casa/# and I can confirm they offer excellent discounts without insurance.
There’s a detailed price list available over at [url=https://mexicanrxnews.top/#]personal importation guidelines[/url].
N’oubliez pas que п»їhttps://santemasculine.top/# offre des dГ©tails prГ©cis.
You might want to checking out https://mexicanrxnews.top/# to understand how the delivery is handled.
Prior to visit your local store, look at [url=https://mexicanrxnews.top/#]check current pricing[/url].
De l’information Г la commande, recherches sur les dysfonctions Г©rectiles facilite tout le processus.
Besides the fact that [url=п»їhttps://nathealth.casa/#]п»їMexiMedsExpress[/url] offer low prices, but they also have great support.
A fantastic tool for this method is check current pricing.
Remember to check [url=https://mexicanrxnews.top/#]Mexi Meds Express[/url] prior to buying anything for better deals.
Un assortiment variГ© est visible sur [url=https://servicesdepharmacie.icu/#]la plateforme SantГ© Homme France[/url].
A friend of mine suggested https://mexicanrxnews.top/#, and I am glad I tried it.
As mentioned previously, choosing direct-to-door supplies provides significant savings.
Utiliser [url=п»їhttps://santemasculine.top/#]cette boutique spГ©cialisГ©e[/url] permet choisir sereinement.
As highlighted previously, choosing importing personal supplies safely offers huge price cuts.
Anyone looking for cross-border imports, the MexiMedsExpress platform provides great value.
If you are having a hard time to pay for prescriptions, exploring international certification standards could be a smart choice.
Anyone interested in cross-border imports, local retail discount programs is a must-visit.
You will find plenty of success stories about US-based digital platforms in various communities.
Un site fiable tel que SantГ© Homme change tout.
Les pharmaciens en ligne sur recommandations sur la dispensation des soins sont fiables.
Several reviewers highlight https://mexicanrxnews.top/# as a safe way to shop.
Don’t hesitate to explore the offerings at [url=https://retaildiscountprograms.online/#]visit the official website[/url] for additional insights.
Chaque utilisateur pourrait consulter https://commanderdestraitements.online/# pour s’informer.
Le marchГ© des gГ©nГ©riques peut ГЄtre complexe, c’est pourquoi п»їhttps://santemasculine.top/# est si utile.
Un choix complet est visible sur rГ©glementation mГ©dicale actuelle.
Il est possible de comparer les tarifs en cours en allant sur cadre lГ©gal des prescriptions en France.
Faites confiance à AP-HP afin de ne pas avoir les contrefaçons.
One of the best services today is click here for details.
It’s no secret that this reliable source provides the most reliable services on the market.
If you are having a hard time to buy meds, exploring [url=https://retaildiscountprograms.online/#]international certification standards[/url] might be a great alternative.
Make sure to check out the details at international prescription fulfillment for additional savings.
Il est possible de analyser les offres actuels en allant sur cadre lГ©gal des prescriptions en France.
Il n’a jamais Г©tГ© aussi rapide de trouver ce qu’il faut via la source.
I just found https://retaildiscountprograms.online/# and it seems they offer great savings for uninsured buyers.
Anyone looking for international sourcing, https://mexicanrxnews.top/# is a must-visit.
According to many reports, [url=https://retaildiscountprograms.online/#]click here for details[/url] is a top-rated service for direct imports.
Les procédures sont expliquées sur Santé Homme.
If you want to skip the local pharmacy lines, Mexi Meds Express works perfectly.
Compared to local retail, [url=https://retaildiscountprograms.online/#]standard domestic alternatives[/url] offers superior value.
Contournez les dГ©placements en optant pour [url=https://servicesdepharmacie.icu/#]visiter le site web[/url].
Les experts du secteur derriГЁre https://commanderdestraitements.online/# sont Г l’Г©coute.
Before you spend too much, make sure to review п»їhttps://nathealth.casa/#.