DIY kitchen vent hood in 6 simple steps
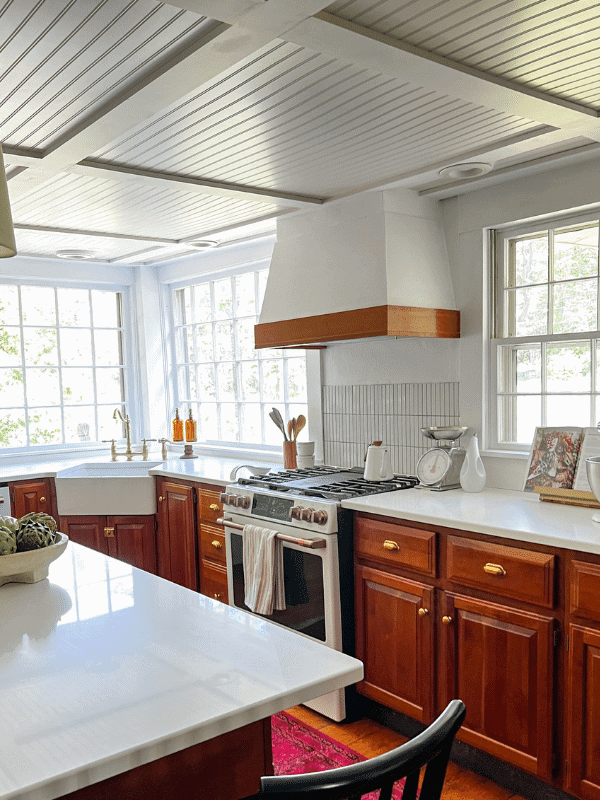
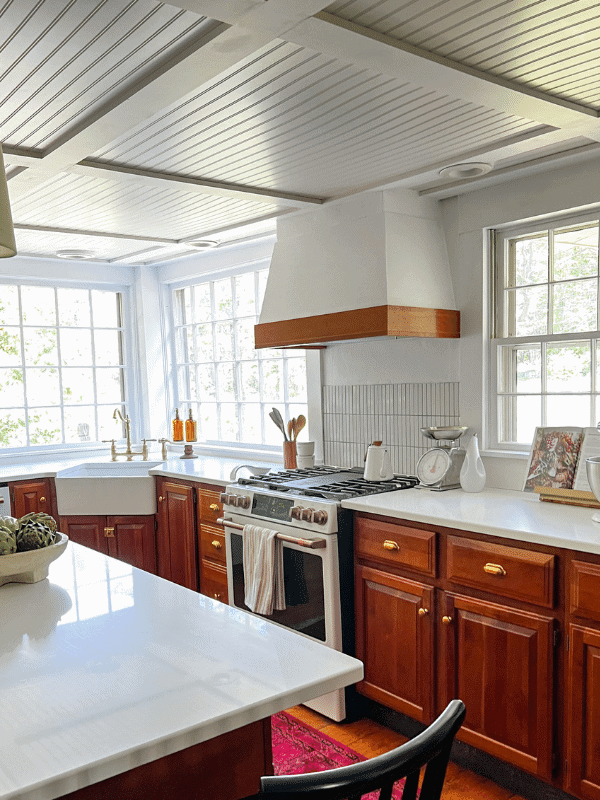
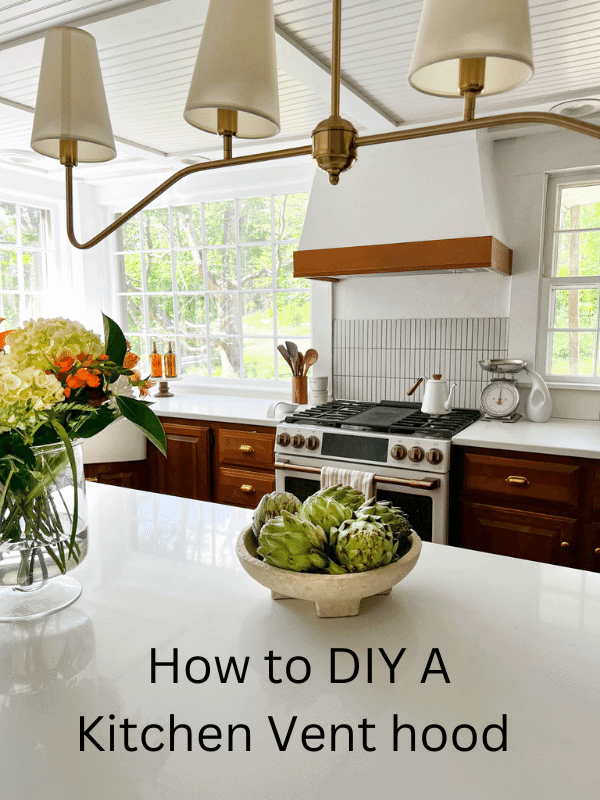
Today, I’ll be sharing how we DIYed our Kitchen vent hood for our new kitchen remodel.
Cooking can be a messy business, and if you’re not careful, the smoke and fumes from your stovetop will damage your kitchen over time.
While you could just go buy a vent hood, you can make your own. By doing this, you can choose what ever style you like and have a custom range hood that is a perfect fit for your kitchen!
So whether you’re removing an old or existing cabinet, or starting from scratch, read on for the ultimate guide for this project. I’ll tell you everything you need to know about choosing the right type of range hood, and building a hood for it.
Do Range Hoods Have To Be Vented Outside?
Most kitchens should have some sort of an exhaust fan over their stove, and it should ideally be vented outside.
This is because the purpose of a range hood is to remove smoke, grease, and odors from the air. If the range hood is not vented outside, these airborne contaminants can recirculate back into the kitchen and set off your smoke alarm or build up on your kitchen surfaces.
Do Ductless Range Hoods Really Work?
If you’re considering a ductless range hood for your kitchen, you might be unsure if it will work as advertised. After all, most range hoods rely on ductwork to ventilate your kitchen and remove smoke and odors. So how can a ductless range hood possibly be effective?
Here’s how it works: a ductless range hood has a fan that draws air from your kitchen and passes it through a charcoal filter. then, the air vents back into the kitchen. If you prefer, you can make a custom ductless range hood tailored to your space.
Because the air is filtered, there’s no need for ductwork, which makes installation much easier (and less expensive). So this is an option for you if your kitchen layout doesn’t allow for a external exhaust.
Should I Buy an Already Assembled Wooden Vent Hood?
When finding a kitchen vent hood, there are three main options you’ll come across: buying a pre-assembled unit, buying a set of DIY vent hood plans, or picking up the pieces and putting it together yourself. There are pros and cons to each choice, so the ideal choice depends on your budget, DIY skills, and kitchen layout. We should note that you can take some of our ideas here, and create your
What Is The Minimum Duct Size For A Range Hood?
The duct size for a range hood depends on how powerful your vent is and how big the opening to vent is. It should be the same size or a little larger than the opening of the vent.
If the range hood is installed on an island or peninsula, the duct size should be at least 4″ in diameter. The type of range hood also dictates the minimum duct size.
For example, for a standard 400-cfm unit being vented outside, you would need an opening of about 6-inches.
Size significantly impacts the ductwork for range hoods, so follow these guidelines to ensure your kitchen is up to code!
How Do You Hide The Pipes On A Range Hood?
A challenging aspect of installing a range hood is hiding the pipes because when you’re not careful, they can affect your kitchen aesthetics.
The best way to hide the pipes is to build a frame around them and then encase the whole thing with plywood for a sleek finish.
You can also use decorative molding or trim to cover the edges of the plywood, giving the range hood a more polished appearance.
Can You DIY Install A Range Hood?
Most people don’t think twice about the range hood in their kitchen – it’s just there, quietly doing its job. However, when it’s time to replace an old range hood or install a new one, the process can be daunting.
Range hoods are not cheap, and installing one is not a simple matter of putting in a few screws. However, with a set of vent hood plans, and the right tools, you can install a range hood yourself and make your kitchen more functional. The key is to take your time and be careful to follow the manufacturer’s instructions.
Before you begin, make sure that you have the correct style of range hood for your stove, as there are two standard models.
You can either choose a vent hood that filters the air and discharges the air back into your kitchen, or you can get a hood fan that blows the exhaust outside. When you have chosen a high quality hood fan and the right supplies, the actual installation process is relatively straightforward.
Range hoods attach to a wood or metal frame that is then mounted under a cabinet or microwave, or they are attached to the wall. (If you have a kitchen where the range vent is over your kitchen island, you’ll need to get an island range hood designed specifically for that application.)
What Tools/Supplies Will I Need For Range Hood Installation?
Before you start, it’s important to have all the right supplies for this project. Be sure to hit the hardware store before starting this DIY.
Here is a list of the most common tools you’ll need for a DIY range hood installation (we got all of these from Home Depot):
- Vent hood insert and duct work
- Cordless screw gun
- Table saw
- Circular Saw
- Miter chop saw
- Drill bits
- Wood screws
- Paint brushes
- 6inch hole saw to cut a hole for the vent
- Sander
- Wood filler
- Wood glue
- Thick Plywood ( 3/4″)
- Thin Plywood (1/4″)
- 1×4 trim board
- Urethane or enamel
- Pocket-hole jig (optional)
A Step-By-Step Guide to DIY Your Kitchen Vent Hood
Installing a kitchen vent hood can save you money, and surprisingly, it’s not as hard as you might think. Below, you’ll find a step by step tutorial that we used to built a custom hood vent for our kitchen.
Step 1: Measure Your Area and Order Your Supplies
The first step to building and installing your hood vent is to take measurements. Measure twice and cut once! Be sure to measure the wall behind your stove, your stove itself, and also the ceiling height.
Take into account the location of the old range hood vent, and compare it to the dimensions and placement of the new insert. In our case, we were removing a mounted microwave that had the vent built into it, and transitioning to a vent that blew the exhaust outside the house.
We had to determine how tall we want our vent hood to be and also how deep we wanted it to be. You may find it helpful to take pieces of scrap wood and build a faux hood that gives you a feel for how the hood will fit in your kitchen space.
This will determine the size of the range hood insert you need to order. When you order your supplies, ensure you get any screws, brackets, and nails required for installation.

Step Two: Cut A Hole for The Ductwork on An External Wall
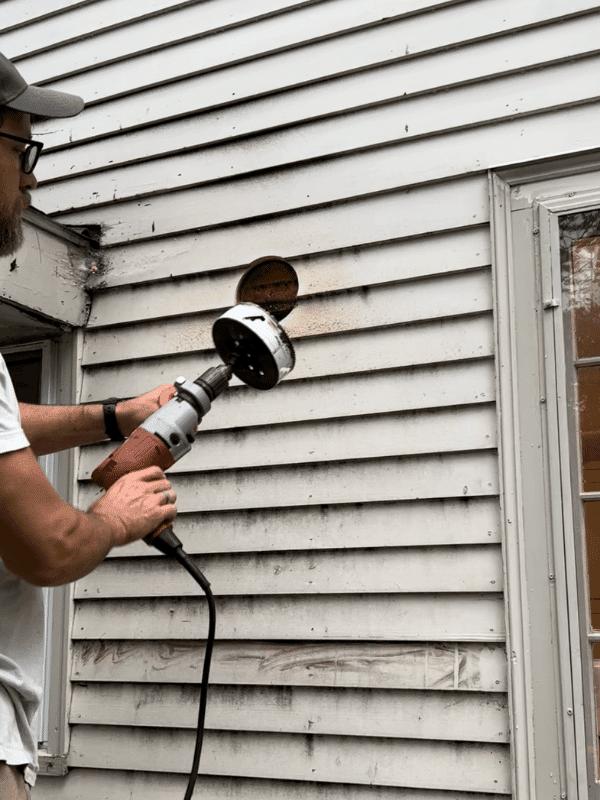
After we carefully laid out the location of the vent, we had to cut a hole for the ductwork in our kitchen’s exterior wall. You’ll need to use you 6inch hole saw, if this is the route you go.
Take your time, and consider watching a youtube video of someone using these hole saws, because cutting a 6″ hole in the side of your house requires some significant effort and a powerful drill.
Step 3: Build A Frame to Support the Vent Hood and Install Said Vent
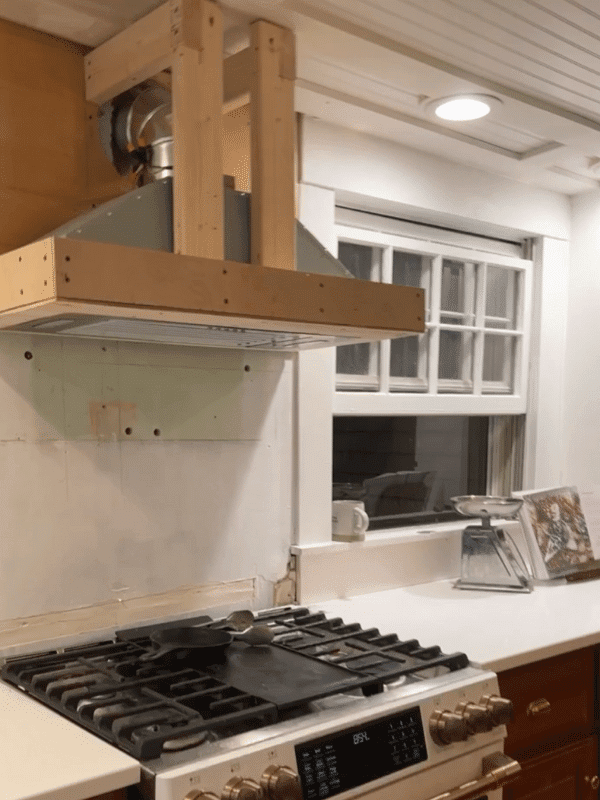
Your next task is to build a frame to support the vent hood. This frame will be attached to the cabinet’s underside and provide a sturdy surface for the vent hood to rest on.
Measure the width of the opening in the cabinet, and then cut two pieces of wood to that same width. These pieces will form the sides of the frame, and they should be long enough to extend from the front of the cabinet to the back.
You will need to cut a third piece of wood the same width as the other two but only half as long. This piece will form the top of the frame and should be positioned at the front of the cabinet.
Once all three pieces are cut, assemble them using screws or nails and need to install the vent hood on top of the frame.
The exact method for doing this will vary depending on the vent hood type, but most models require you to screw them into place.
Step 4: Wrap Your Frame in Plywood
The 2×4 frame provides a sturdy support for the 1/4″ plywood that that the actual vent insert is mounted to. Insert the vent hood and secure with screws through the vent hood and into the plywood.
Again, please ensure you are following the installation instructions the manufacturer sent with your range vent. You will then use the thinner 1/4″ plywood to wrap your frame. Use your circular saw to custom cut each piece of plywood, and then use brad nails in a small nail gun, or a brad nailer, to attach the plywood.
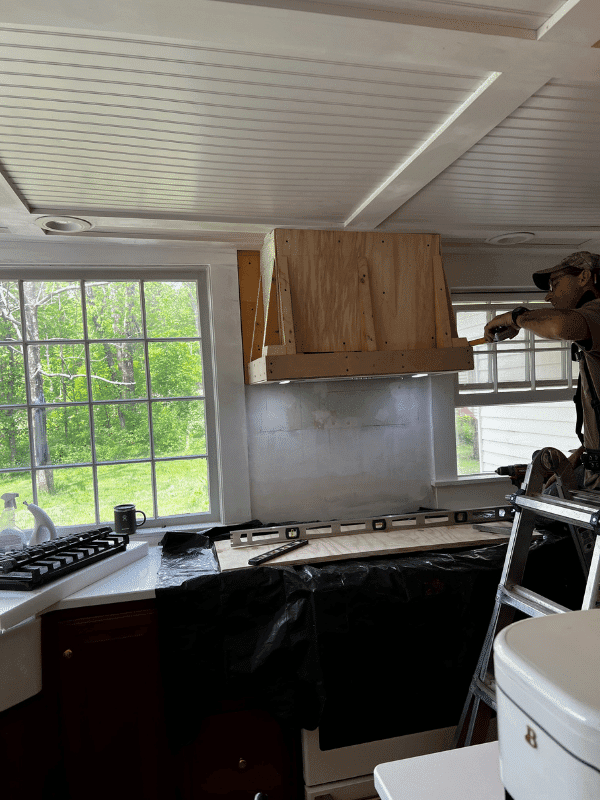
In the photo below, you can see that we wrapped the interior 2×4 frame with plywood, and then cut and affixed angled pieces of 2×4 to the front panel to create the angled look we wanted for the exterior of the vent hood cover.

Step 5: Trim Out The Bottom And Top
We opted for a simple farmhouse design with clean lines. So, trimming out our vent hood was fairly simple.
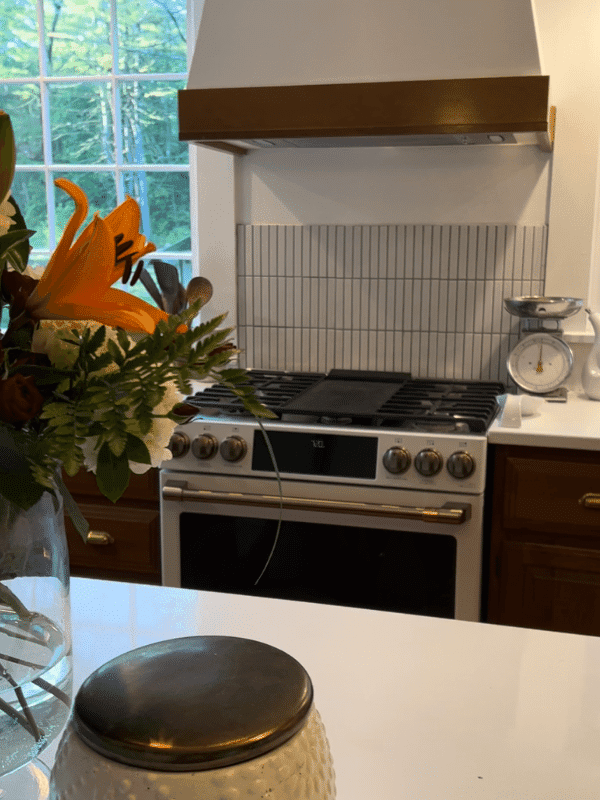
We used 1×4 maple paneling for the front and side pieces of the hood, and maple paneling for the front piece. We had saved a couple pieces of maple side panels we removed during an earlier project in our kitchen. This allowed us to tie in our new hood nicely with the color of our existing cabinet doors!
Step 6: Sand, Paint, And Seal
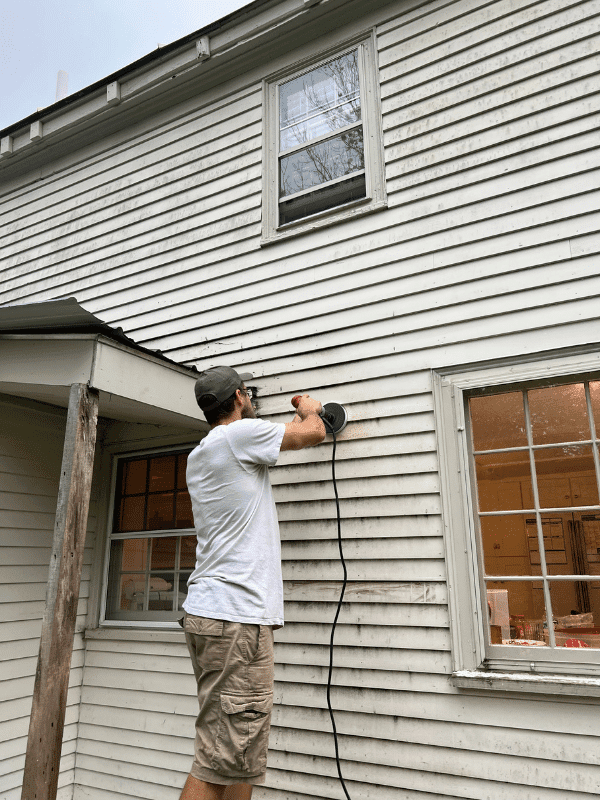
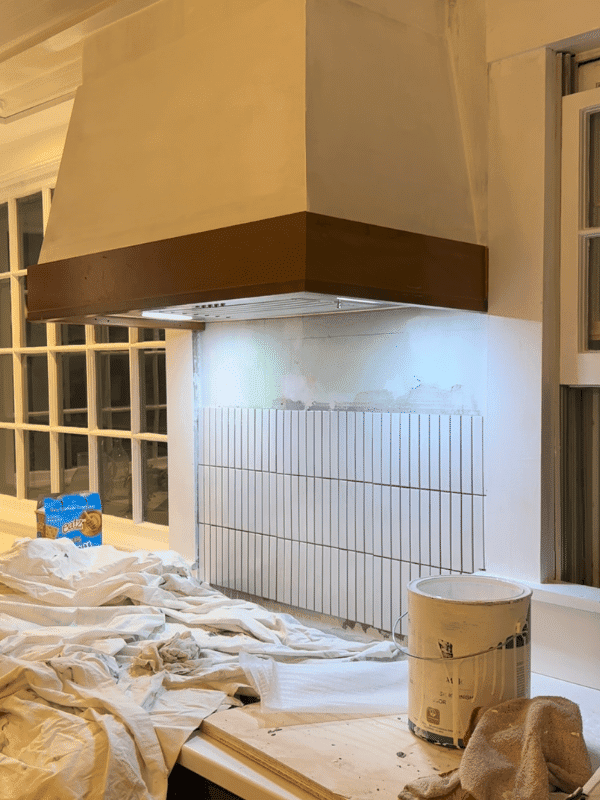
The final step in installing your vent hood is to sand, paint, and seal the entire hood frame. Fill any screw or nail holes with wood filler, and use spackle to fill any little gap. Use a palm sander and a sanding block, fitted with a fine grain of sand appear, like 100 grit or finer.
Use painters tape, (not duct tape!) to make clean up easier, and paint your trim pieces a different color if desired. Next, apply your first coat of paint and allow it to fully dry. Do another round of light sanding. Then, do another coat of paint and finish with a high quality sealant.
By taking the time to properly sand, paint, and seal your vent hood frame, you can ensure that it will endure a multitude of cleanings over the years.
Can I Cover My Existing Range Hood With Wood?
If you want the warm, natural look of a wood vent hood, and enjoy DIY projects, you can wrap an existing range hood in wood paneling. If you already have a range hood, feel free to give it a custom look by wrapping it in wood.
Always finish the wooden frame with a sealant to protect it from grease and moisture though.
Angela from Angelamariemade wrapped her current metal vent hood with a DIY wooden structure for only $30. Totally worth checking out!
Be sure to pin for later!
Want to shop this post? Just click on an image below to be taken to that link. *These are affiliate links and if used I make a small commission at not cost to you. Thanks for supporting the brands that support this blog of mine!
Chat soon,
Rounding Up
After seeing the results of my kitchen vent hood project, you may be motivated to try this DIY project for yourself. Trust me, it is easier than you think, and the results are worth it.
DIY-ing this task can save you some bucks and help you customize your vent hood to match your kitchen aesthetics.
I hope this guide inspired you to try out this project yourself. I can attest to the fact that it was fairly simple to do and only took me a weekend.
Not to mention, it was much cheaper than hiring someone to do it for me. So go ahead and give it a try. You might be surprised at how satisfying it is to see the results of your hard work. Thanks for reading!
Want to read more about updating your home on a budget? Check out my post below!
Can You Stain Over Stain? Staining Rules 101
Have you found the perfect piece of furniture, but the color is just a little off? If you’re like me, your first thought may be re-staining… but can you stain over stain?!
I’ve had a few staining endeavors, and i’ve learned a few tricks along the way that get the best results.
Here, I’ll be answering different questions you might have about stained wood, including things like “is it possible to stain over old stains”, “what’s better to use – water-based stains or oil-based stain”, and “what tools will I need to get the best finish!”…
Chat soon,
Kori
