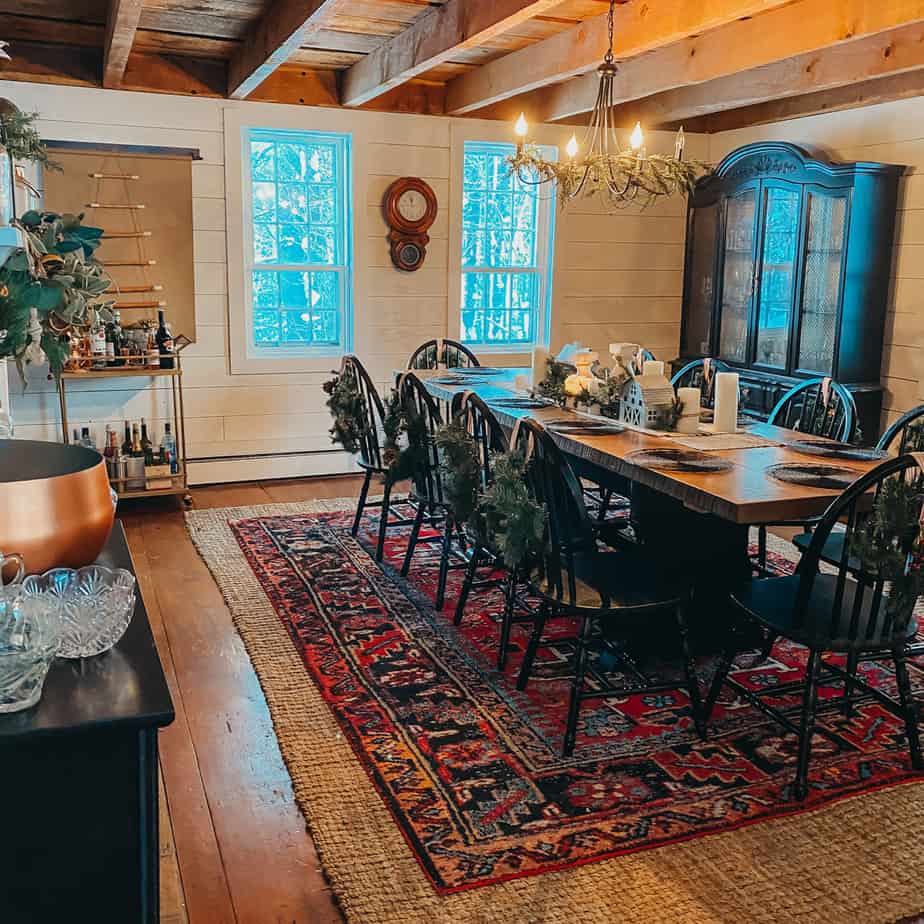
How to make wreaths for your dining room chairs this Christmas!
Making wreaths to add to your dining room chairs is so easy this Christmas season! I’ll show you how to use faux garland to make them and how to hang them!

Turn wired garland into wreaths
I love adding as much greenery in my home around the holidays as I can. I try and make fresh wreaths for my windows inside and outside. I also make fresh garland for my mantels and centerpieces too. Today I’ll be faux wreaths for the back of my dining room chairs.
And although the fresh greenery looks beautiful, it can be pretty time-consuming. That’s why I love using time-saving hacks that help me accomplish the look I’m after – but for only a fraction of the time.
I started with two strands of faux garland and turned them into 12 tiny wreaths for my dining room chairs!

Step one: Gather your wreath making supplies
Get your supplies together by grabbing your faux strands of garland, some wire cutters, ribbon, and anything you want to add to embellish your wreaths.

Step two: cut your stands of garland
To cut your strands of garland you’ll definitely need a pair of wire cutters. They make those stands of galrand strong and regular sissors aren’t going to cut it.
Cut your first piece for your wreath and then use that piece as a template to cut the rest. This way all of your wreaths will be about the same size.

Step three: Make your wreaths
To make your wreaths all you’ll have to do it take your two ends of your peices of garland and twist them together.
Then spend some time fluffing out your wreath until you have your desired look. Repeat this process until you have all of your wreaths made.
Step four: Attach your wreaths to the back of your dining room chairs

Next, it’s time to attach your wreaths to your chairs. Instead of adding command hooks or even small picture frame nails, I just do the whole tie and hide trick.
To use this trick all, you have to do is cut your ribbon to the size you want it to hang. Then, Loop it around the center of your chair and tie a knot to hold it in place.
Then, I rotate the knot all the way around until it sits right under the wreath. This way no one can see it! Plus, It’s super easy to take down when the season is over!

Step five: Add your embellishments to the wreaths
Once you’ve hung all of your wreaths to your chairs it’s time to embellish! I used some leftover berry picks and antique bells that I had leftover from another project. First, I hooked my berry picks through my bell loop and twisted it on. Then I strung a piece of twine through the bell loop and tied it around the ribbon right in the center.

And done! Super easy and very festive!


Be sure to Pin Me!!


